- Print
- DarkLight
- PDF
Overview
The Set State node is used for a State Diagram only.
The Set State node is designed to store tasks and control their flow through a State Diagram. It allows you to keep a task within the node until there is the task modification request and certain condition is met after which it is forwarded to the next node associated with that condition. In a way, the Set State node in a State Diagram combines the functionality of the Condition and Waiting for Callback nodes found in Processes.
The general flow:
- A task enters Set State node and waits for a modification.
- Waits for any type of modification:
- Manual
- API
- Modify Task node
- Any modification triggers parameters check:
- Compares current parameters with conditions
- The task moves forward when:
- Any modification occurred
- Parameters match conditions
- Returns to wait if no match
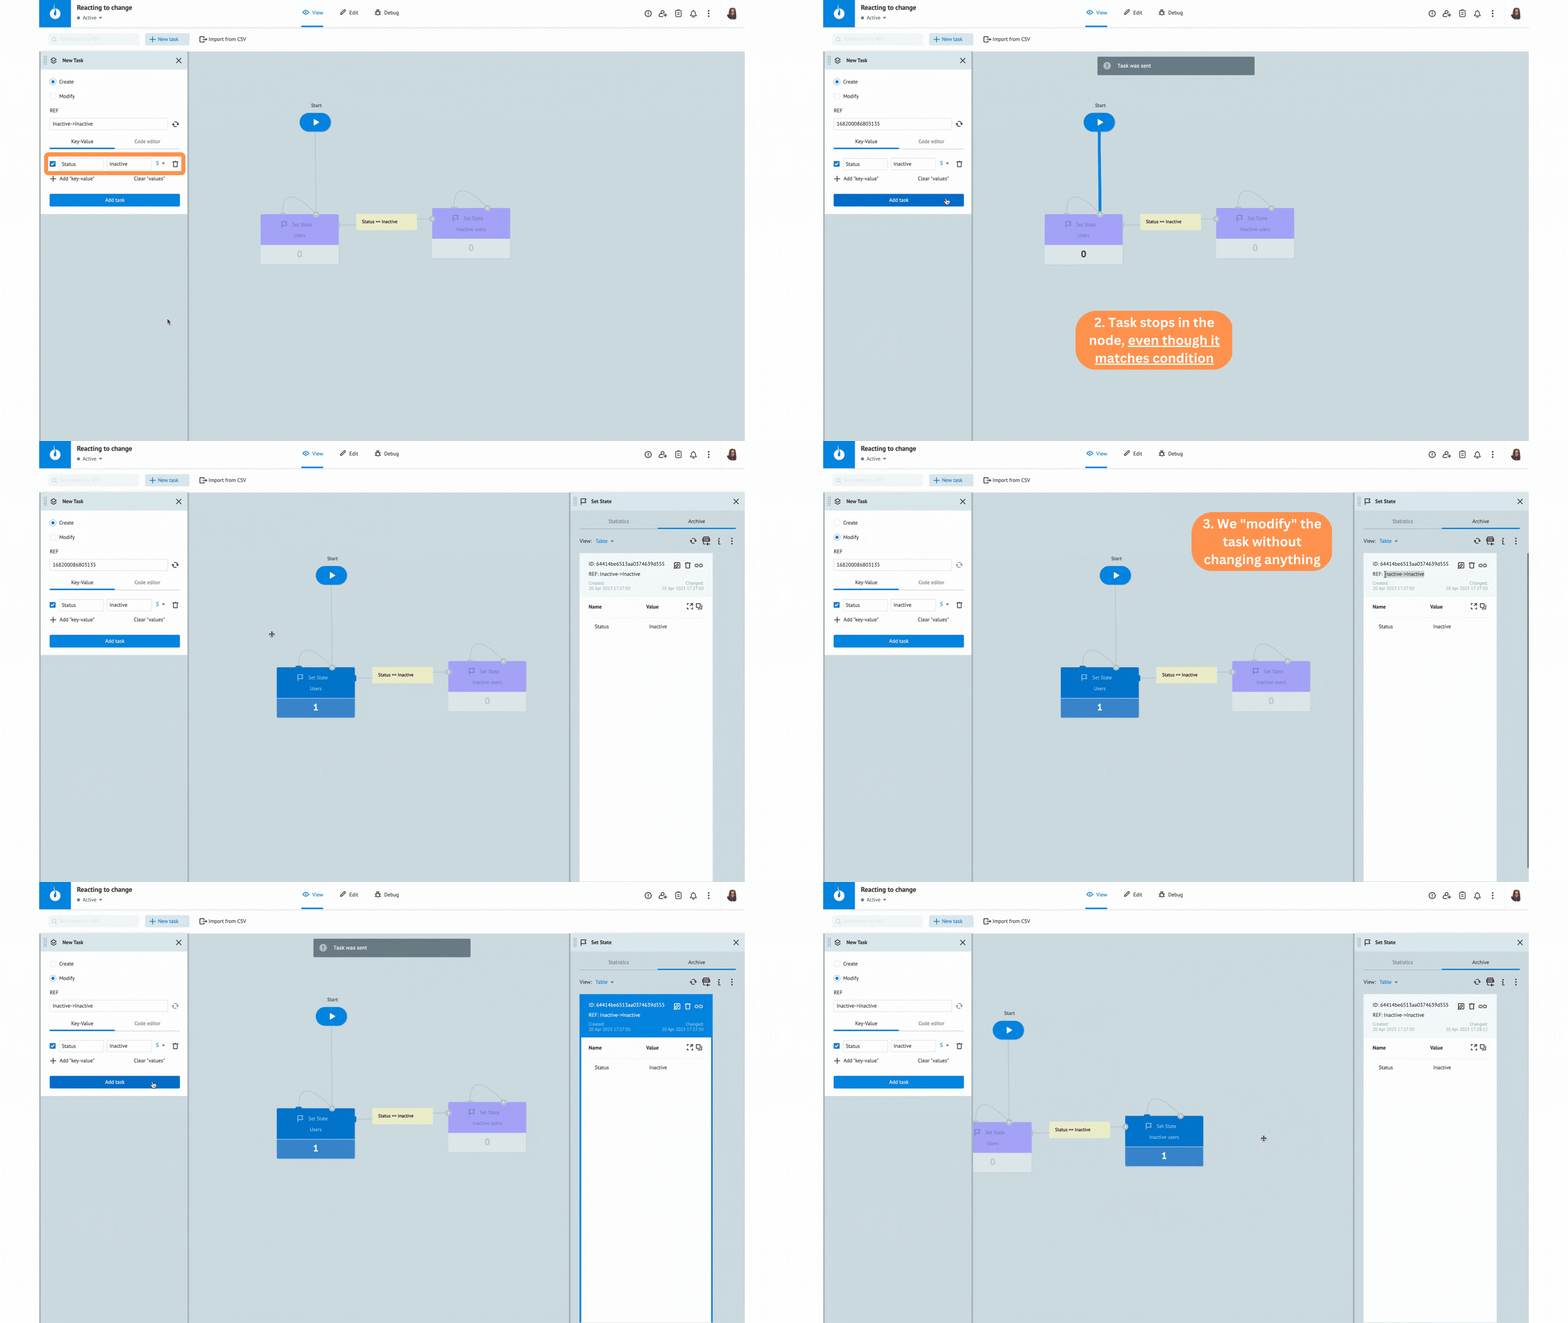
Note: Initial parameter match on entry doesn't trigger forwarding. Only modification + condition match enables forwarding.

In a State Diagram, you have the flexibility to manage tasks from outside the diagram by using:
- Modify Task node
- API Call node
- Manually created or imported tasks in the View mode

Settings
The Set State node has the following parameters:
- (Optional) Title and Description: Name and details of the node.
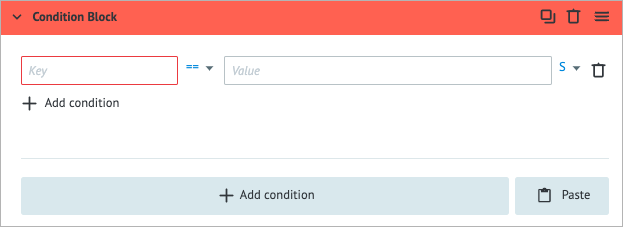
- + Add condition:
Key: Key to specify variables; use curly brackets to enter the key. For example, {{age}}.
Comparison operator: The way the key and the value have to be compared:
- Equal to (==)
- Not equal (!=)
- More than (>)
- More than or equal to (>=)
- Less than (<)
- Less than or equal to(<=)
- Regular Expression (RegExp)).
Value: The value you want to assign to the corresponding Key parameter. The value can be a constant, a variable reference, or a function applied to a variable.
Note: For more information, go to Parameters and functions.- String (S)
- Number (N)
- Boolean (B)
- Array (A)
- Object (O)
Note: For more information, go to Data types.
You can do the following actions in the Condition Block:
- Add a new condition: Below the Key field, click + Add condition, and then fill in the needed information in the condition line that appears.
- Delete a condition: On the right side of the condition line, click the trash icon

- Add a new Condition Block: Below the condition line, click + New block, and then fill in the needed information in the block that opens.
- Copy a Condition Block: On the right side of the Condition Block, hover over the red/gray line, and then click the copy icon

- Paste a Condition Block: In the lower-right corner of the panel, click Paste.
- Delete a Condition Block: On the right side of the Condition Block, hover over the red/gray line, and then click the trash icon
 that appears.
Other:
- Alert if the number of tasks in the node queue reaches the following number: Helps monitor whether the number of tasks in the node exceeds the specified threshold. When selecting the checkbox, you have to enter the needed number of tasks in the field that appears below.
- Maximum interval, for which the task stays in the node before being forwarded: The amount of time a task is allowed to be in the node can be set in seconds, minutes, hours, and days.
Note: The checkbox has a minimum value of 30 seconds. You can set a shorter interval by using the Unixtime function.
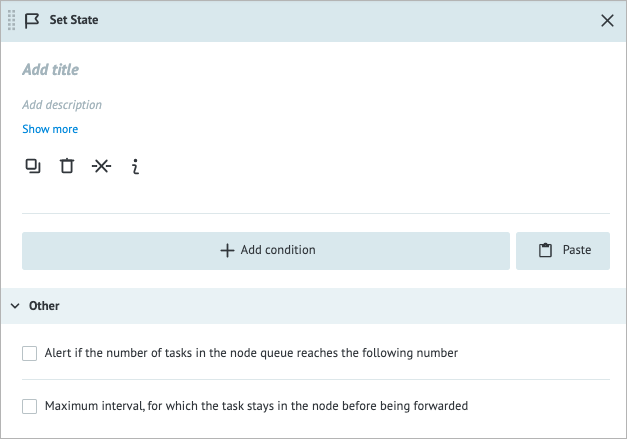
The Set State node does not necessarily have to contain a condition. If it does not have a condition, the tasks will stay in it forever.
Examples
Storage
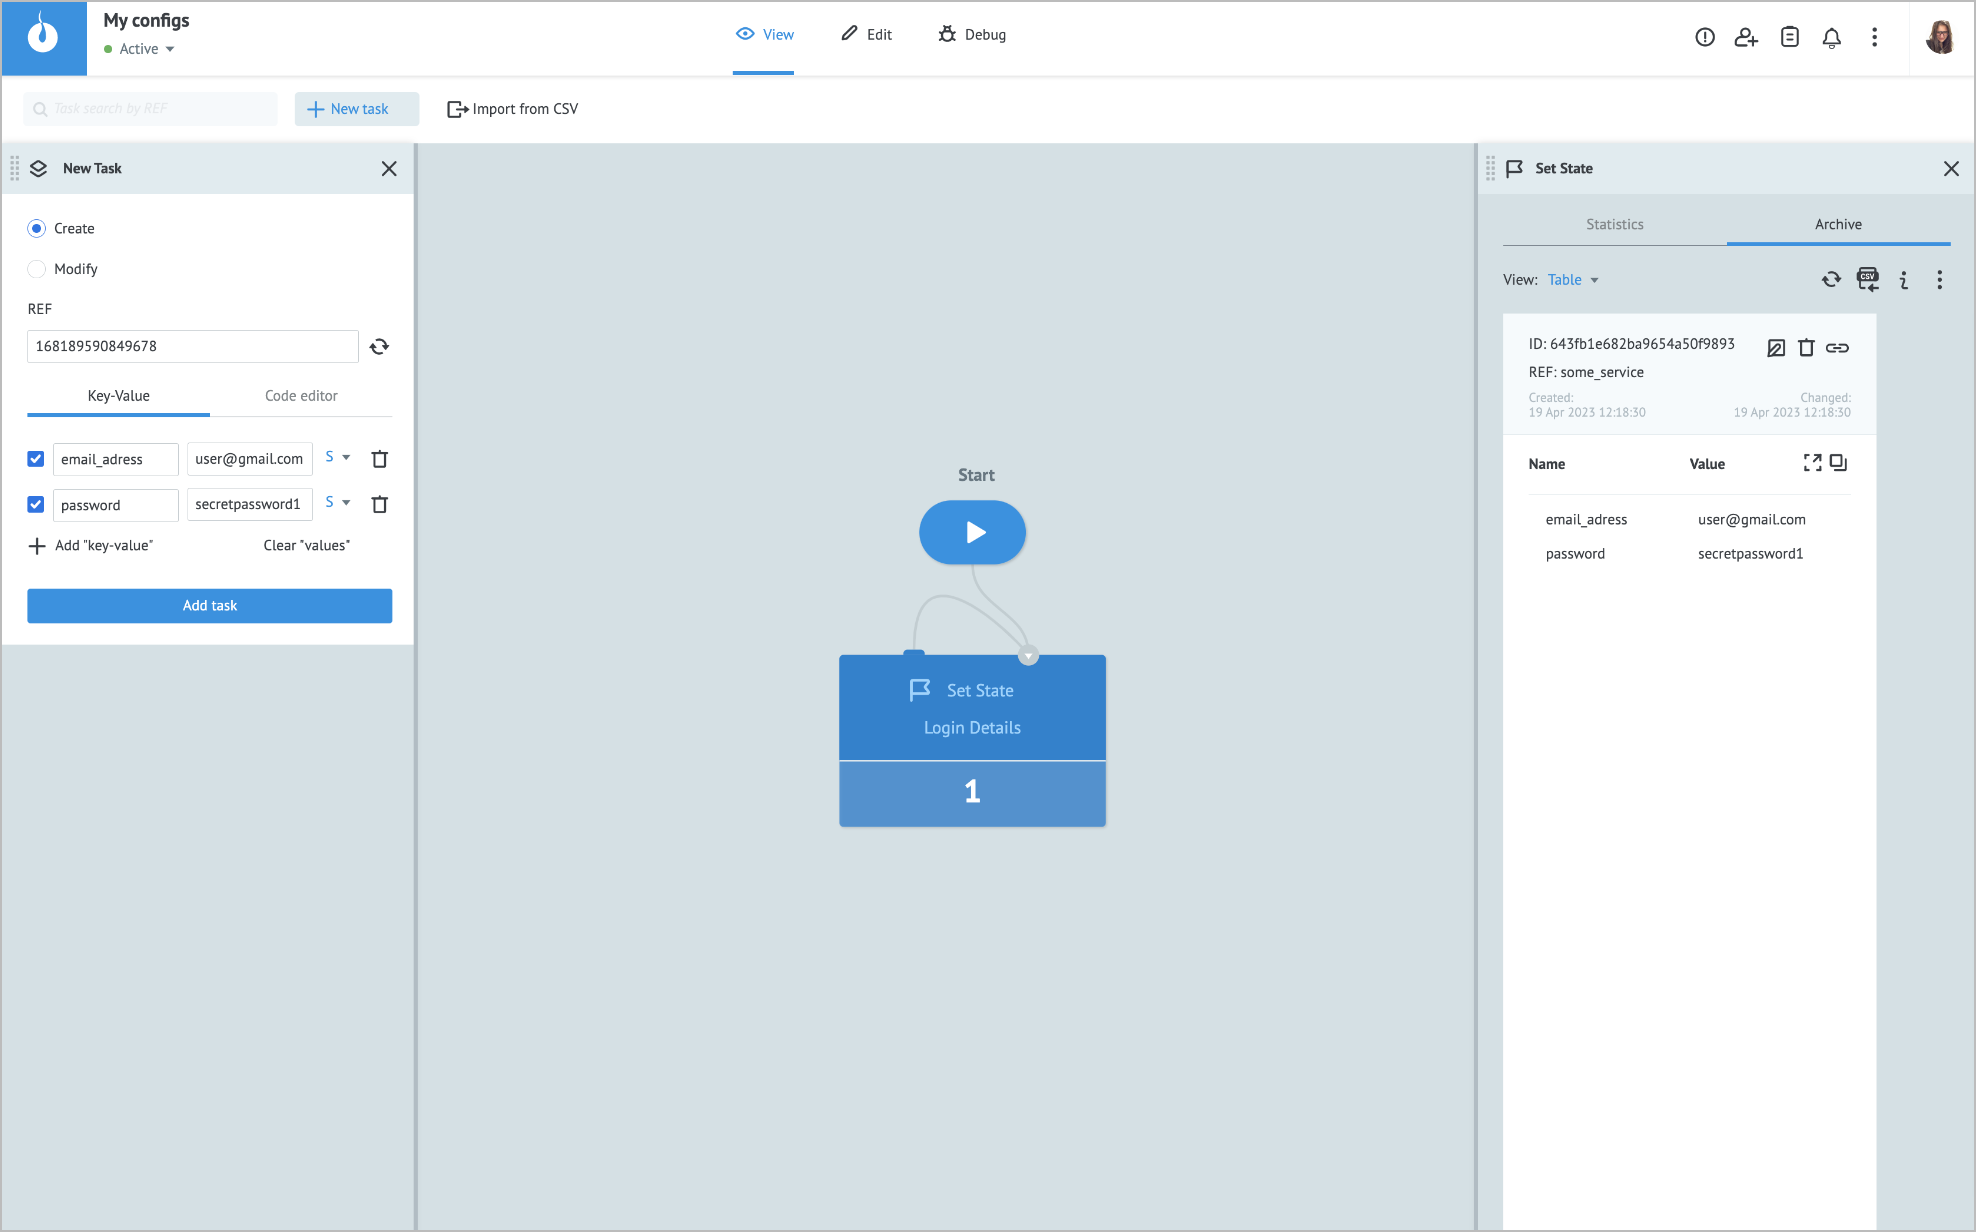
Description: In the example below, you can see how to safely store any values you might need to run your Processes, such as login and password, within the Set State node.
Precondition:
- Create a State Diagram.
- Add the Set State node.
- Add tasks with sensitive parameters.
Flow: You can refer to sensitive parameters when you need to use them in other State Diagrams, without revealing their actual value.
Reacting to task parameters changes
Description: In the example below, you can see how the Set State node handles and modifies the received tasks.
Precondition:
- Create a State Diagram.
- Add the Set State node.
- In the Condition block of the Set State node, add the Status key and the Inactive value.
Flow:
The condition is met.
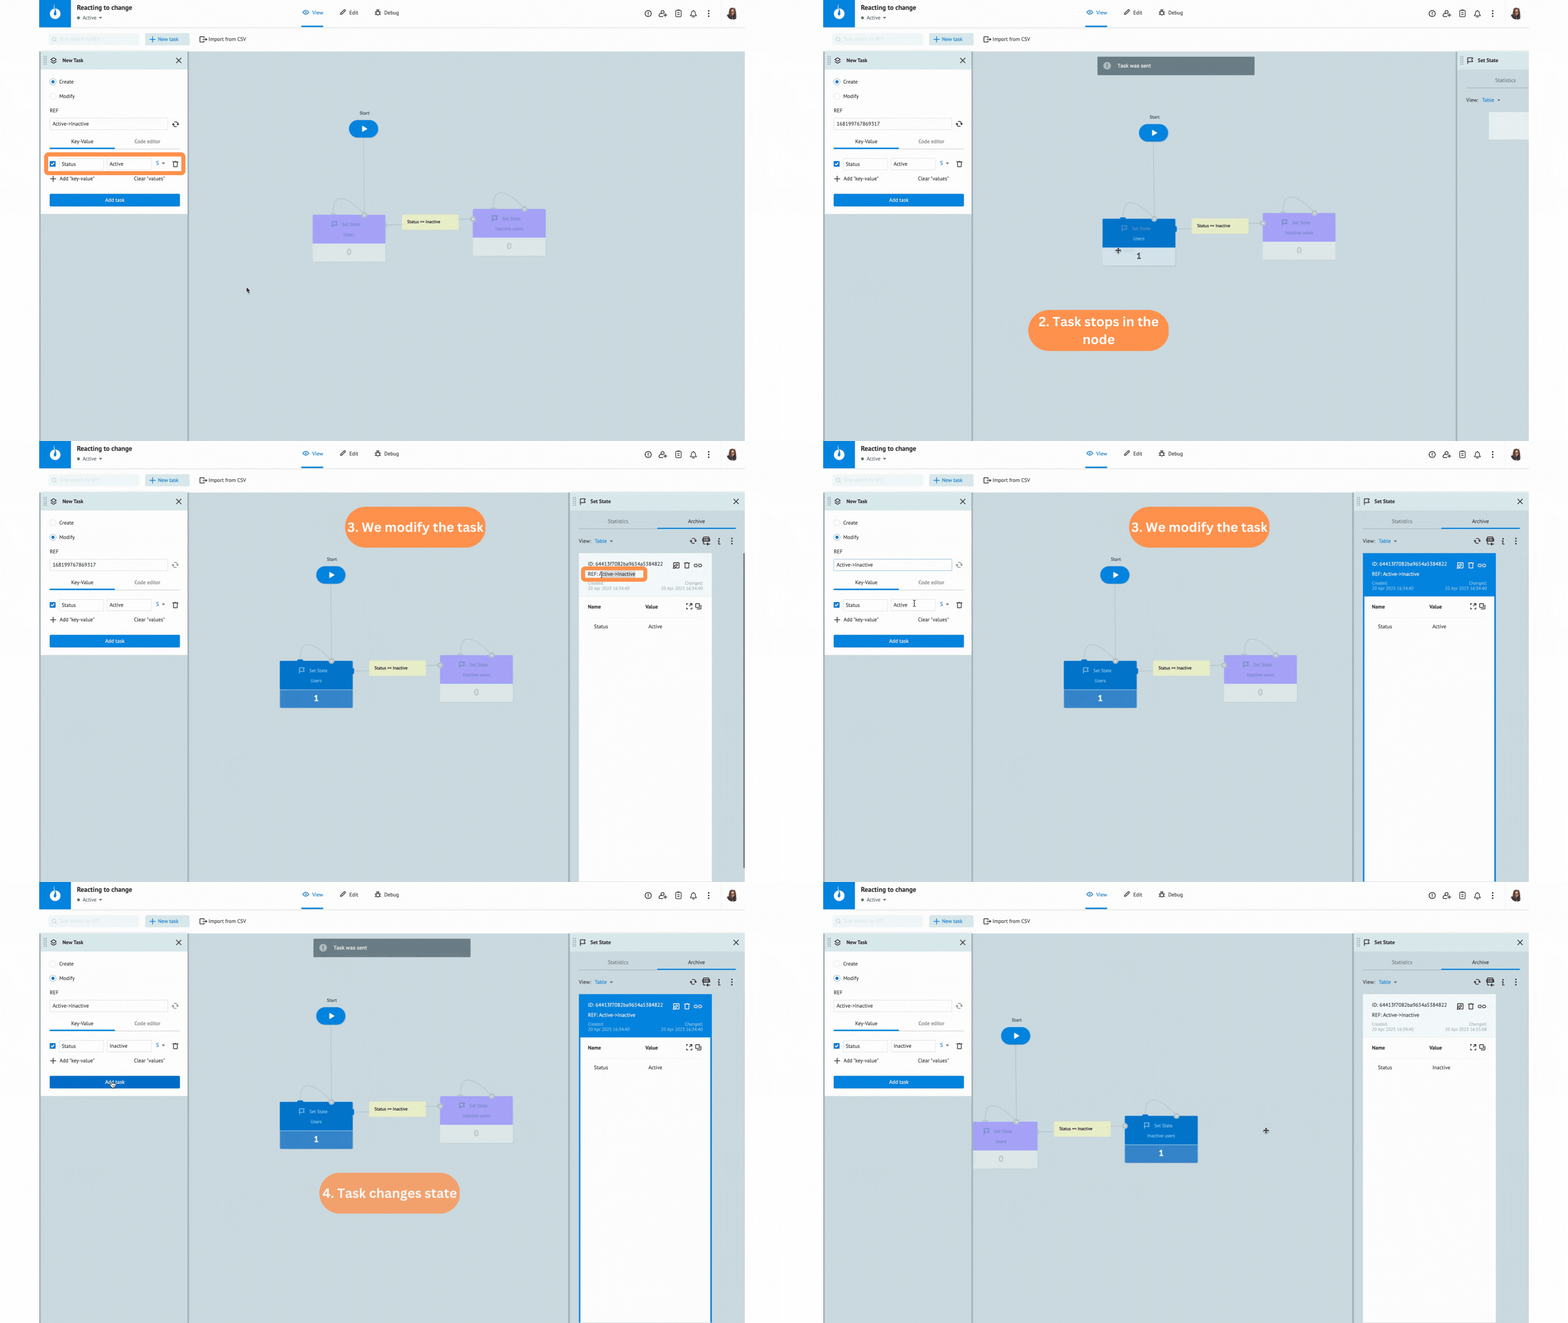
The condition is not met.
Error handling & troubleshooting
When working with your State Diagram, you may encounter the following issues.
| Issue | Cause | Solution |
|---|---|---|
| Task is not updated. | If the task has an empty reference, it cannot be updated. An empty reference is not considered to be unique. | Update the task reference manually. |


