Perform auxiliary actions on actor
- 02 Jul 2024
- 2 Minutes to read
- Contributors

- Print
- DarkLight
- PDF
Perform auxiliary actions on actor
- Updated on 02 Jul 2024
- 2 Minutes to read
- Contributors
- Print
- DarkLight
- PDF
Article summary
Did you find this summary helpful?
Thank you for your feedback
On the Actors bag page, the auxiliary actions that you can perform on an actor, depend on the actor type:
General type actor
These actions are available if you have the corresponding permissions for the selected actor.

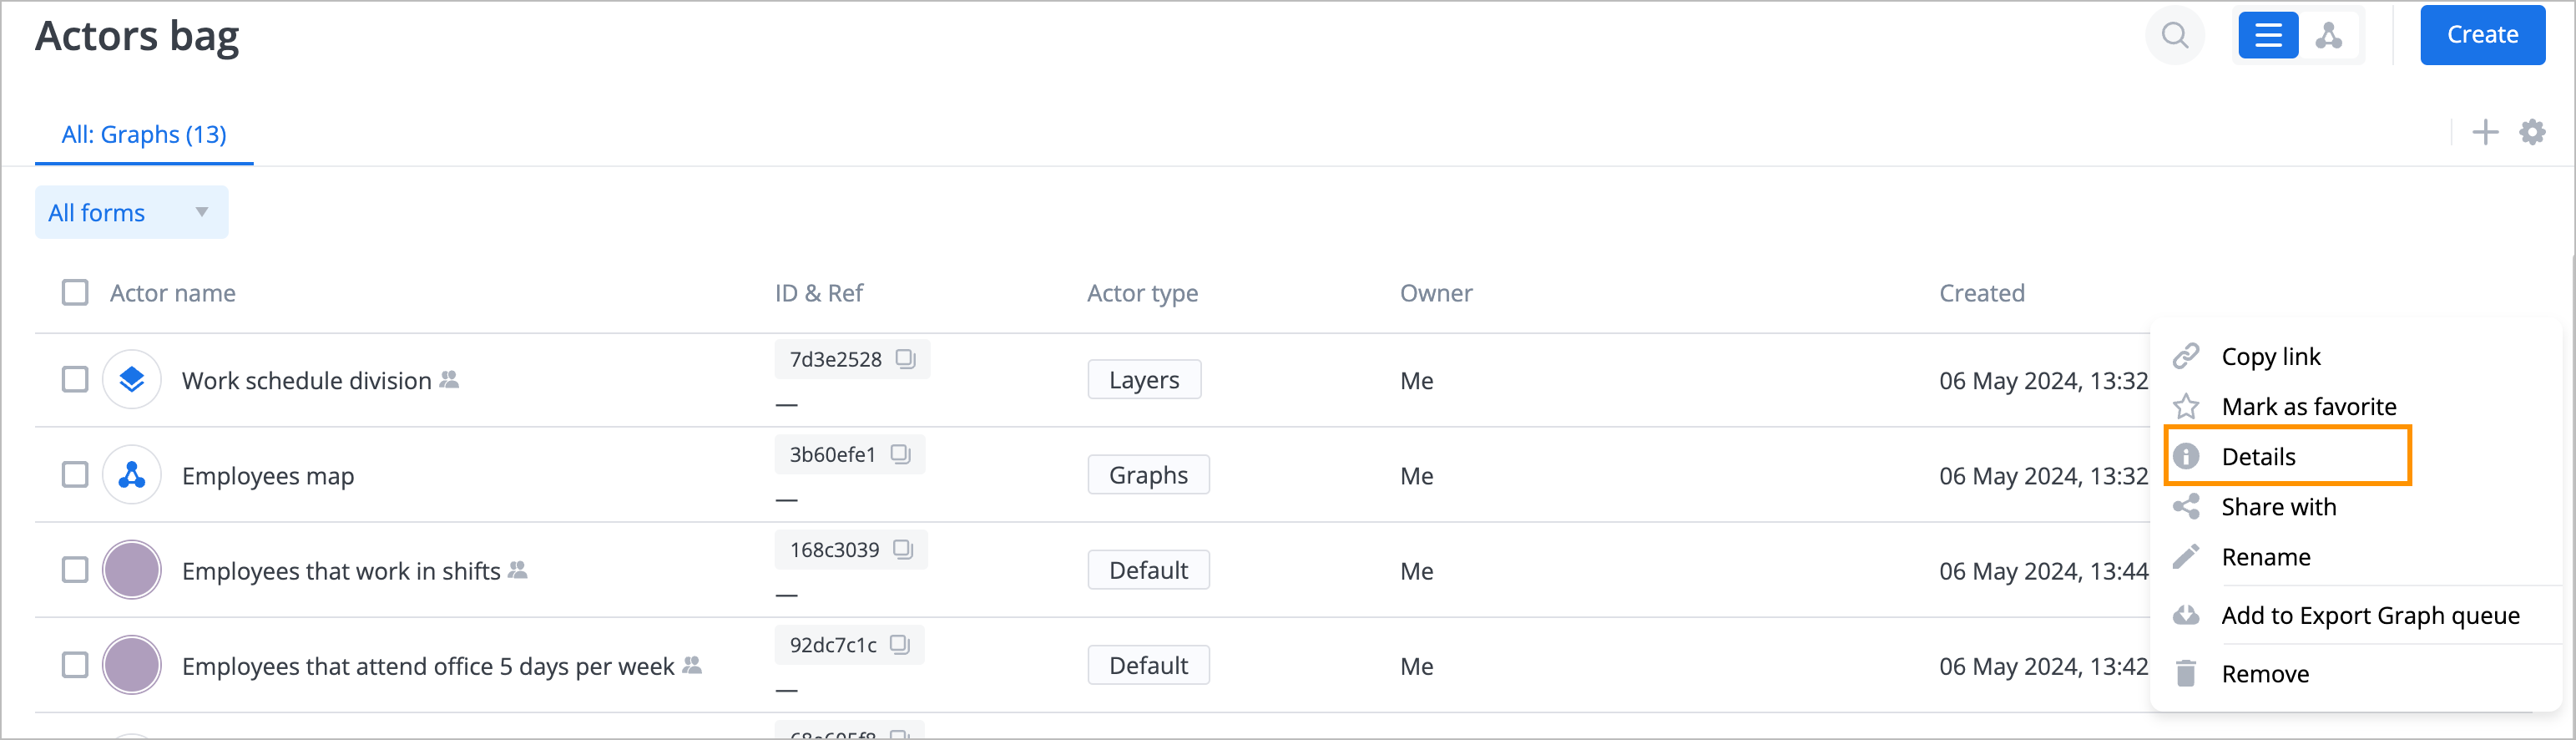
To perform auxiliary actions on an actor with Default, Layers, Events, Dashboards, and other types, on the right side of the needed actor, click the options icon  and from the dropdown list select:
Make copy to make a copy of an actor. The copy is created instantly.
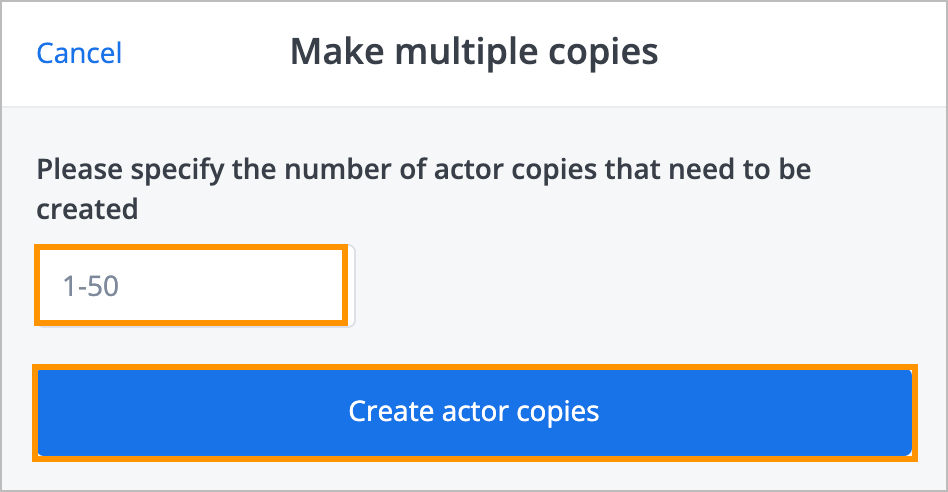
Make multiple copies to make multiple copies of an actor: In the Make multiple copies dialog, enter the number of actor copies and click Create actor copies. The copies are created instantly.
Add to Export Graph queue to add an actor to the export graph queue.
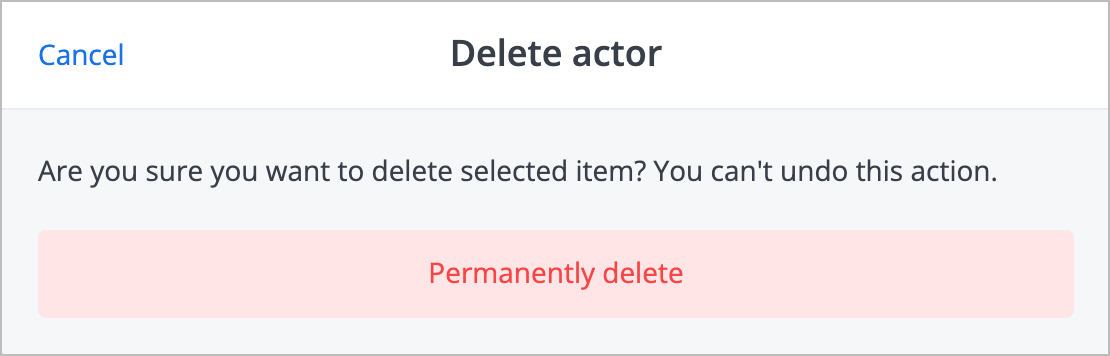
Note: For more information, go to Import & Export.Remove to remove an actor: In the Delete actor dialog, click Permanently delete. The actor has been deleted.


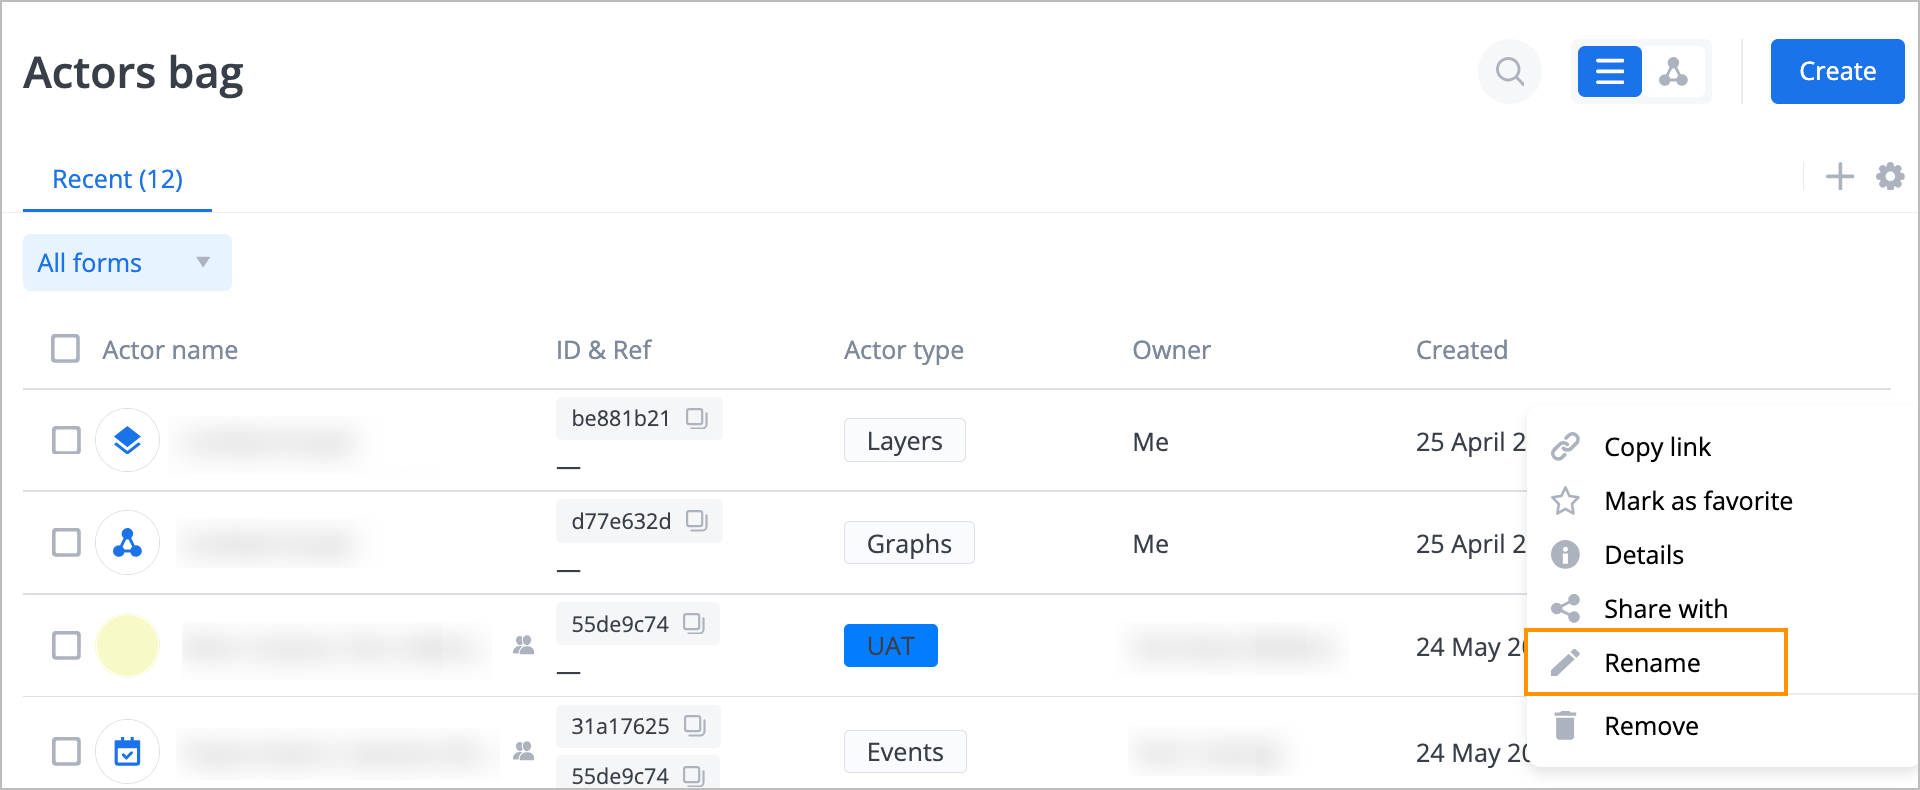
Graphs type actor
To perform auxiliary actions on an actor with the Graphs types, on the right side of the needed actor, click the options icon and from the dropdown list select:
- Copy link to copy an actor link.
- Mark as favorite to mark an actor as your favorite.
- Details to view and edit actor details.
- Share with to share an actor with other users and groups.
Note: For more information, go to Share actors with users. - Rename to rename an actor.
- Add to Export graph queue to add an actor to the export graph queue.
Note: For more information, go to Import & Export. - Remove to remove an actor.
Note: For more information, go to General type actor.

Сopy link
To copy an actor link, on the right side of the needed actor, click the options icon and from the dropdown list, select Copy link.

The actor link has been copied, and the success message appears at the top of the page.

Mark as favorite
To mark an actor as a favorite, on the right side of the needed actor, click the options icon and from the dropdown list, select Mark as favorite.

The favorite icon marked with orange appears at the top of the actor details panel.

To unmark the actor as a favorite, click the options icon on the right side of the actor and select Unmark as favorite.

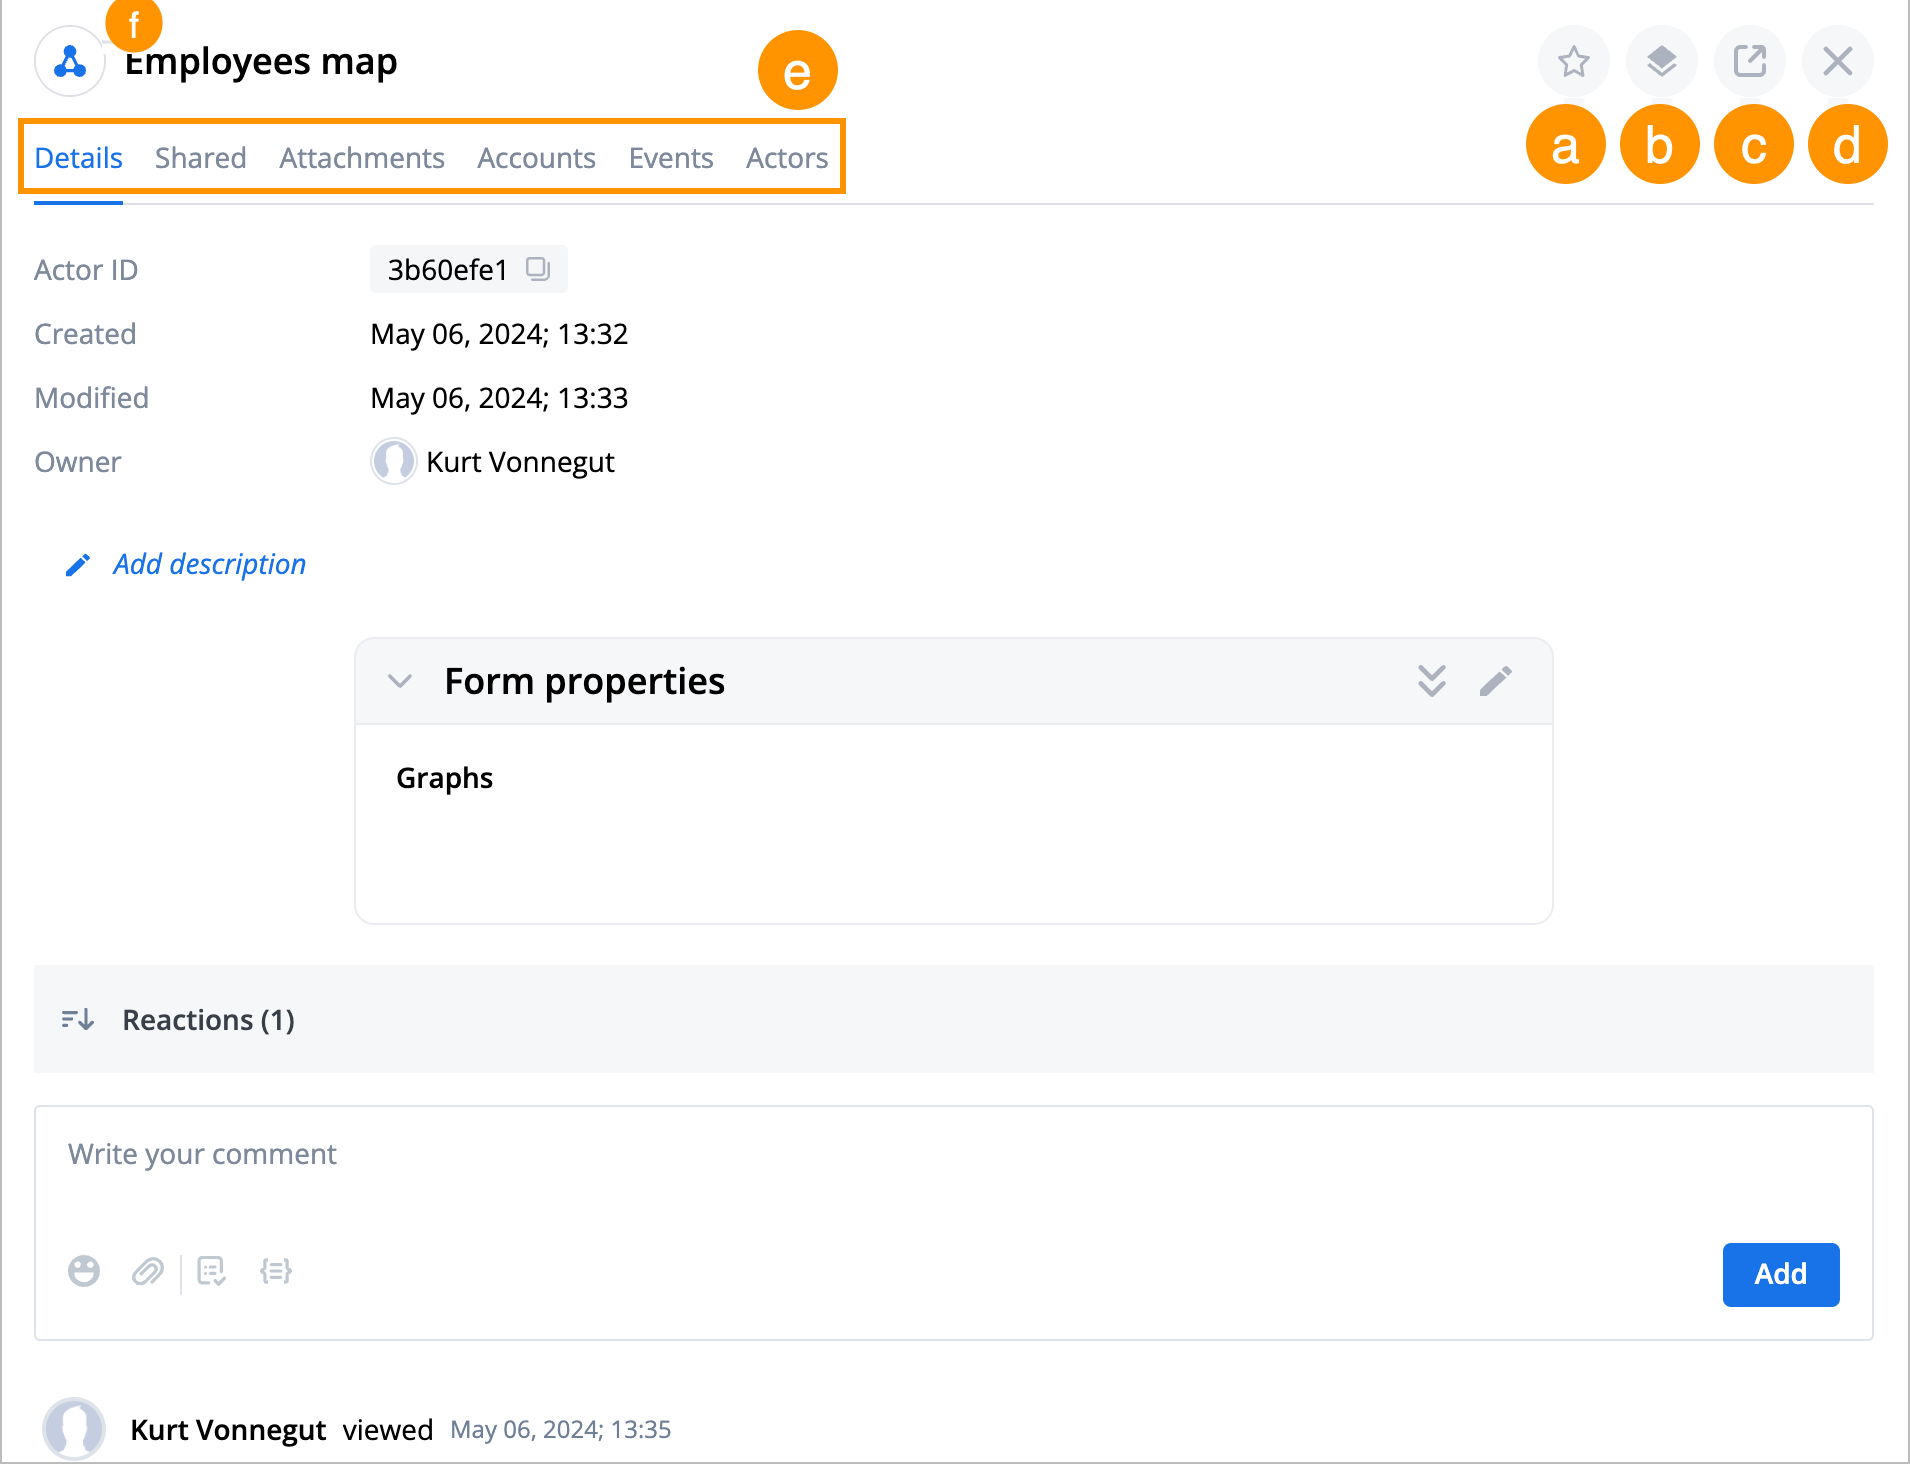
View and edit details
To view and edit actor details:
On the right side of the needed actor, click the options icon
 and from the dropdown list, select Details.
On the actor details panel, you can:
Mark or unmark the actor as a favorite.
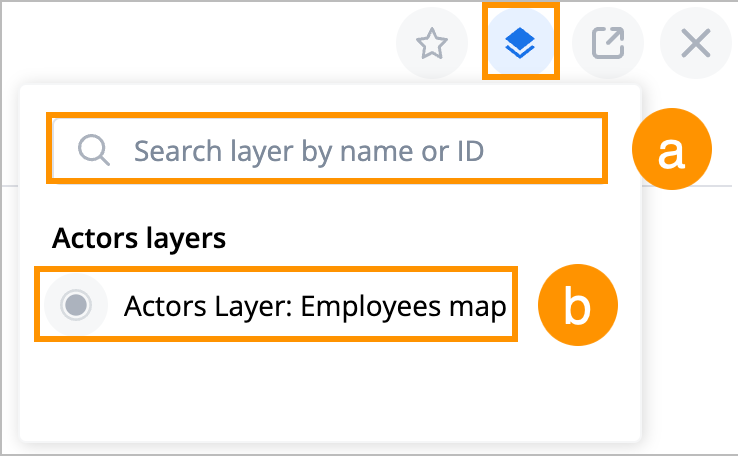
Note: For more information, go to Mark as favorite.Show layers with the actor: search layers by name (a) and open the graph layer by clicking the layer actor in the Actors layers field (b).
- Open the actor in a new tab.
- Close the actor details panel.
- View and manage tabs (Details, Shared, Attachments, Accounts, Events, Actors)
Note: For more information, go to Edit tabs. - Manage the actor's avatar and set the avatar color.
Note: Graph layers appear in the Actors tab by default for actors with the Graphs type.


Rename actor
To rename an actor:
On the right side of the needed actor, click the options icon
and from the dropdown list, select Rename.
In the Create new account name dialog, enter the new name in the Name field and click Save.
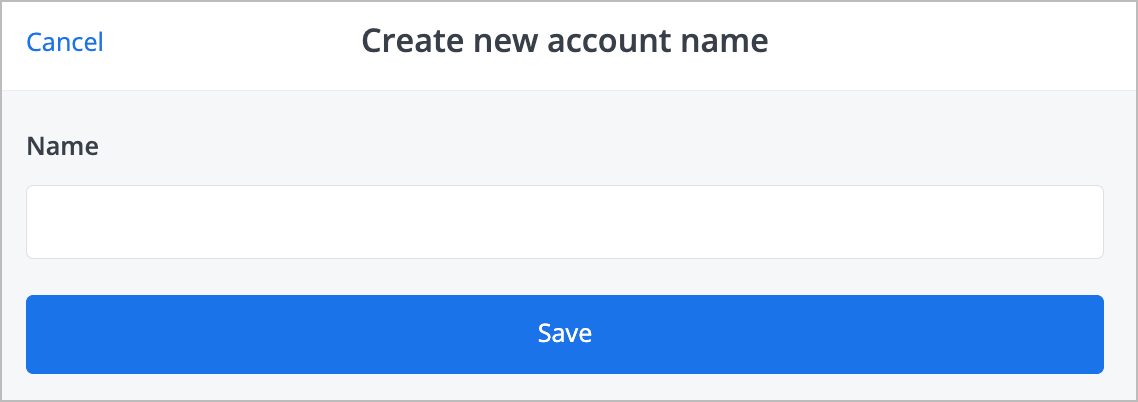


The actor has been renamed, and you can see its new name in the list.
Was this article helpful?