Import & Export
- 15 Feb 2024
- 5 Minutes to read
- Contributors

- Print
- DarkLight
- PDF
Import & Export
- Updated on 15 Feb 2024
- 5 Minutes to read
- Contributors
- Print
- DarkLight
- PDF
Article summary
Did you find this summary helpful?
Thank you for your feedback
Export
Selecting objects for export
You can export actors and forms to which you have access by adding them to the Export graph and then saving the resulting file. To do this, go to the Actors bag, Graphs, Scripts, Forms, or Communications section of the main menu and select the desired entities.
Adding objects to the export graph
Once you've selected the entities, in the section you're in, open the group action menu and click Add to Export Graph queue:
You can add objects to your export queue one by one by selecting them in the list and clicking Add to Export Graph queue in the right-side item actions menu:

Actors' connections export
Together with actors, you can export and import all their connections of the Hierarchy type.
Editing the export graph
The entities you've selected will then be added to the Export graph, which is available in the Settings -> Import & Export -> Export tab. Before performing the export, you can edit your Export graph by clicking the Edit button. This will open the export list, where you can select items and remove them from the list by clicking Remove in the group actions menu or the remove symbol to the right.
If you select the Export accounts with transactions and transfers box, the selected accounts will be exported together with transfers and transactions against them. When the box is cleared, the accounts are exported with zero balances and without any transactions and transfers against them.
Click Save to save the changes:
Exporting selected objects
To export the items in your Export graph, click Export. You will see the export task created in the Export tab list with the export progress and current status in the task field:

Downloading exported objects
After the export has finished, you will see the export status and links to the resulting export file, as well as the automatically created export event:
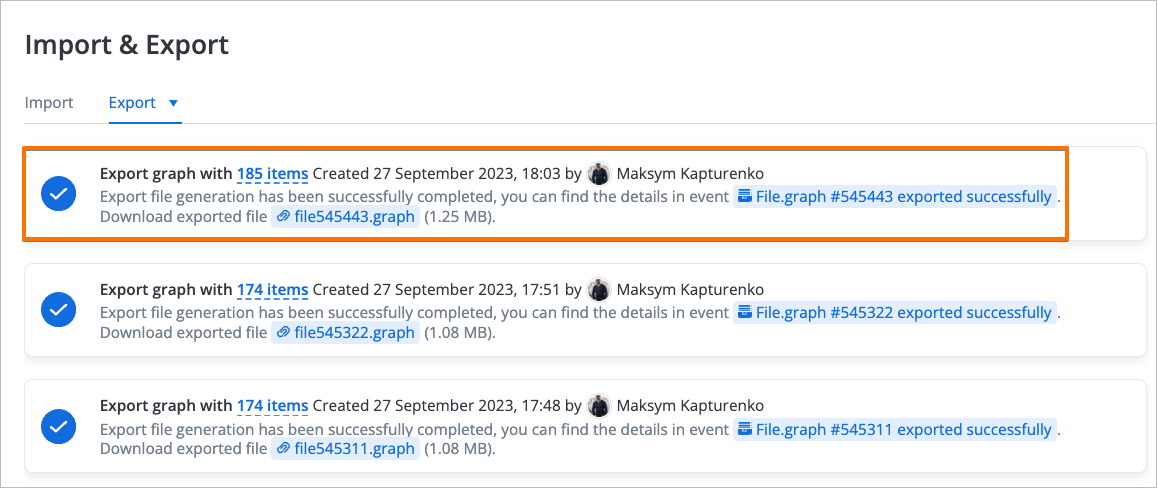
Clicking the export event link will open the automatically created event. In the event's Details tab, you can view the list of exported items. In the Attachments tab, you can download the export file:

Exporting a workspace
Instead of exporting specific objects, you can choose to export an entire workspace along with all the included objects. This is convenient when you have numerous objects to export, as it eliminates the need to select each object individually and map access rights afterward to prevent conflicts.
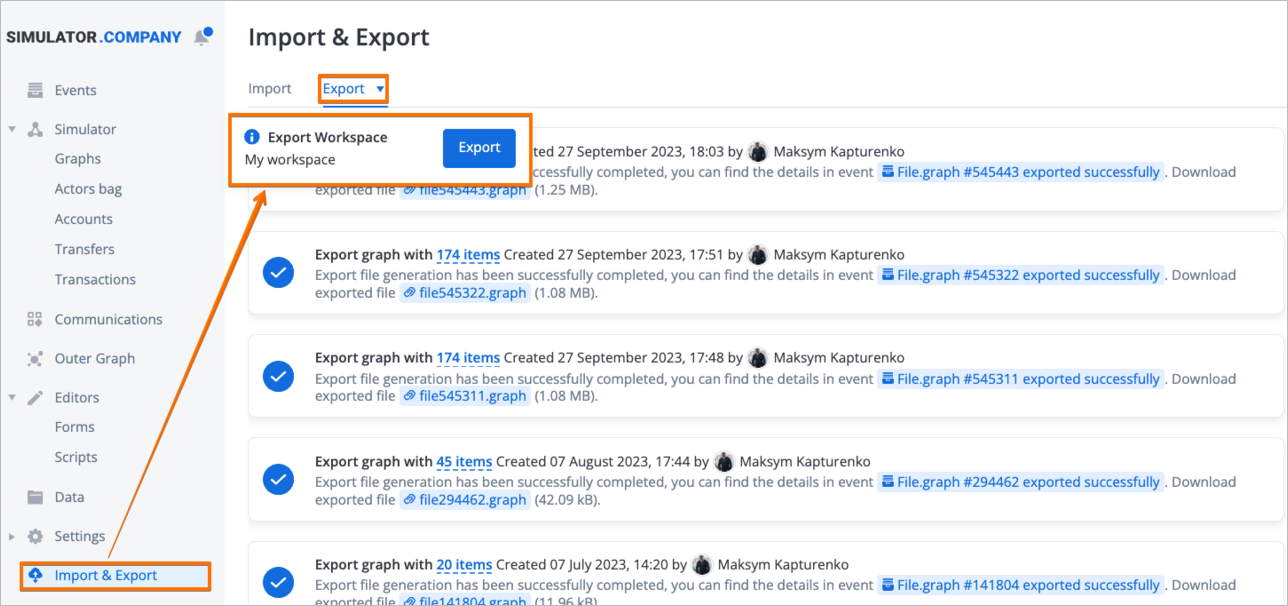
To export a workspace, follow these steps in the Import & Export section:
- Select the workspace you want to export in the lower left corner as the current one
- Open the Export tab and click the arrow to open the dropdown menu
- In the dropdown menu, click Export:
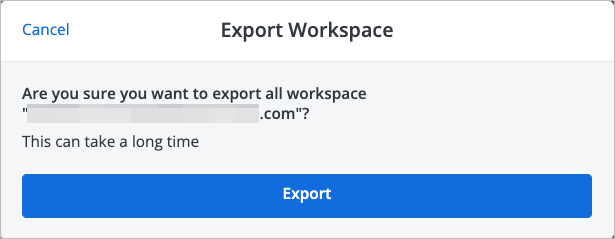
- Click Export in the workspace export confirm window:
After that, you can download the exported workspace file from the automatically created event and share it with another user so they can add your exported workspace to their own workspaces.
Handling export errors
When an export is performed, objects are exported in a top-down manner (forms, actors, related accounts, etc.) considering the inherent access rights. Due to this, access rights conflicts may arise for the exported items. If such conflicts occur, the export will fail with an error status and the resulting file will not be generated. You can view the error status and details of the error in the Export tab:
If you've encountered an export error, resolve the access rights conflicts and repeat the export procedure.
Import
Importing exported objects from a file
To import previously exported objects into your workspace or add an entire workspace that was exported by another user to your workspaces, follow these steps:
- Open the Import & Export -> Import tab;
- Click Browse to select the export file or drag and drop the file into the designated field;
- The import window will open, displaying two import options (1), the initial numbers of users and user groups with rights to the imported objects (2), and a warning about rights mapping (3):
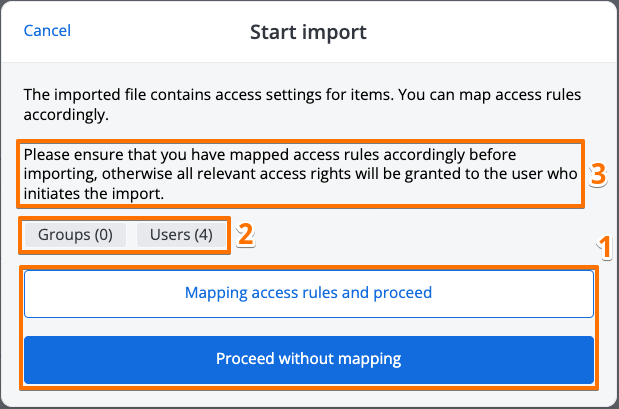
Proceed without mapping
If you choose to proceed with actor/form import without mapping, you will have to manually manage and grant all access rights to imported objects to workspace users afterwards.
Please ensure that you have mapped access rules accordingly before importing, otherwise all relevant access rights will be granted to the user who initiates the import.
Mapping access rights
To map access rights on the imported objects to the current workspace users, click Mapping access rules and proceed. To proceed with the import without mapping, click the Proceed without mapping button;
- Clicking Mapping access rules and proceed opens the access rights mapping menu:
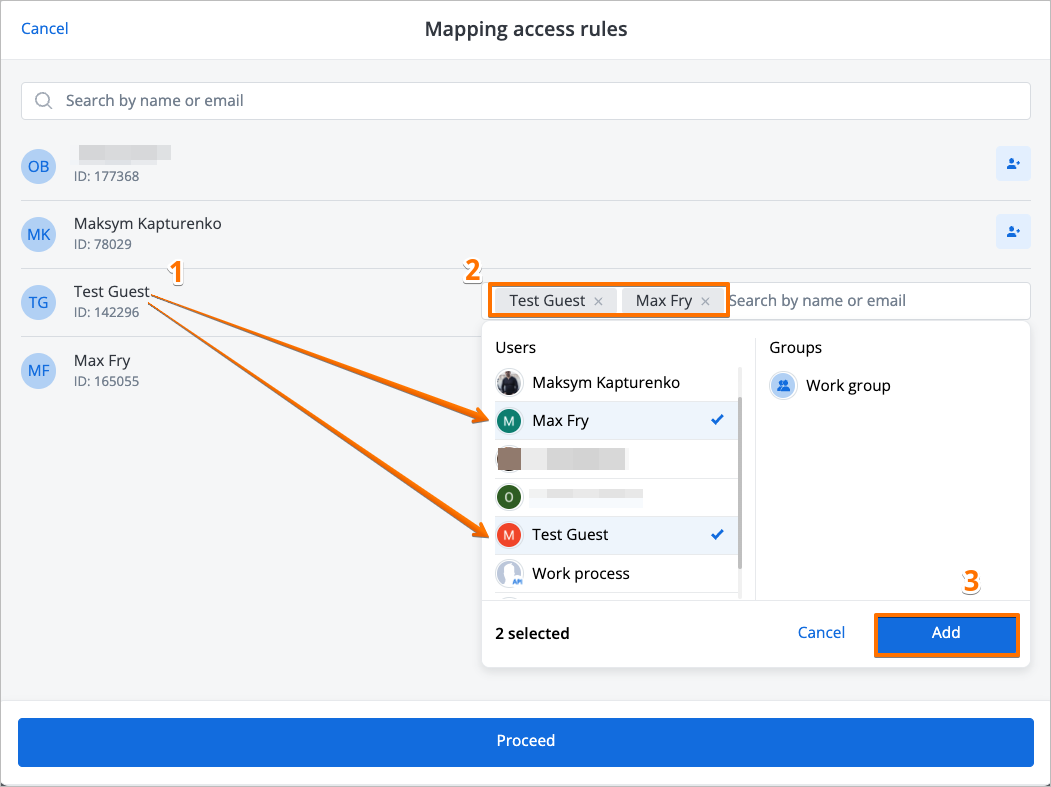
In the menu, you can select a user which had initial access rights to imported objects (1) from the list and click on the user selection field on the right (2). Clicking on the field opens a menu where you can select users and user groups from the current workspace to which the initial access rights will be passed/mapped.
- After you've mapped all the needed rights to the current workspace users/user groups, click Add (3);
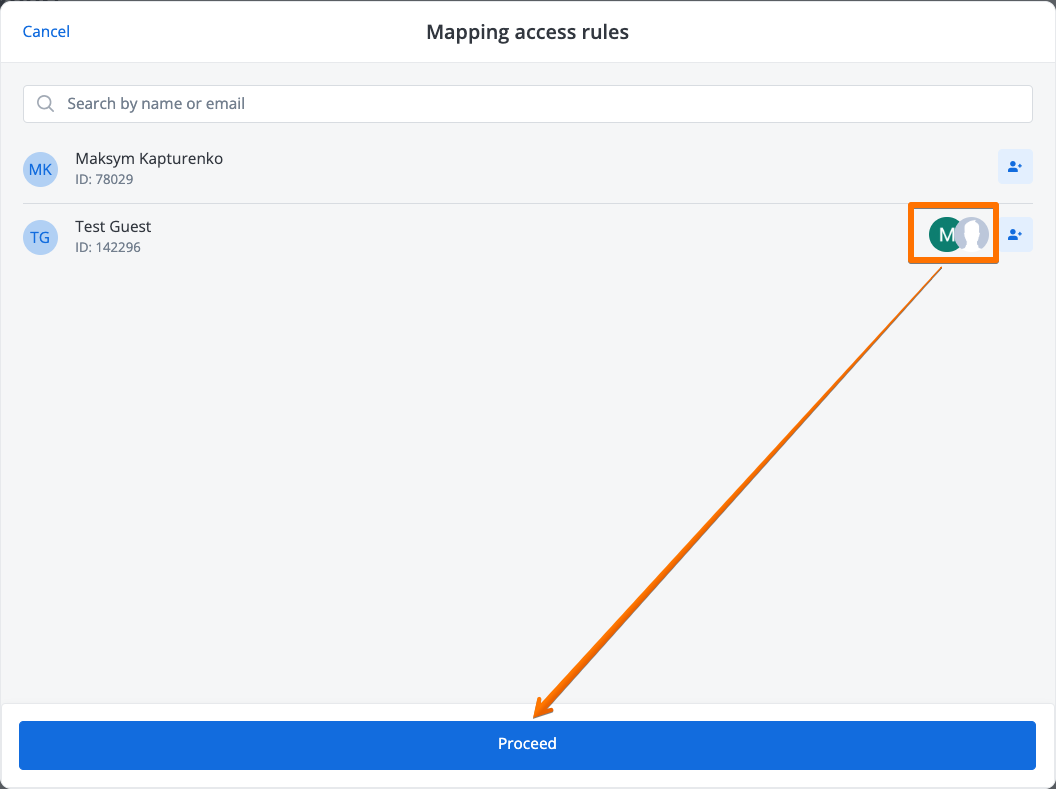
- Clicking the Add button opens a window where you can review the rights mapping. Each initial user with transferred access rights will have the avatars of the current workspace users/user groups to which the rights were mapped:
Mapping credentials when importing scripts
You can use the mapping functionality when importing scripts. If the file that you are importing contains at least one script, when mapping, the Corezoid credentials tab is displayed. On the tab, you can specify new credentials for each script contained in the file correspondingly.

With this feature, you can use scripts immediately after the import is complete.
Viewing the list of objects to be imported
After you've reviewed the rights mapping, click Proceed;
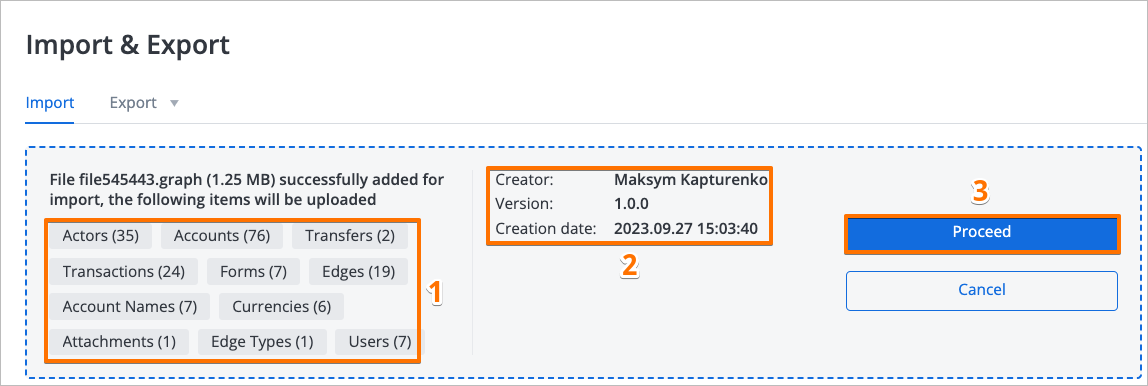
- This will open a menu where you can view the details of the imported file. The menu displays the imported object types and numbers (1), creator name, version, and creation date (2).
After you have reviewed the rights mapping, click Proceed (3) :
Transfers and Transactions Import
Transfers and transactions against the accounts of the objects you import are displayed in the list of objects and imported only if you've selected the Export accounts with transactions and transfers box when editing the export graph.
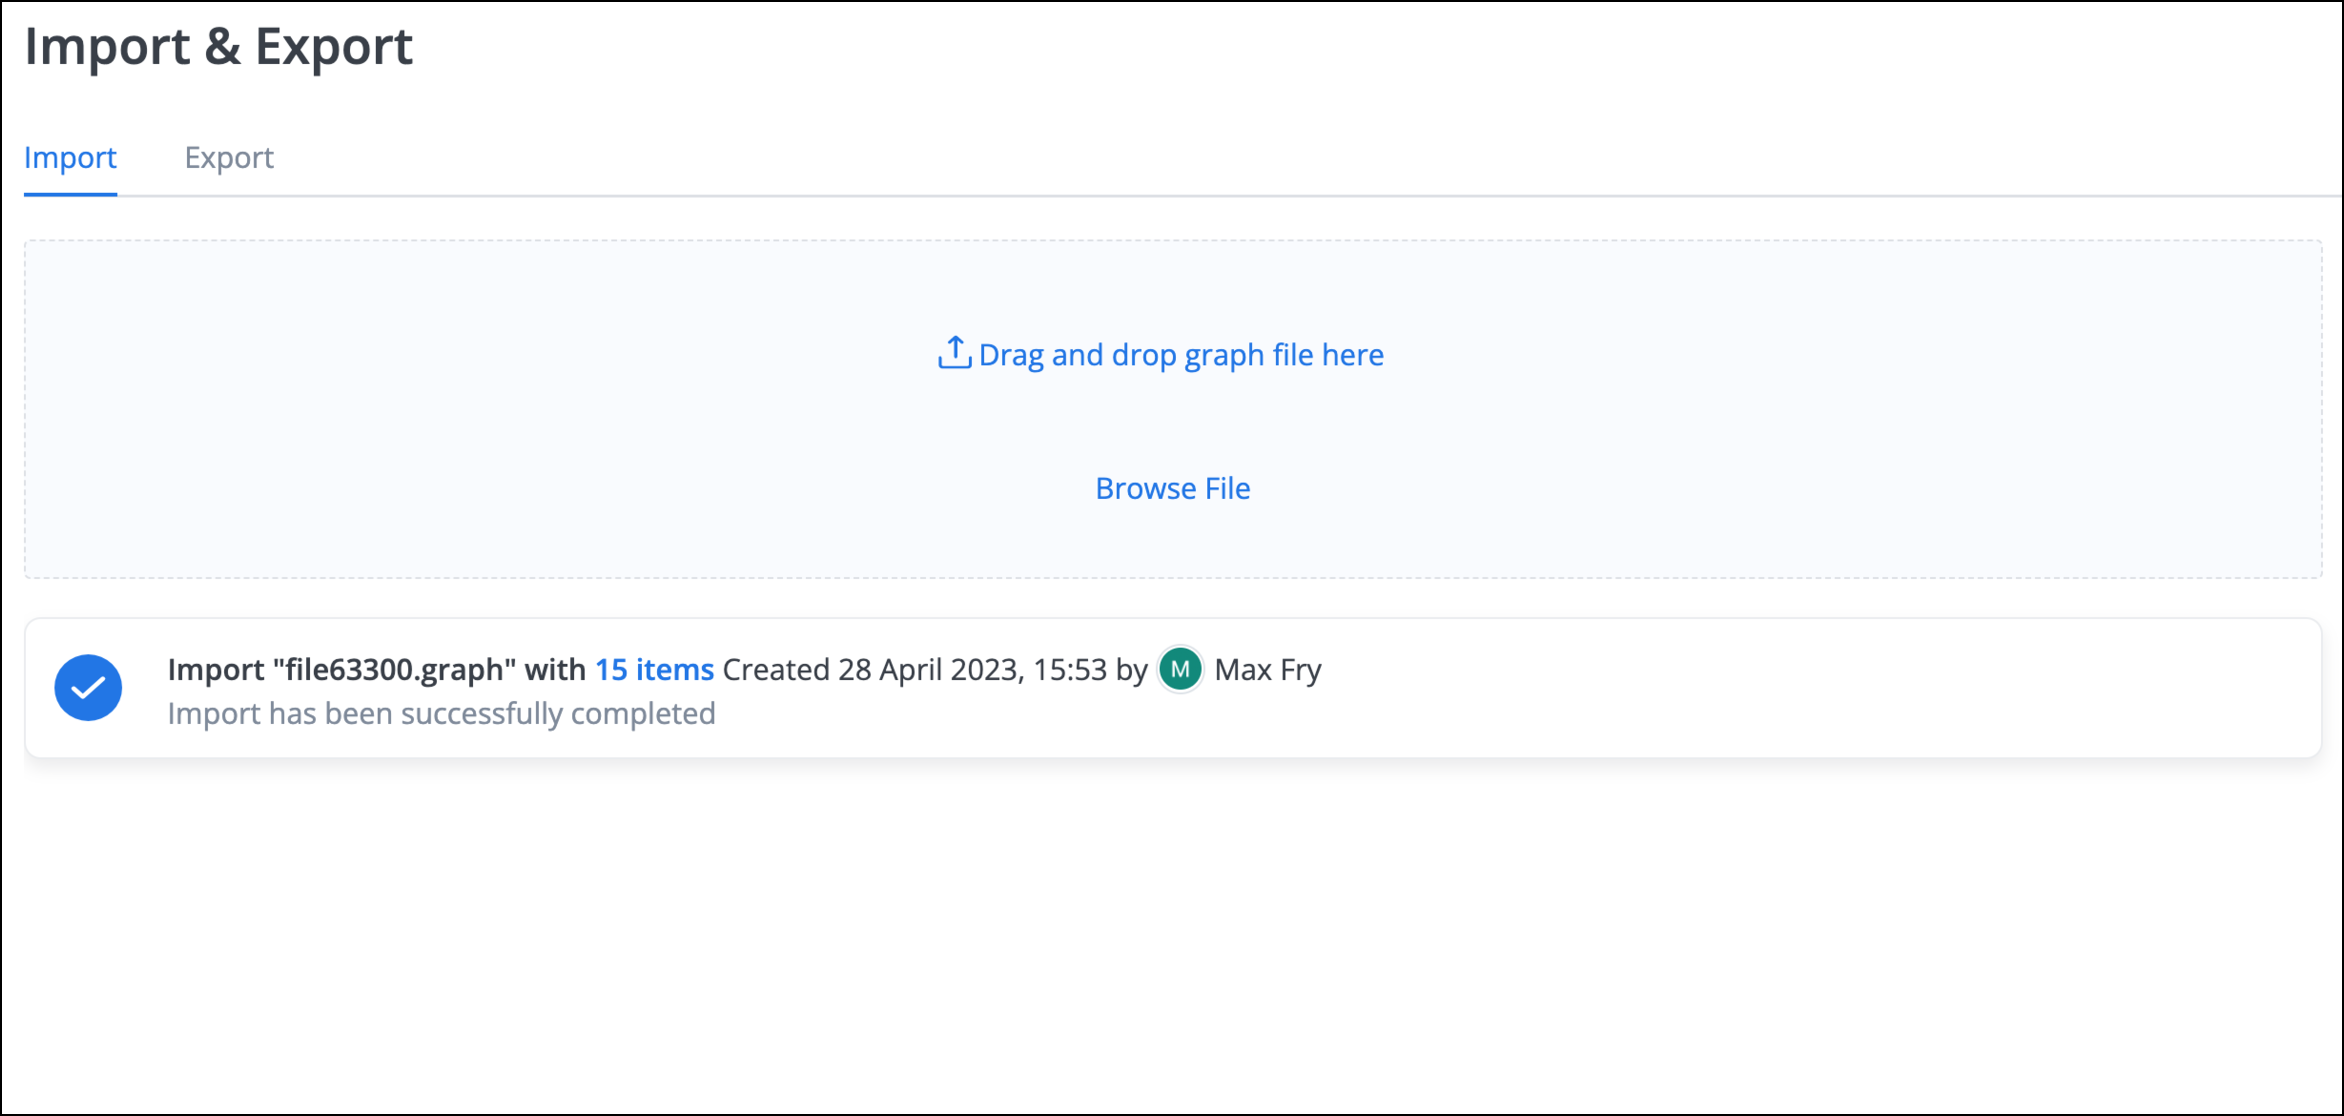
Wait for the import procedure to complete and view the import status. If the file was imported successfully, you will see the following information:
Imported objects ownership
All the imported objects are created under the user which performed the import.
For accounts, their balances are imported, however, with no transaction history
Handling import errors
Import may fail due to various reasons. If there is an error, you can view the details in the Import tab:
Based on the import error information, try to check the import file or export it again to repeat the import procedure.
Was this article helpful?