Create bot and Communications Orchestrator project
- 11 Jun 2024
- 3 Minutes to read
- Contributors

- Print
- DarkLight
- PDF
Create bot and Communications Orchestrator project
- Updated on 11 Jun 2024
- 3 Minutes to read
- Contributors
- Print
- DarkLight
- PDF
Article summary
Did you find this summary helpful?
Thank you for your feedback
A bot in Corezoid represents a separate project, which is created from scratch following a simple procedure:
You can connect Communications Orchestrator to new or earlier created messenger bots.
Step 1. Create bots in messengers
Communications Orchestrator accesses bots in the messengers using HTTP API with token identification. A token is a key for accessing your bot. Anyone who possesses this key can control your bot. The token storage and access to it must comply with security requirements for sensitive data.
To connect an existing bot to Communications Orchestrator, go to step 2. Connect bots to Communications Orchestrator in Corezoid.
Telegram
- Begin a chat with BotFather and click Start.
- Send the
/newbotcommand to BotFather to create a new bot. - Follow the BotFather’s instructions:
- Name your bot.
- Give your bot a username to be displayed in contacts, chats, and addresses.
Note: A username must have the bot ending, for example, TetrisBot or tetris_bot. The name and username of a bot must be unique in Telegram.
- Save the provided access token to your bot.
Viber
Follow the contact form link to submit your application for a Viber bot registration. Our Support team will guide you through the procedure and provide all the necessary information.
Facebook Messenger
Log in to your Facebook account.
Create a new page that your bot will be connected to by following the instructions.
Note: You must connect each Facebook bot to a Facebook page.Go to Facebook for Developers.
Note: If you are new here, register as a developer.Hover over My Apps, and then click Create New App.
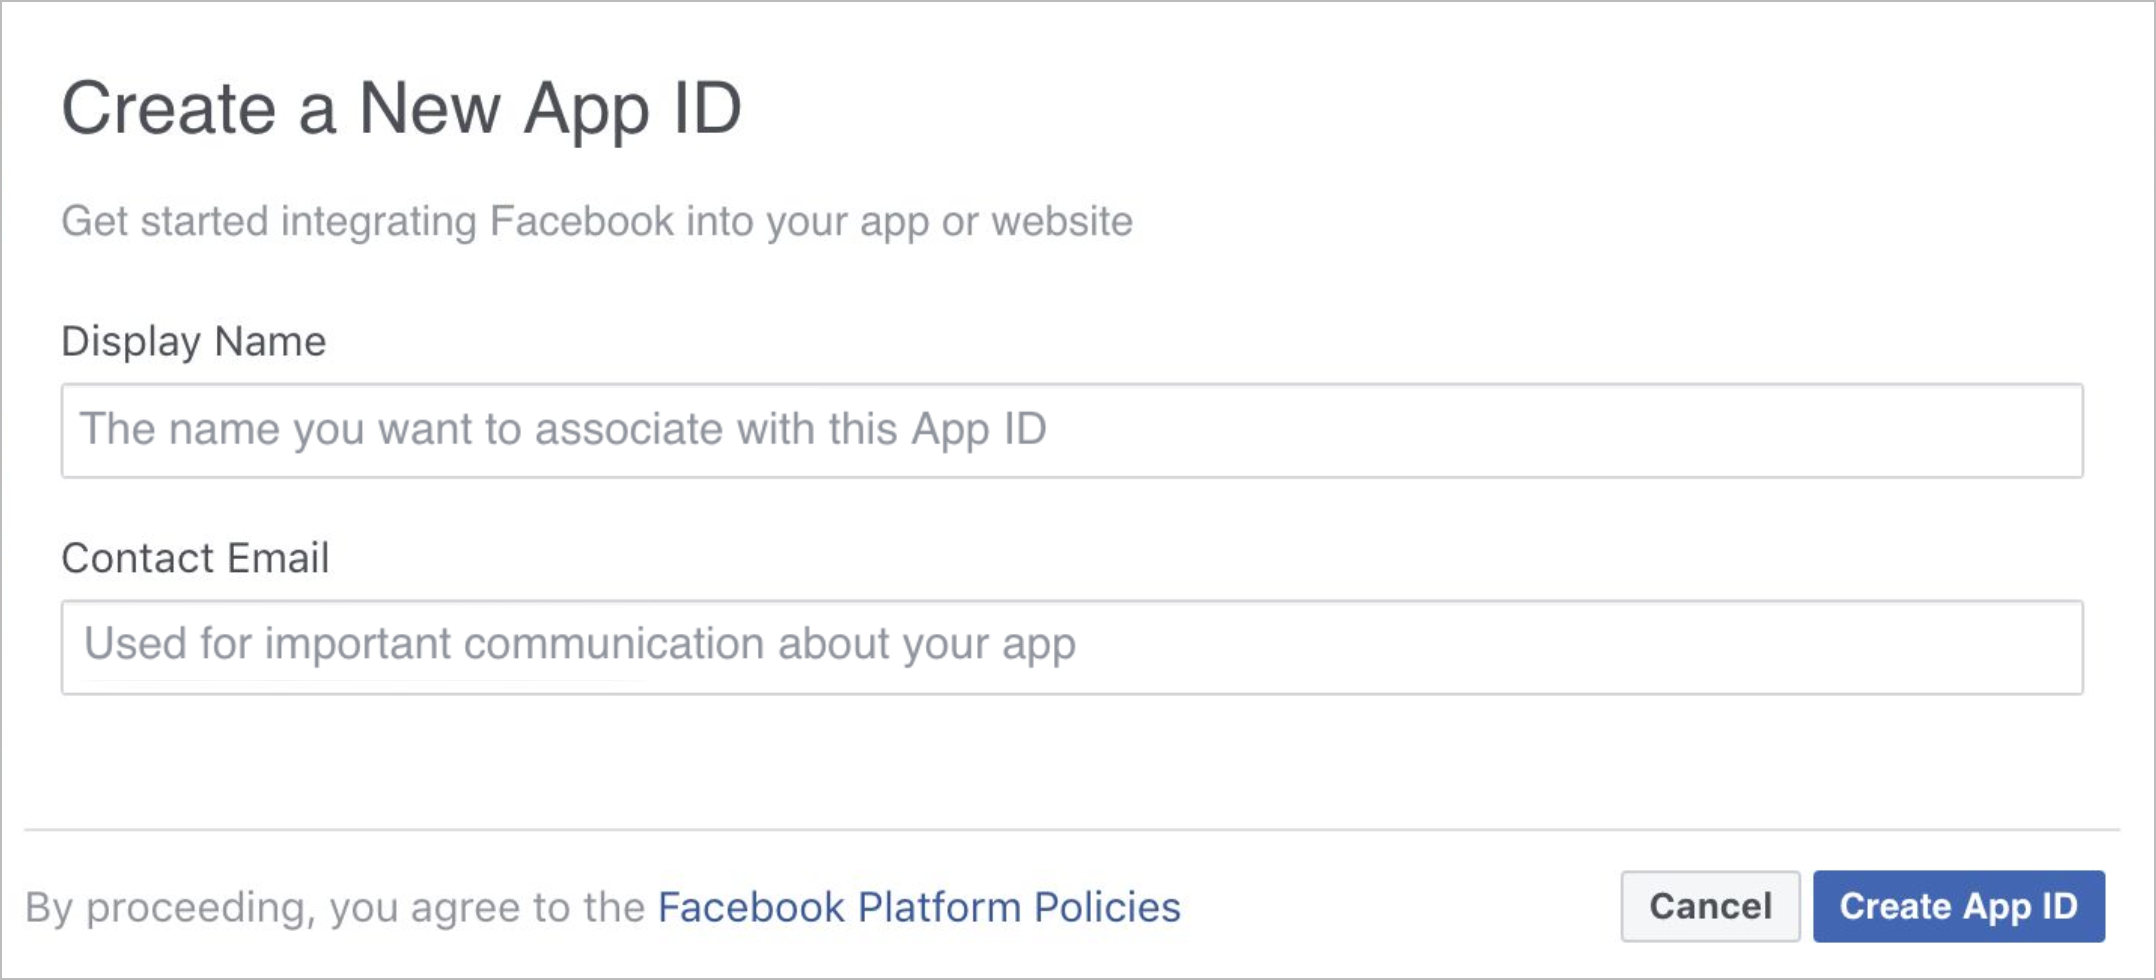
In the Create a New App ID dialog, fill in all the fields and click Create App ID.
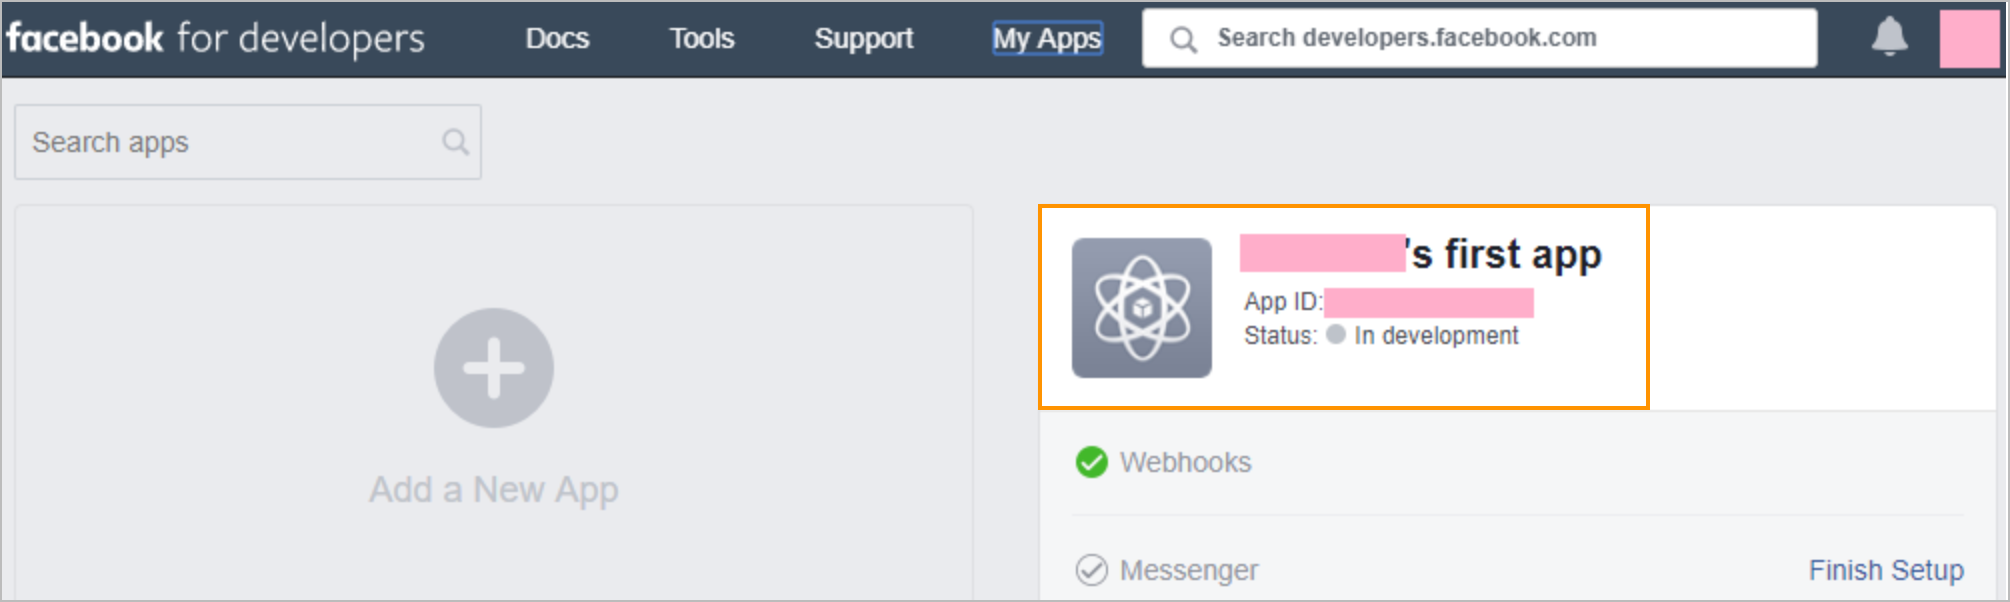
Click the app creation icon.
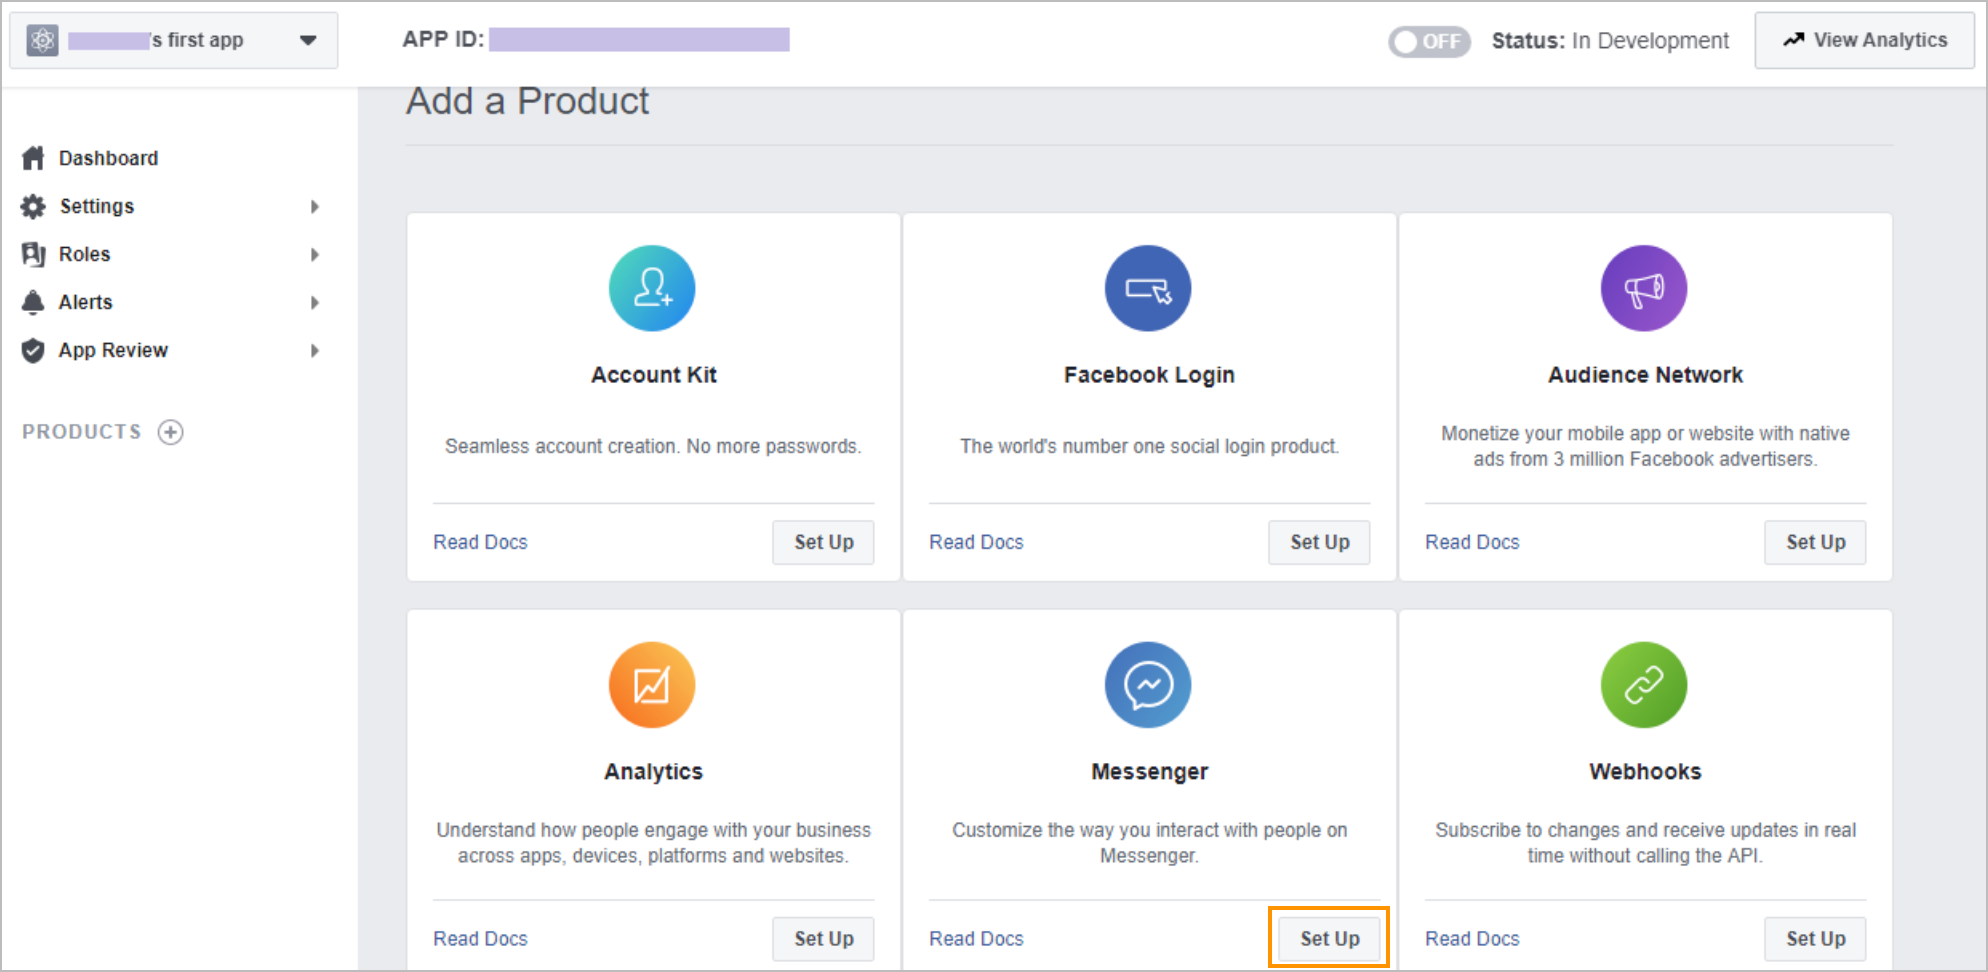
On the left navigation panel, click Dashboard, and in the Add a Product list, find Messenger and click Set Up below.
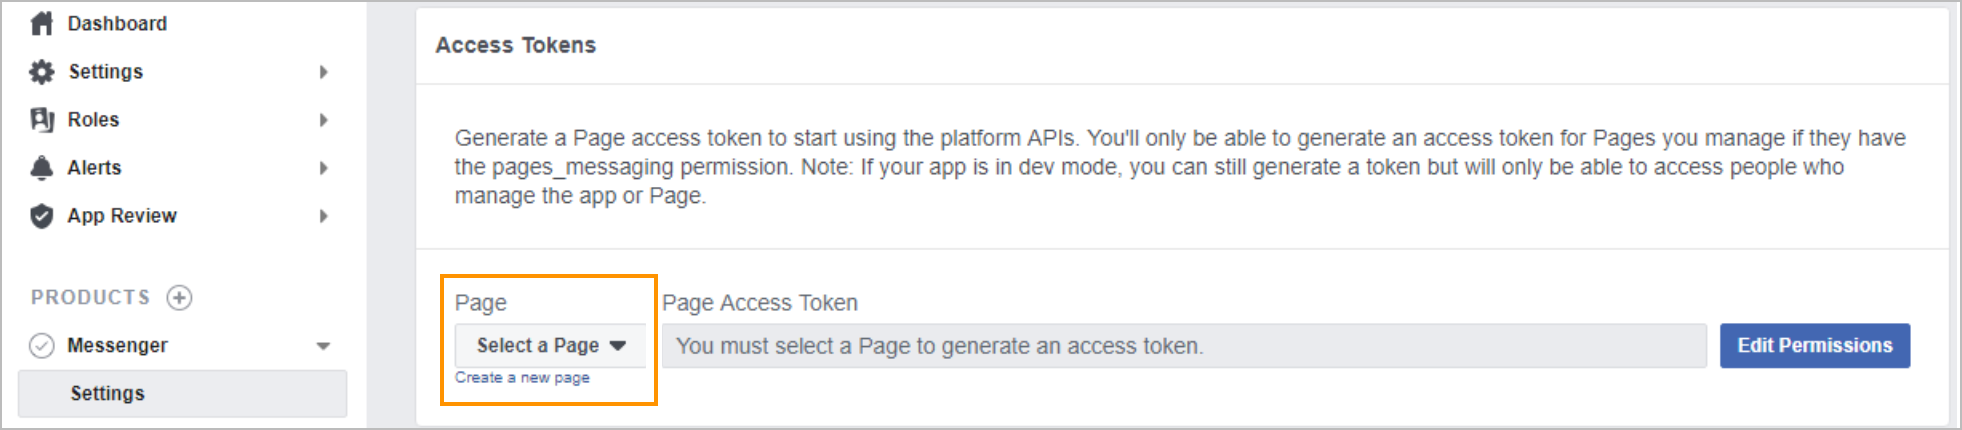
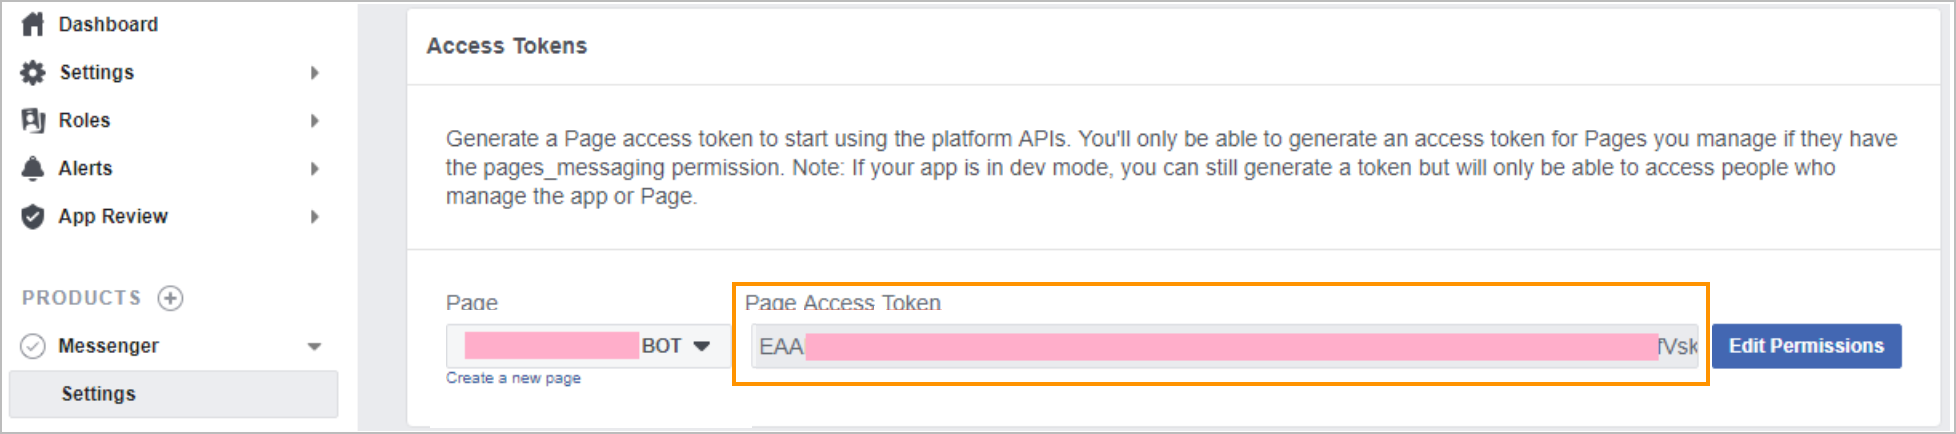
In the Page dropdown list of Access Tokens on the Messenger Settings page, select Edit Permission.
Note: This is the page you created in step 2.
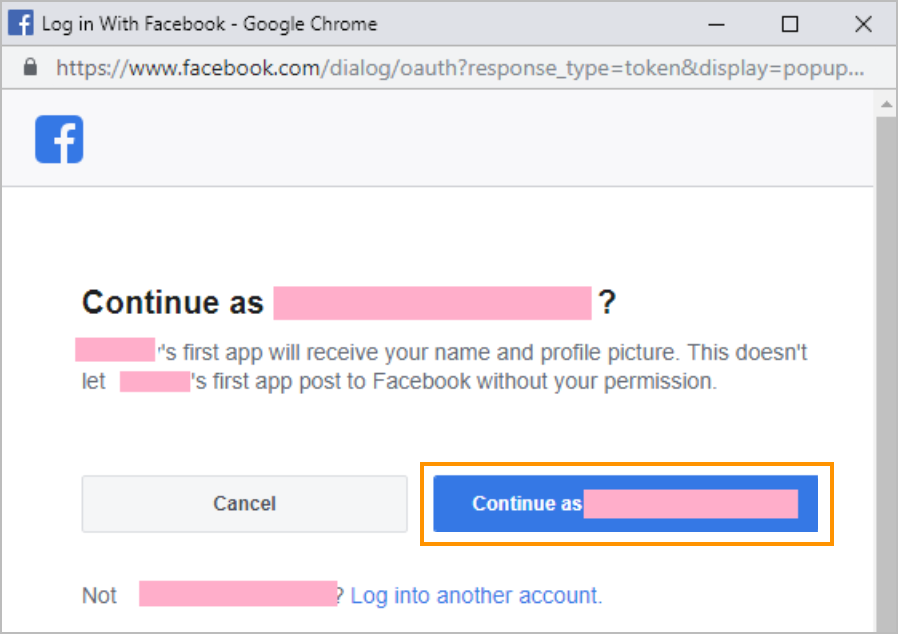
In the new browser dialog, click Continue as [Your Profile Name] to confirm assigning your bot to your Facebook account.
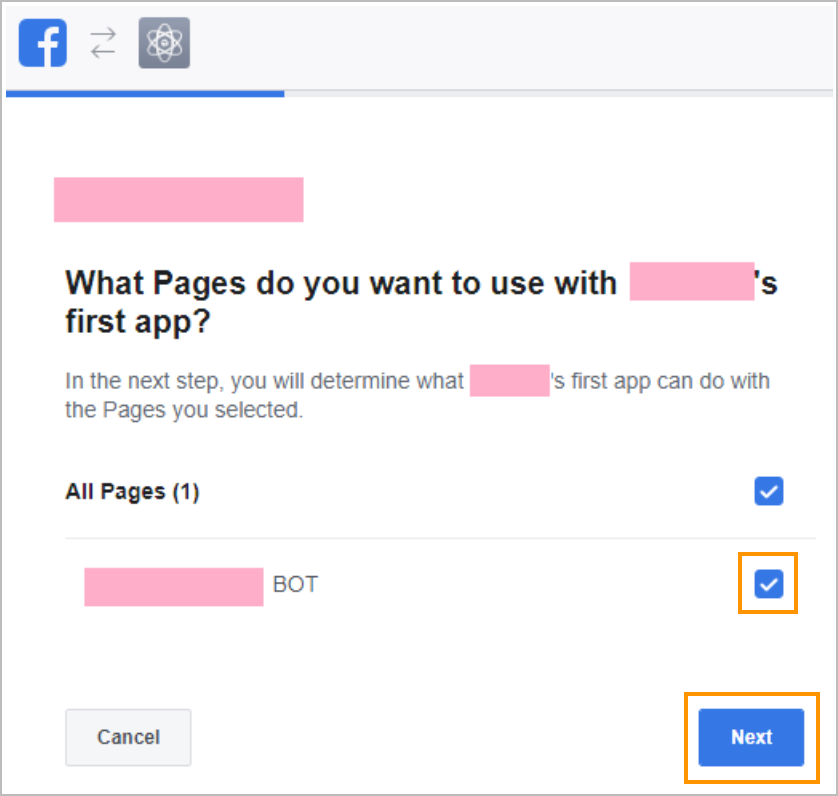
In the next dialog, select the checkbox of the page your bot will be attached to and click Next.
Note: This is the page you created in step 2.
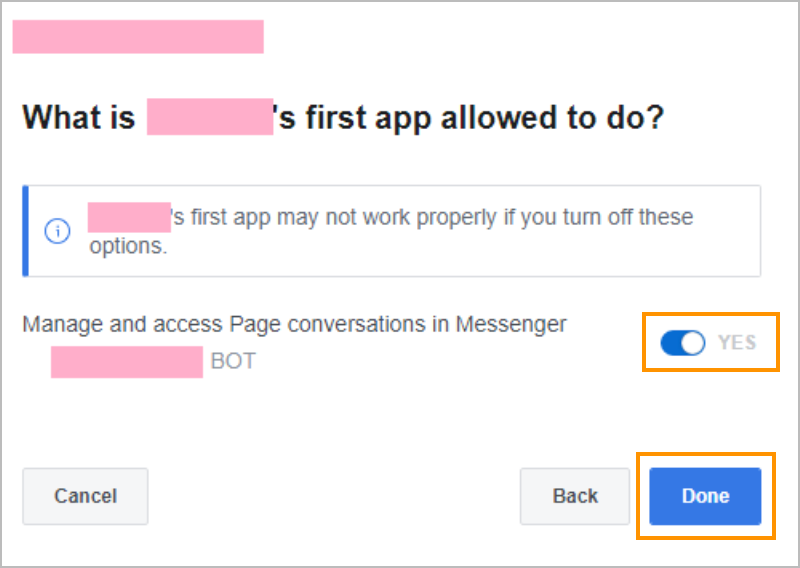
In the next dialog, set the toggle for your page to YES to allow your bot to participate in the P2P chats in the messenger and click Done.
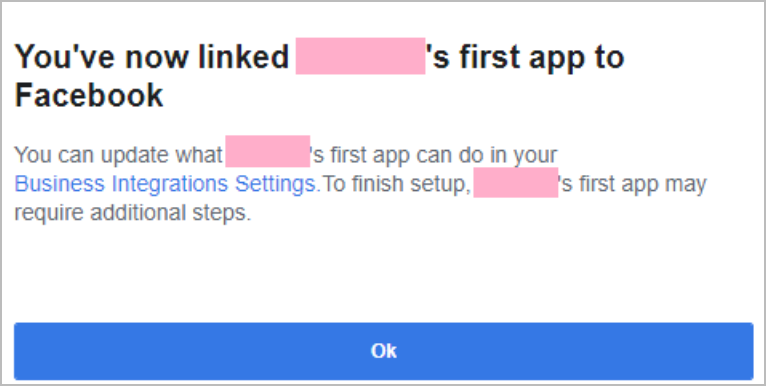
In the next dialog, click Ok.
In the Page Access Token field, copy and save the access token.


Step 2. Connect bots to Communications Orchestrator in Corezoid
Go to admin.corezoid.com, open the Workspace tab, and click the Projects folder.
Select the needed stage, create a new project, or open an existing one.
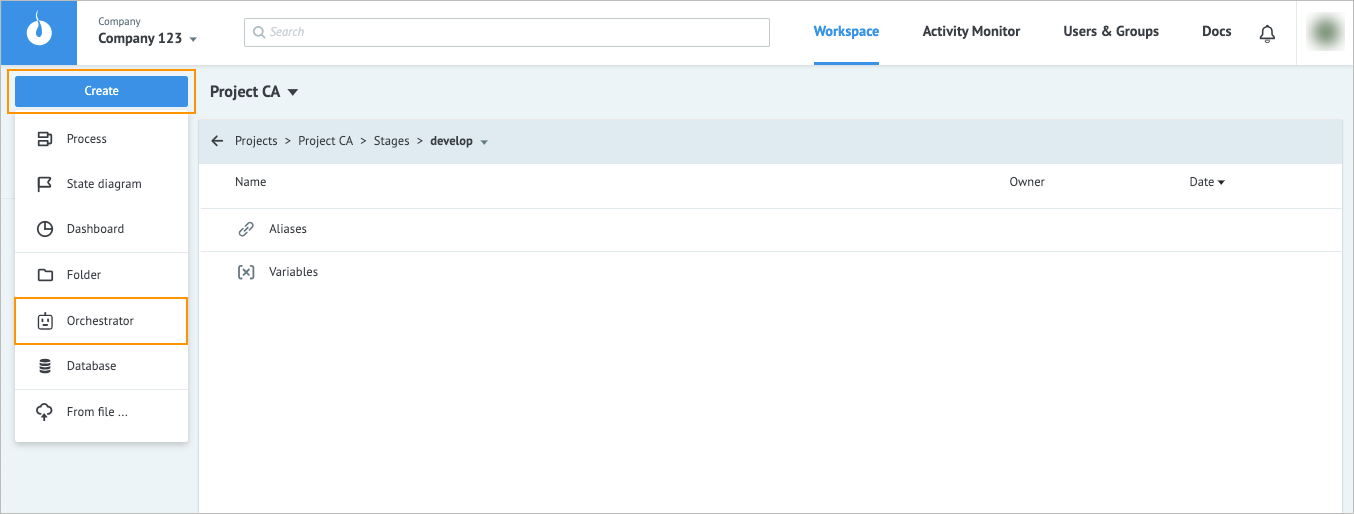
Note: To create a Communications Orchestrator project, choose a non-immutable stage.In the upper-left corner, click Create and from the dropdown list, select Orchestrator.
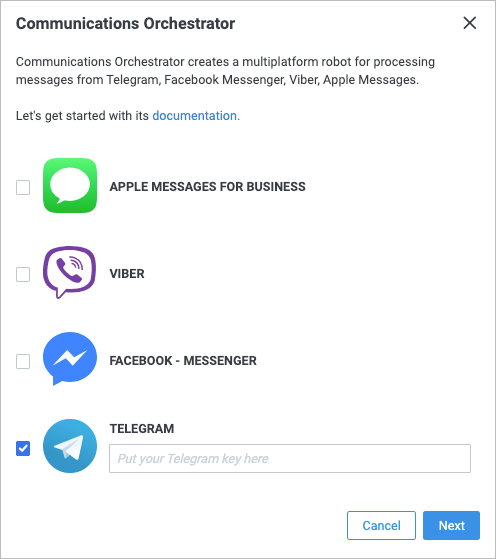
In the Communications Orchestrator dialog:
- Select the messengers you want to integrate.
- Paste the access token you copied when creating the bot
- Click Next.


Note:
- If the connecting process didn’t succeed, check each token to be valid.
- If you connect Facebook Messenger, you need to subscribe to Facebook Webhooks in the Facebook admin panel. For more information, go to Subscribe to Facebook Webhook.
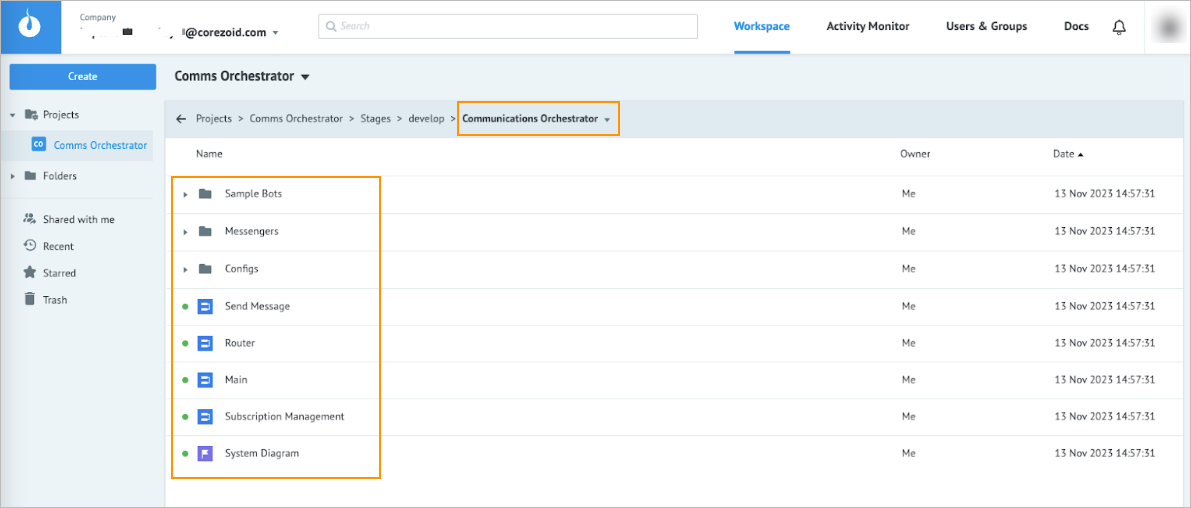
- In the dialog, click Open the created Bot to open the Communications Orchestrator folder.
The bot is connected to the Communications Orchestrator folder, and you can start working in the folder. For more information, go to Components.
Subscribe to Facebook Webhook
When you select other messengers, these steps are done automatically.
Go to your Facebook app’s page for developers.
Copy your access token created above Facebook Messenger, step 14).
In the Communications Orchestrator dialog of Corezoid, click Copy under the Webhook URL for Facebook Messenger.

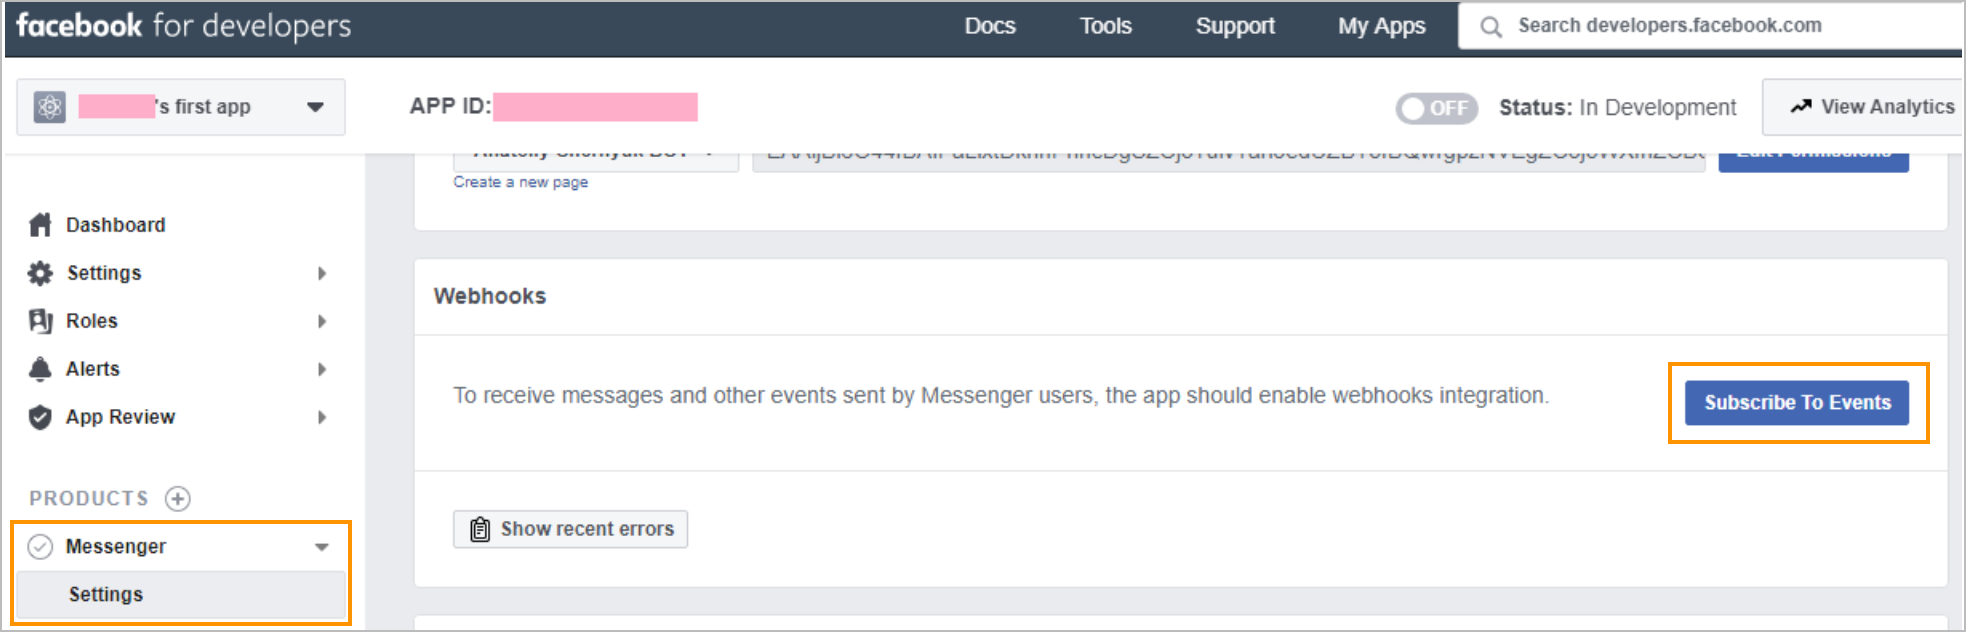
In the left navigation panel, go to Messenger > Settings and click Subscribe to Events.
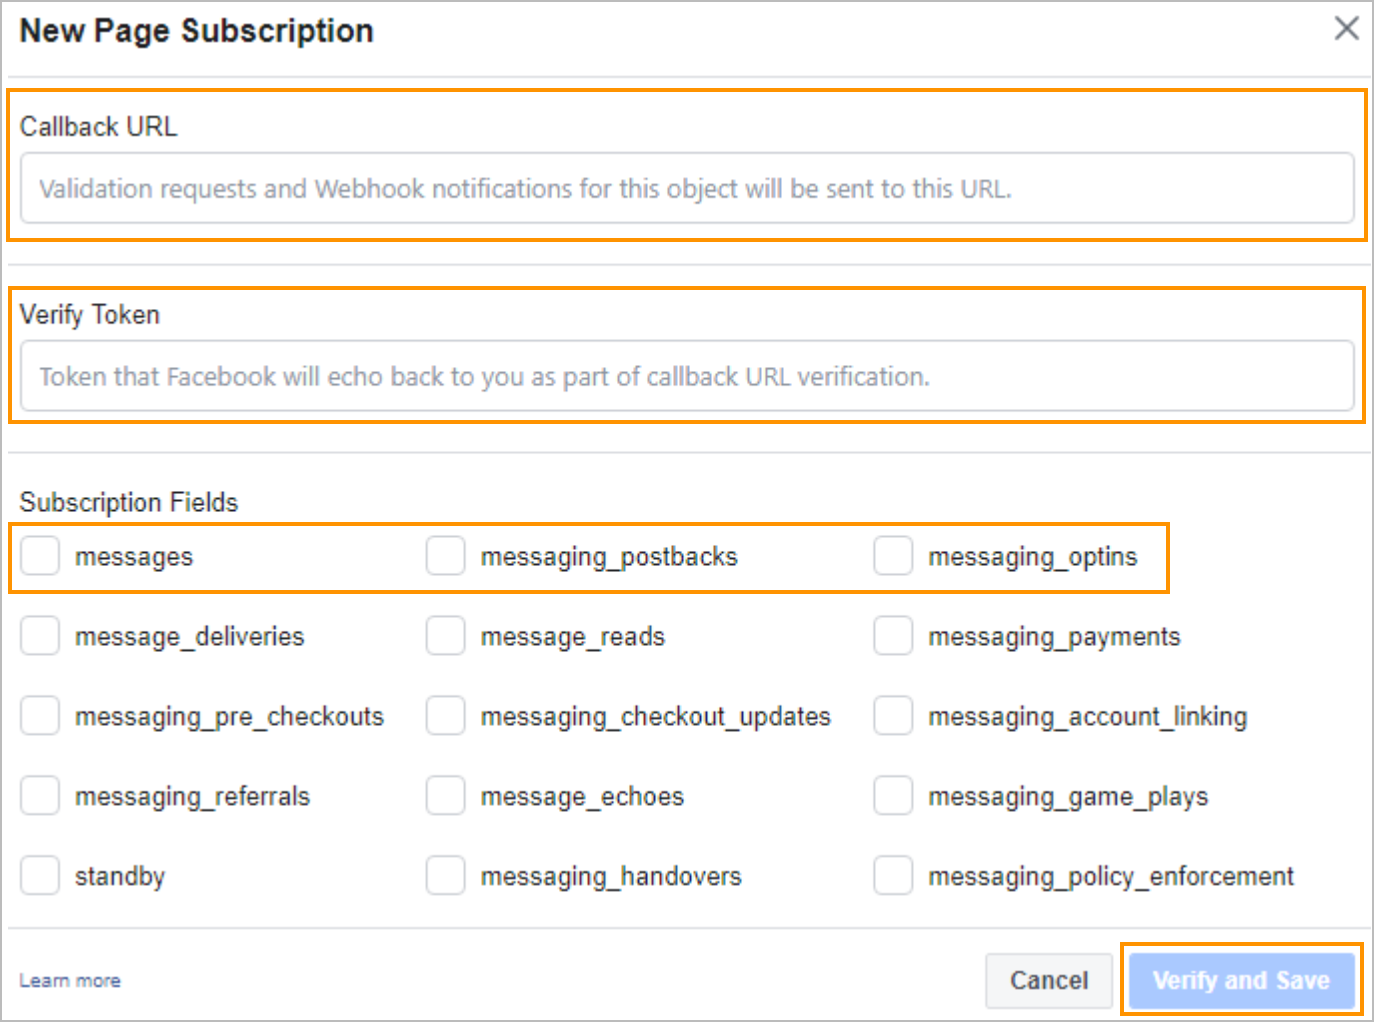
In the New Page Subscription dialog:
- Enter the copied Webhook URL in the Callback URL field.
- Enter the copied token in the Verify Token field.
- Select the messages, messaging_postbacks, and messaging_optins checkboxes.
- Click Verify and Save.
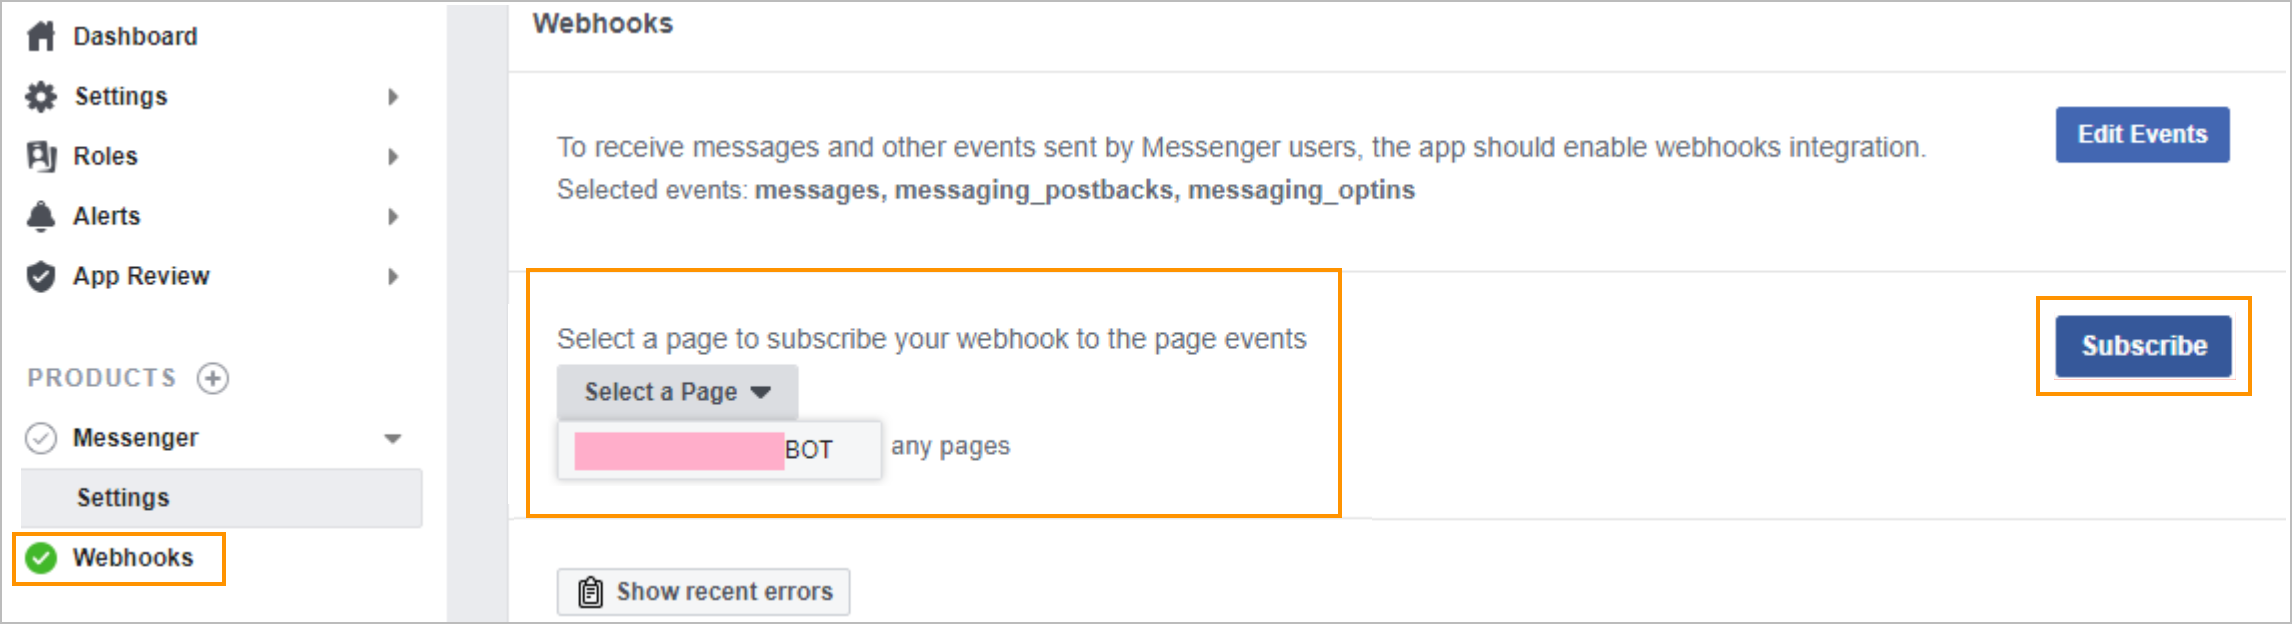
In the Select a Page dropdown list of the Webhooks page, select the page to which your page will be subscribed for events and click Subscribe.


You’ve created your first Communications Orchestrator.
Was this article helpful?