Condition
- 31 Oct 2024
- 4 Minutes to read
- Contributors


- Print
- DarkLight
- PDF
Condition
- Updated on 31 Oct 2024
- 4 Minutes to read
- Contributors
- Print
- DarkLight
- PDF
Article summary
Did you find this summary helpful?
Thank you for your feedback
Overview
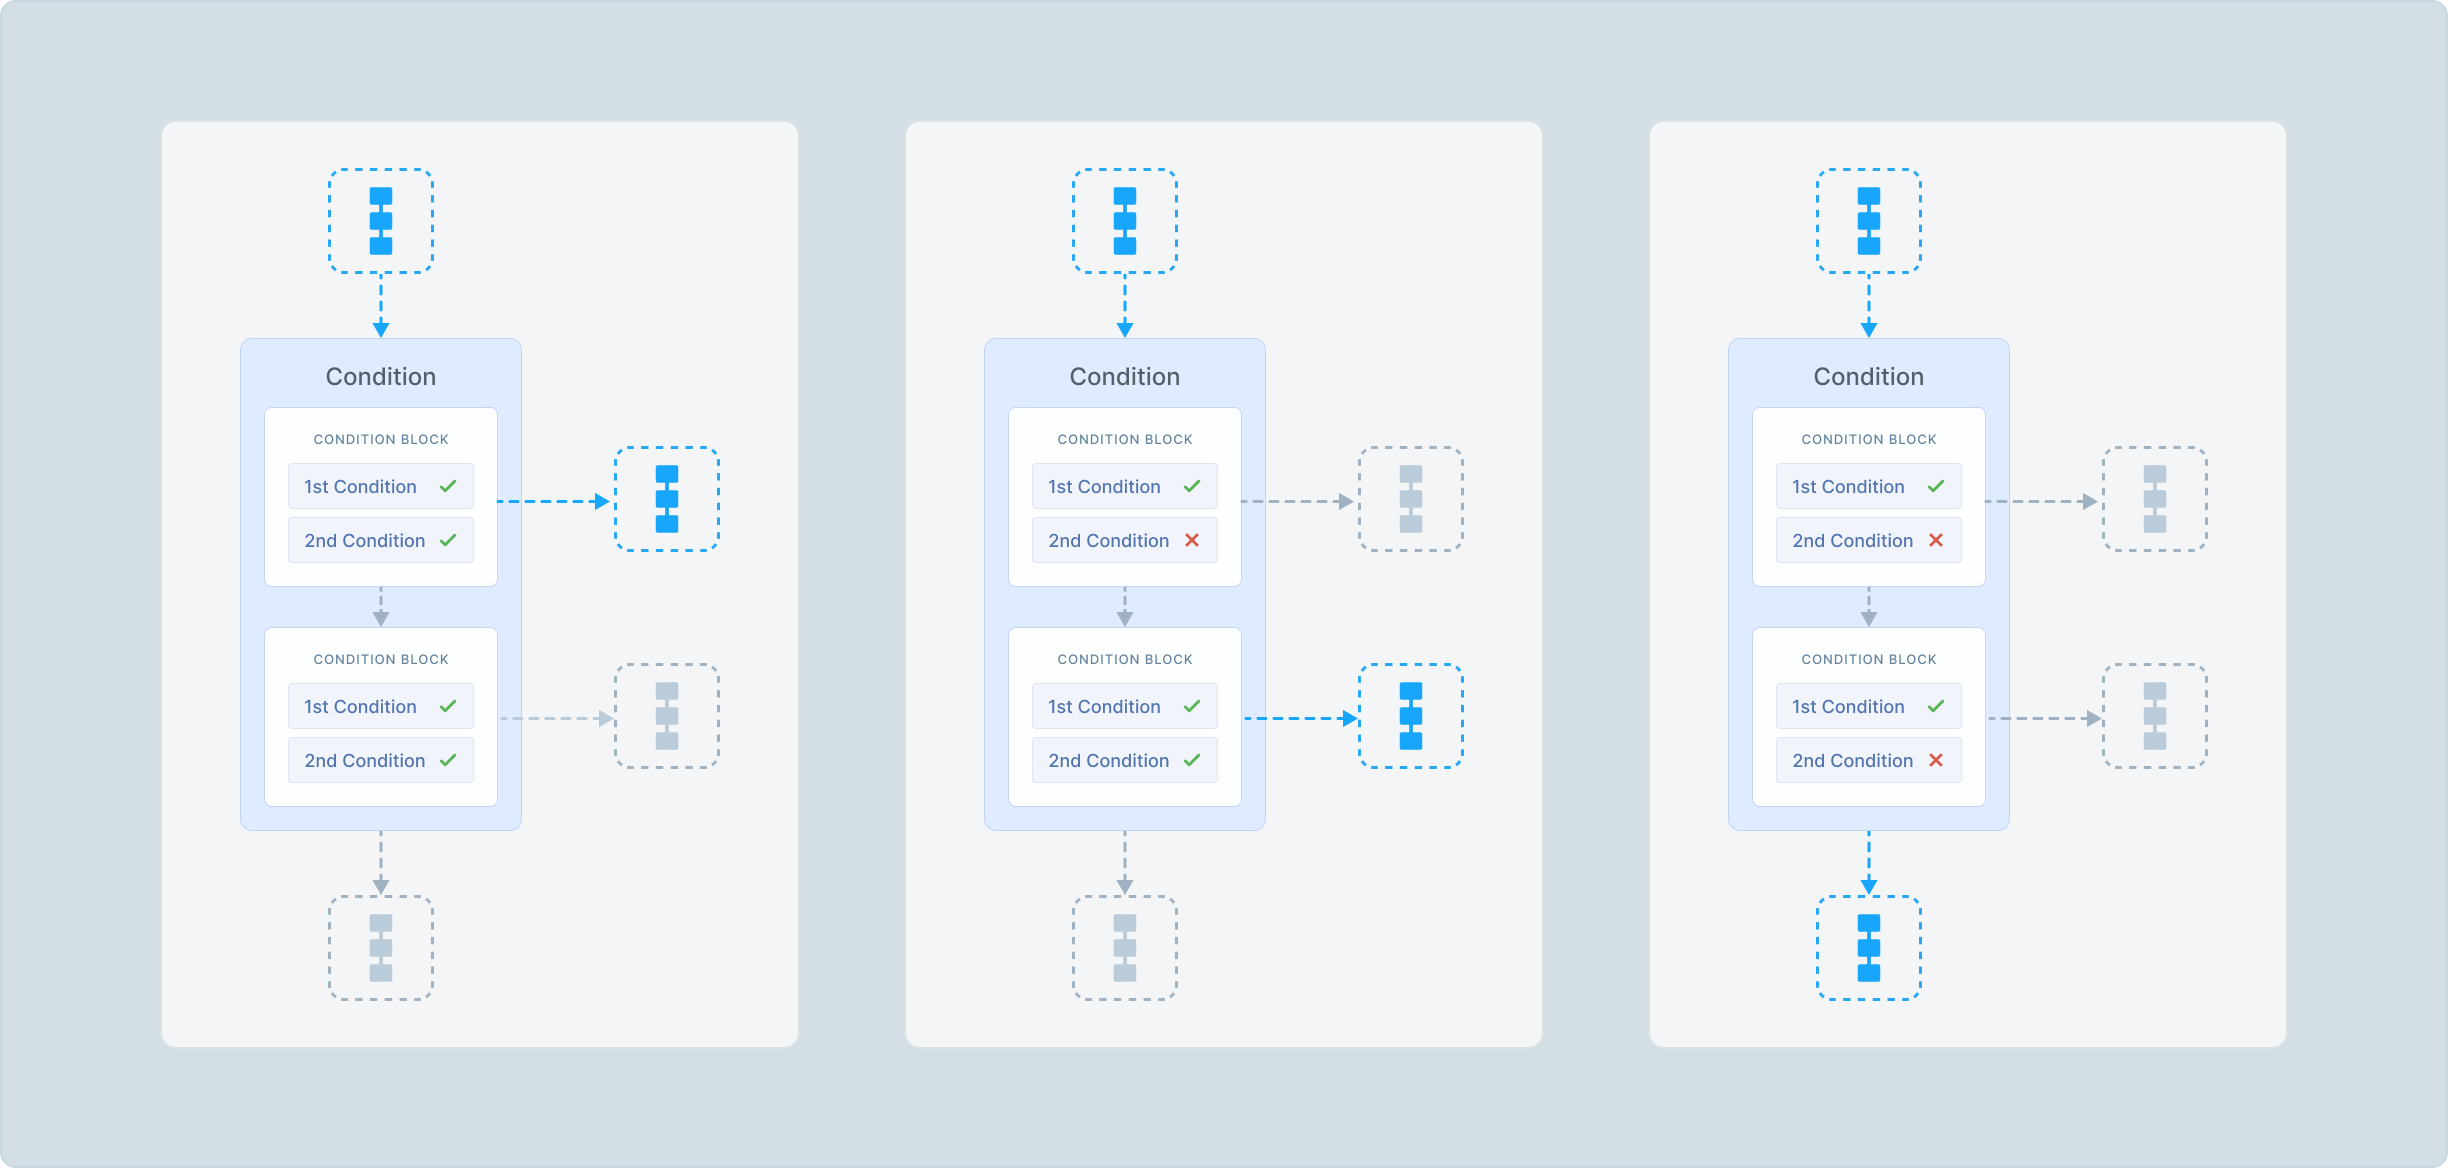
The Condition node functions as an "if" statement and enables you to evaluate task parameters and direct the flow of your tasks based on specific requirements set by the user. The Condition node may consist of one or more Condition blocks; each block includes one or more conditions and a single output edge, which leads to the End node. By using multiple Сondition blocks, you can create a nested if/switch-case structure and achieve more flexibility in controlling the task flow based on various conditions.
When a task enters the Condition node, it is evaluated against each condition in the topmost Condition block:
- If the task satisfies every condition in the block, it goes to the End node of the block.
- If the task doesn’t satisfy at least one condition in the block, it goes to the next Condition block.
- If the task doesn’t satisfy all the conditions of any Condition block, it goes to the default End node.
Settings
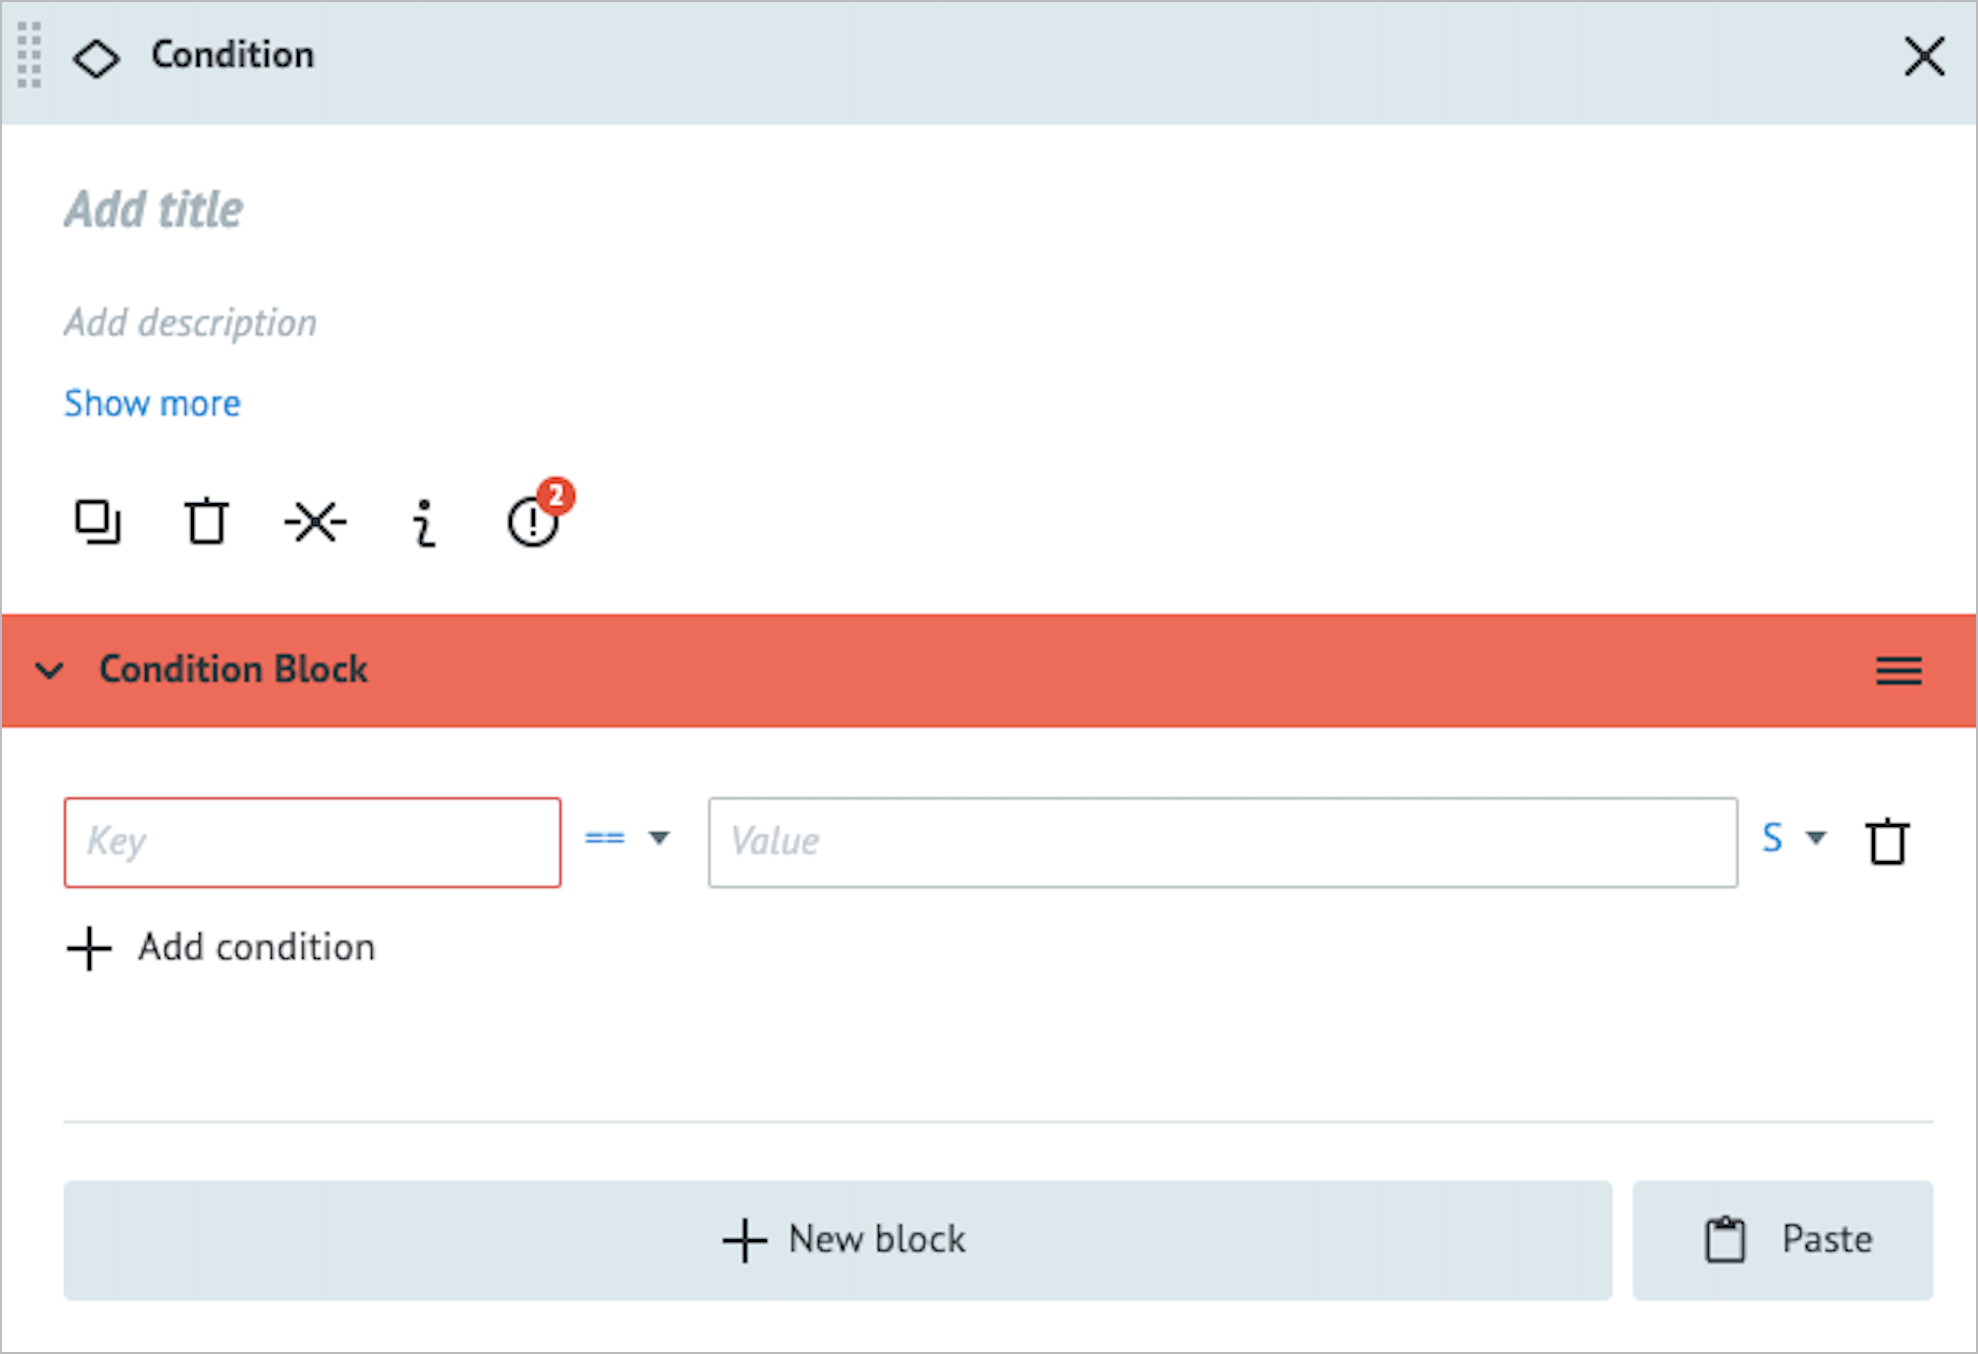
The Condition node has the following parameters:
(Optional) Title and Description: Name and details of the node.
Condition block:
Key: Key to specify variables; use curly brackets to enter the key. For example, {{age}}.
Comparison operator: The way the key and the value have to be compared:
- Equal to (==)
- Not equal (!=)
- More than (>)
- More than or equal to (>=)
- Less than (<)
- Less than or equal to(<=)
- Regular Expression (RegExp)).
Value: Value to compare; use curly brackets to enter the value. For example, {{age}}.
Note: For more information, go to Parameters and functions.
3. Type of data:
* String (S)
* Number (N)
* Boolean (B)
* Array (A)
* Object (O)Note: For more information, go to Data types.
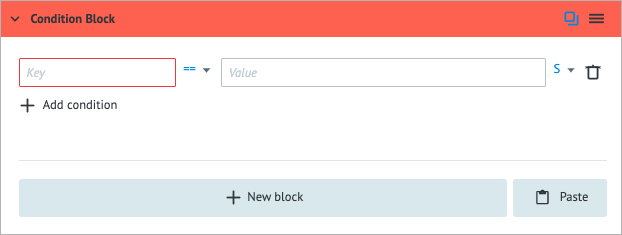
You can do the following actions in the Condition Block:
- Add a new condition: Below the Key field, click + Add condition, and then fill in the needed information in the condition line that appears.
- Delete a condition: On the right side of the condition line, click the trash icon

- Add a new Condition Block: Below the condition line, click + New block, and then fill in the needed information in the block that opens.
- Copy a Condition Block: On the right side of the Condition Block, hover over the red/gray line, and then click the copy icon

- Paste a Condition Block: In the lower-right corner of the panel, click Paste.


Examples
Adding one Condition block and one condition
In the examples below, we check if the condition is met: whether the value of the age parameter in the task is above 18:
Condition is met.
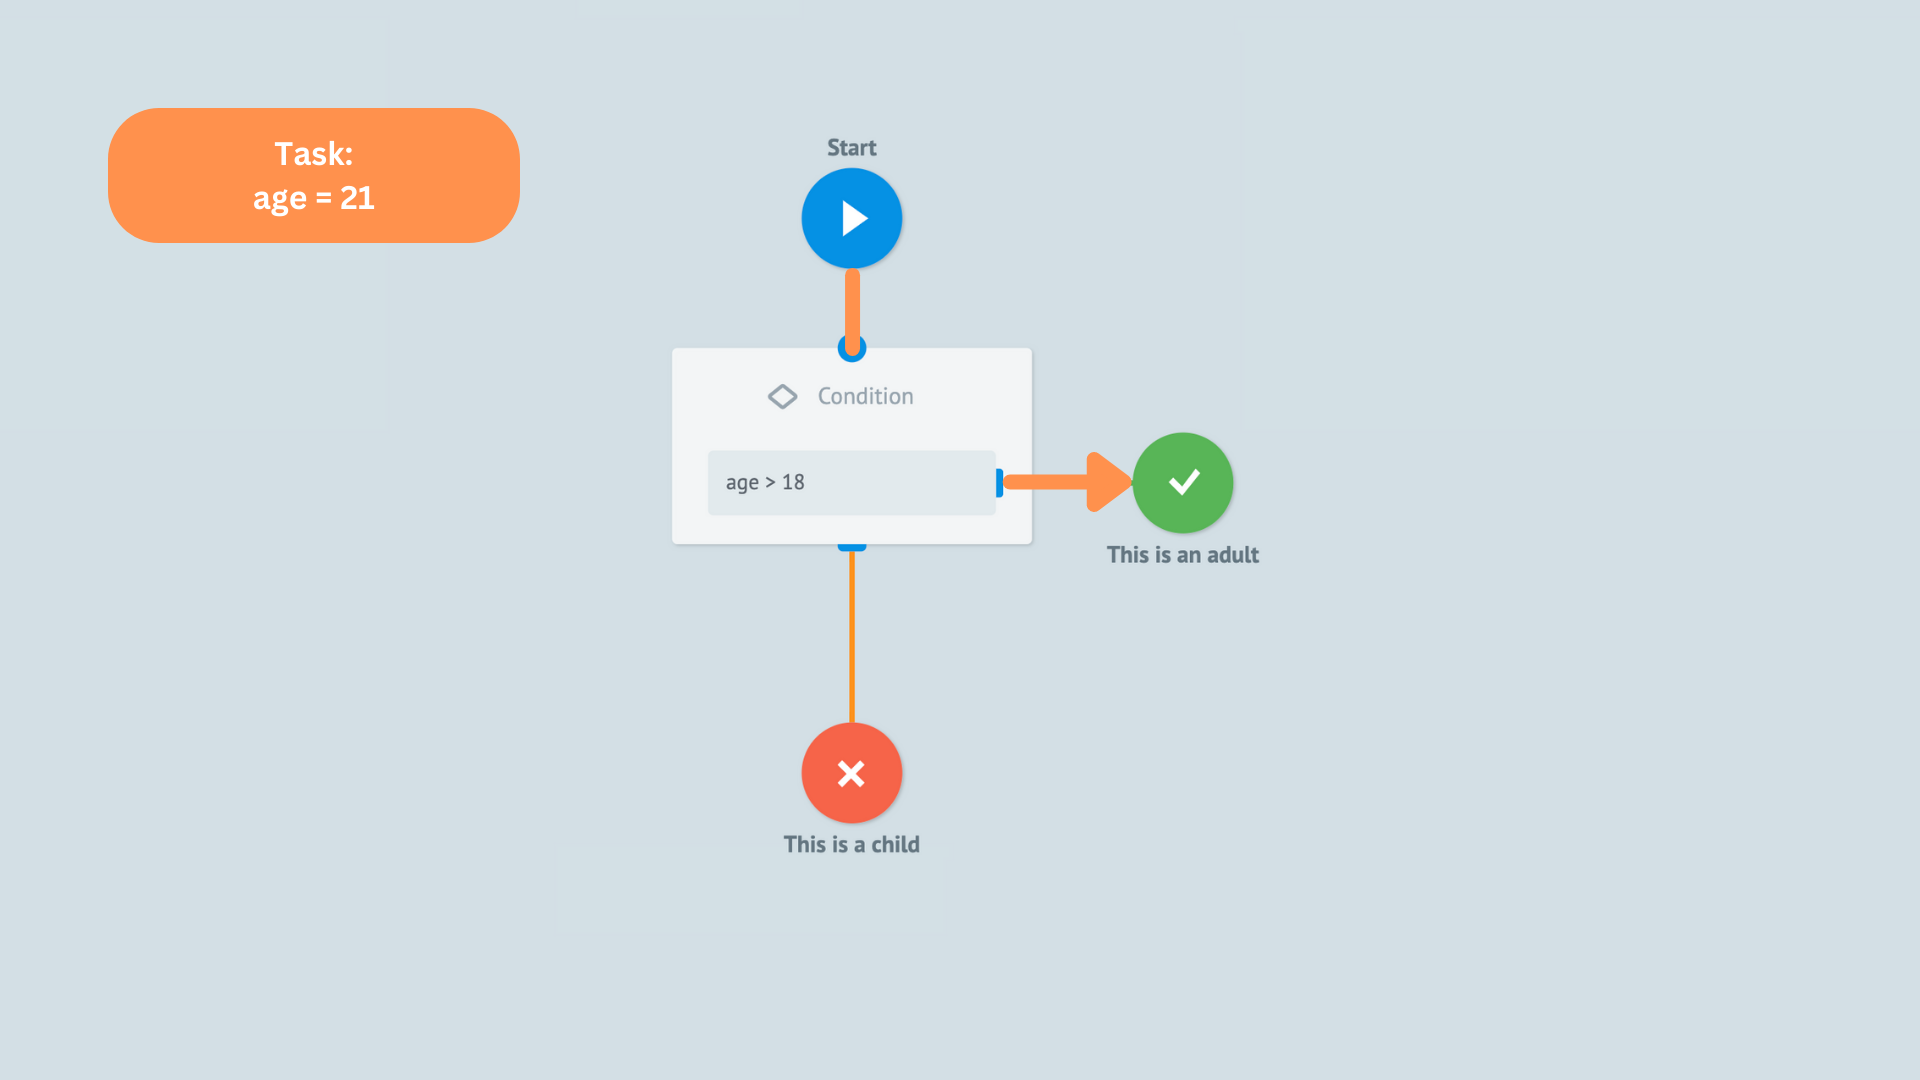
Condition is not met.
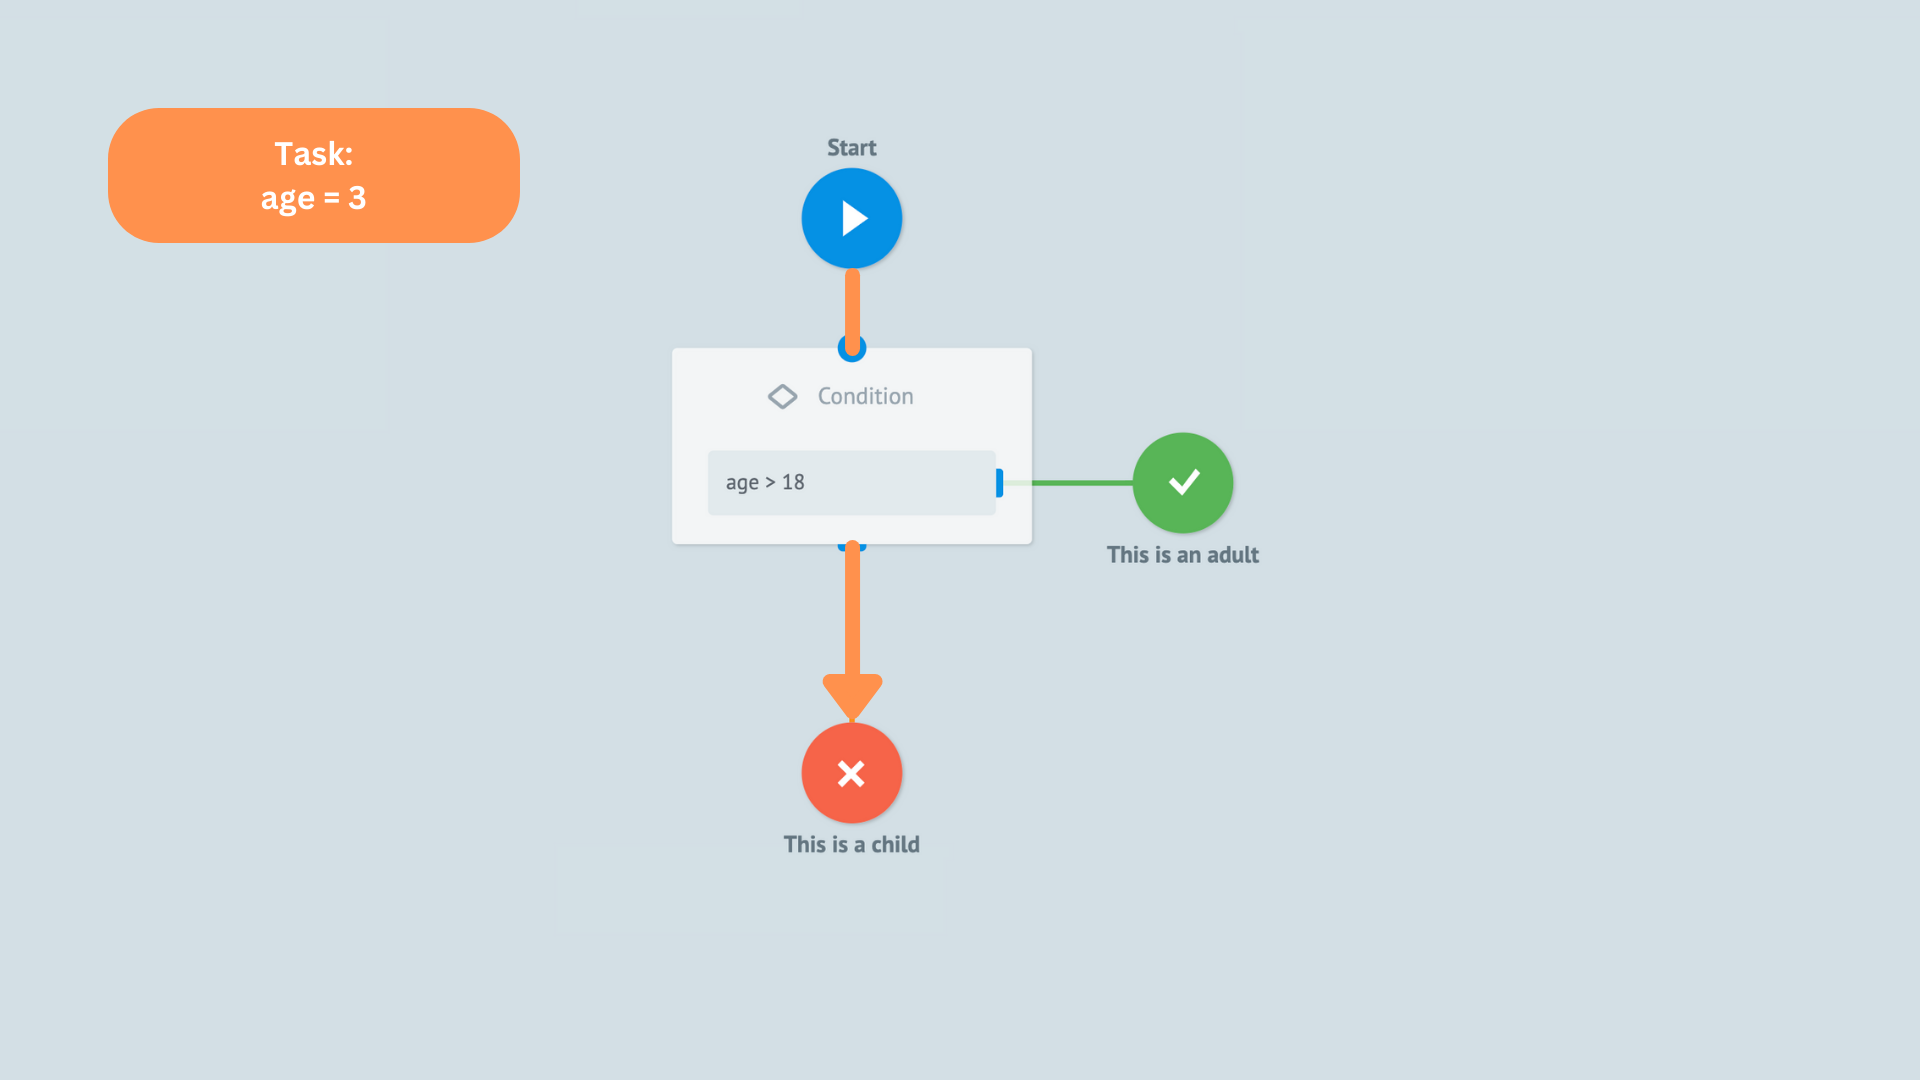


To pass a condition check, the task's parameters must meet the condition: if a task does not contain the age parameter, it fails to meet the condition.
Adding one Condition block with two Conditions
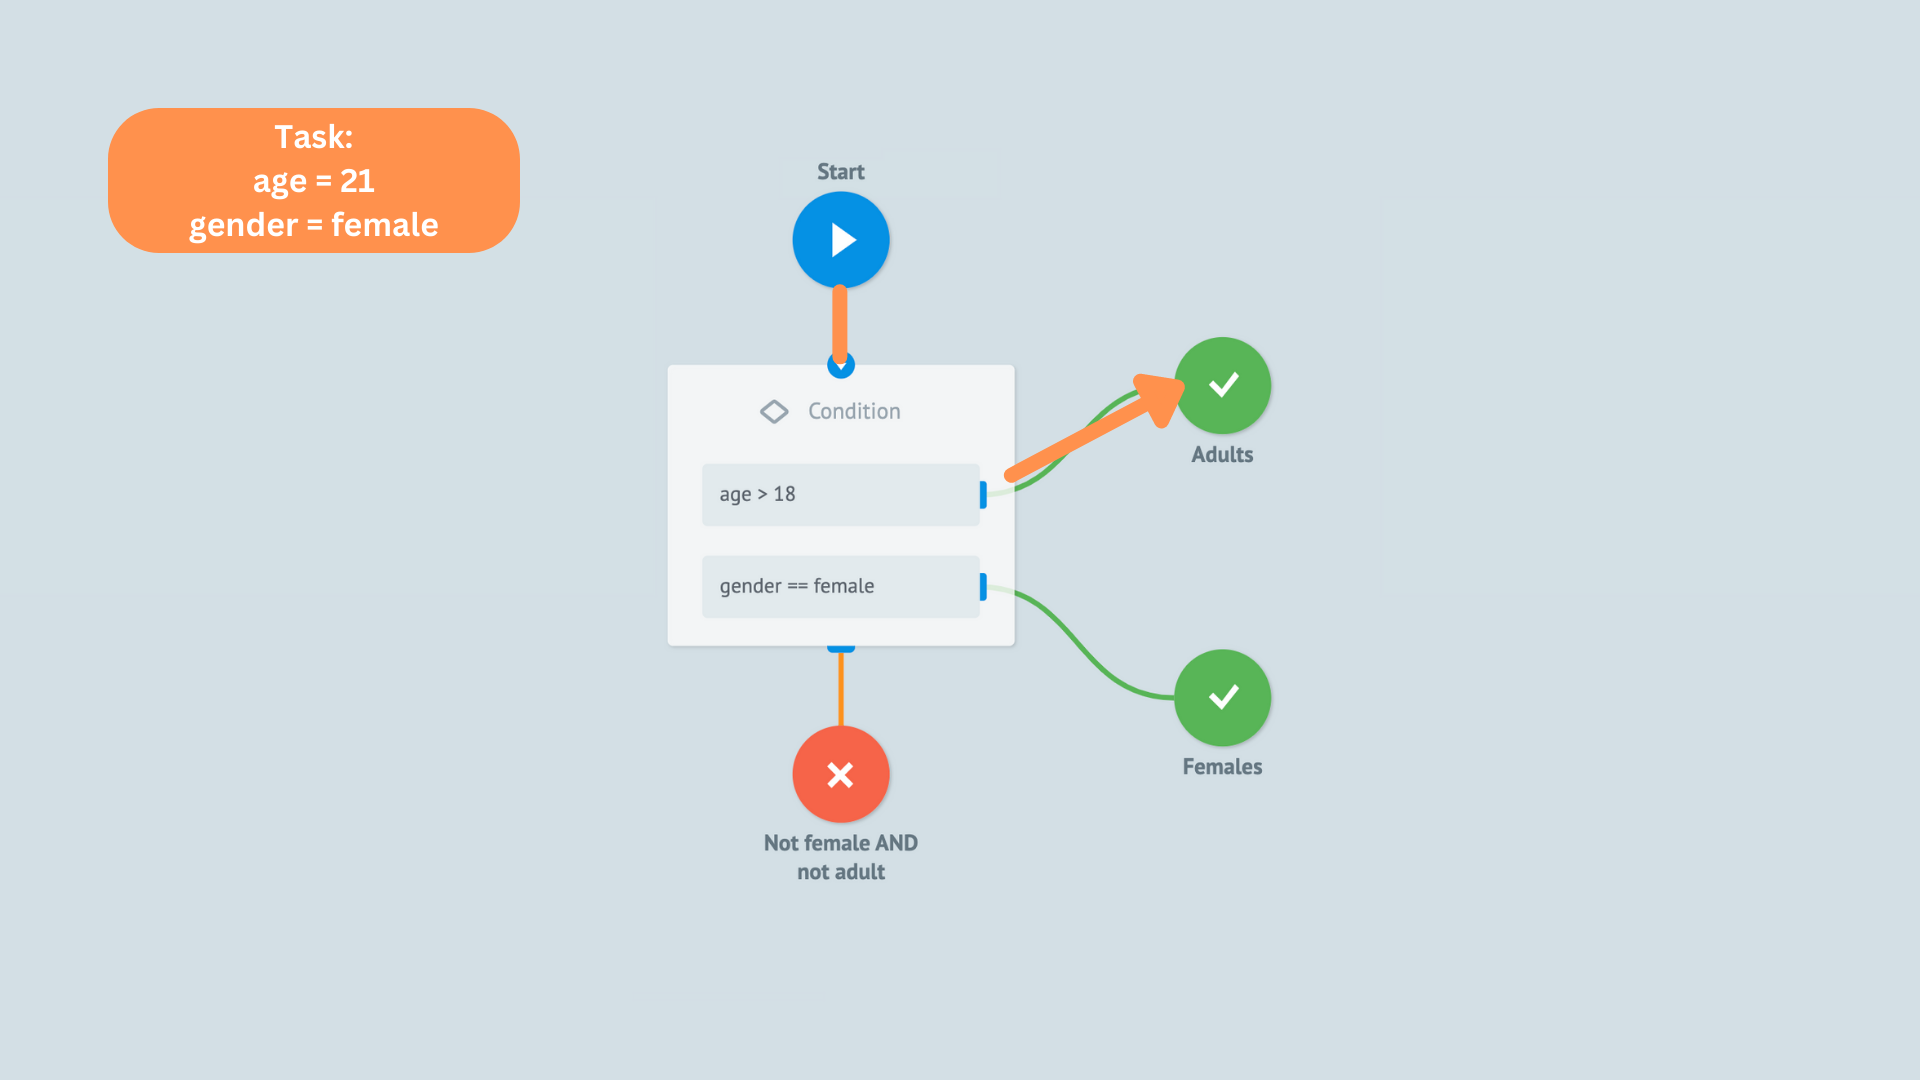
In the examples below, we check whether the two conditions of the Condition block are met:
whether the value of the age parameter in the task is above 18, and the value of the gender parameter is female:
Both conditions are met.
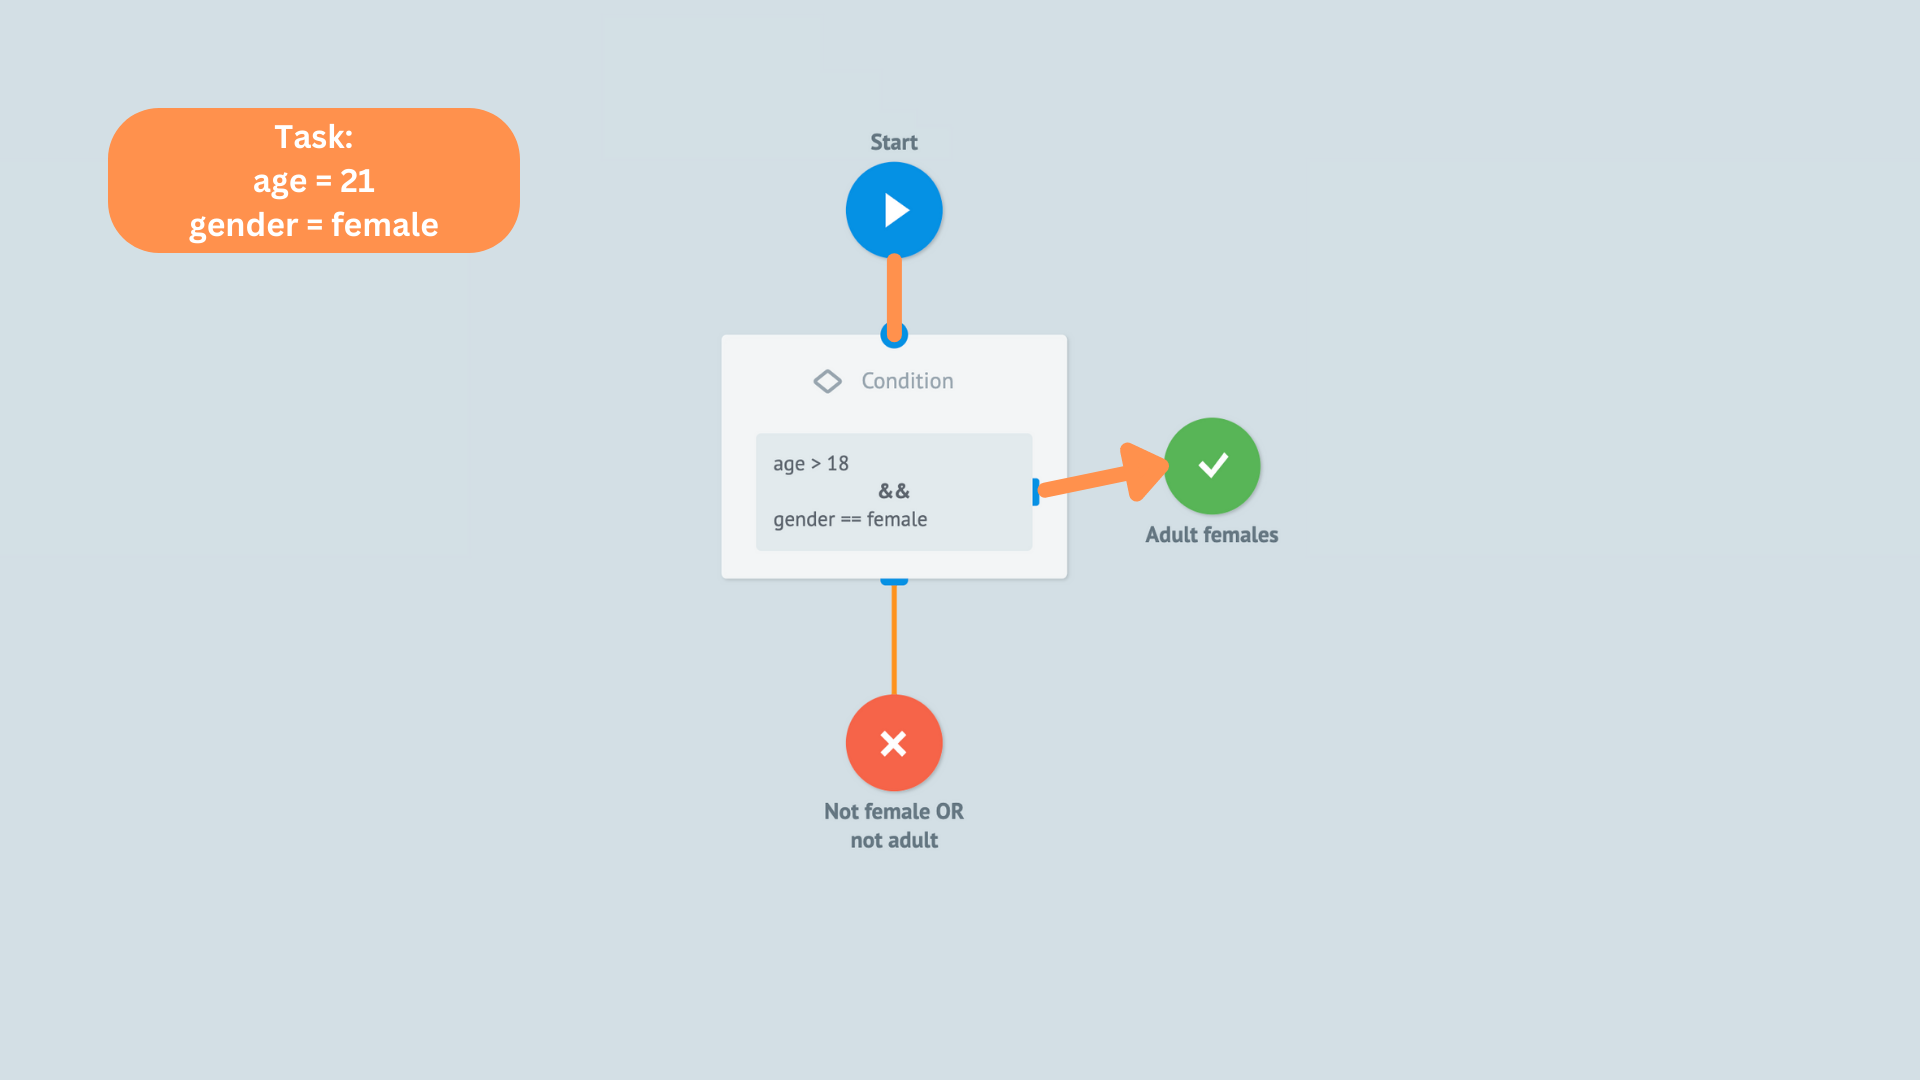
The first condition is met, but the second one is not.


If one block contains several conditions, all of them must be met for the block check to be considered true.
Adding two Condition blocks with one Condition in each
In the example below, the task's parameters are evaluated against two separate Condition blocks. Even though the conditions sets in both blocks are met, the task will only follow the output edge of the top block since it is the first one to be checked against.
You can access a single task parameter or a whole task stored in a State Diagram by Getting Task Parameters from State Diagrams.
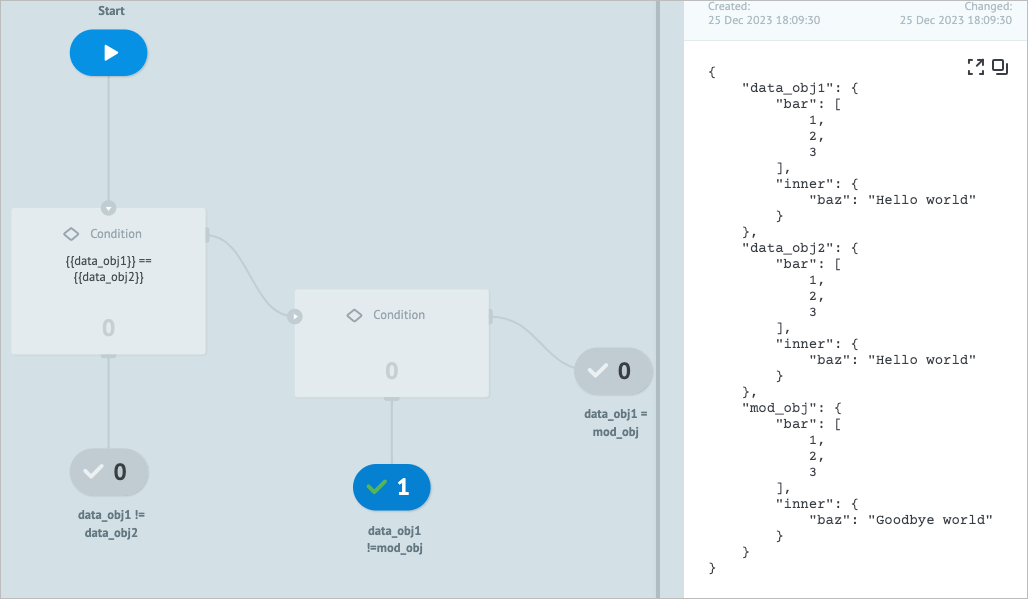
Comparing objects in Condition blocks
In the example Process below, we use two Condition nodes in sequence to compare object data type parameters in the following objects with nested parameters: data_obj1, data_obj2 and mod_obj.
In-depth comparison
In Condition nodes, we can compare objects with as many nesting levels and parameters as we need, owing to the in-depth object comparison.
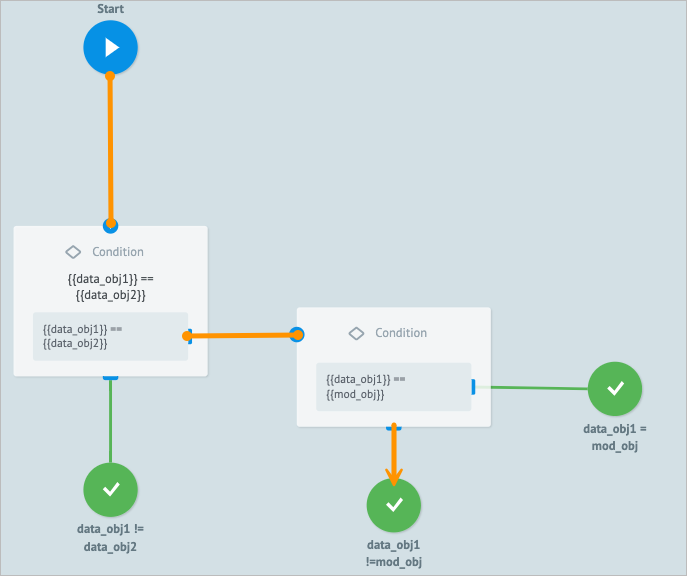
First, we define the objects and their parameters in the task.
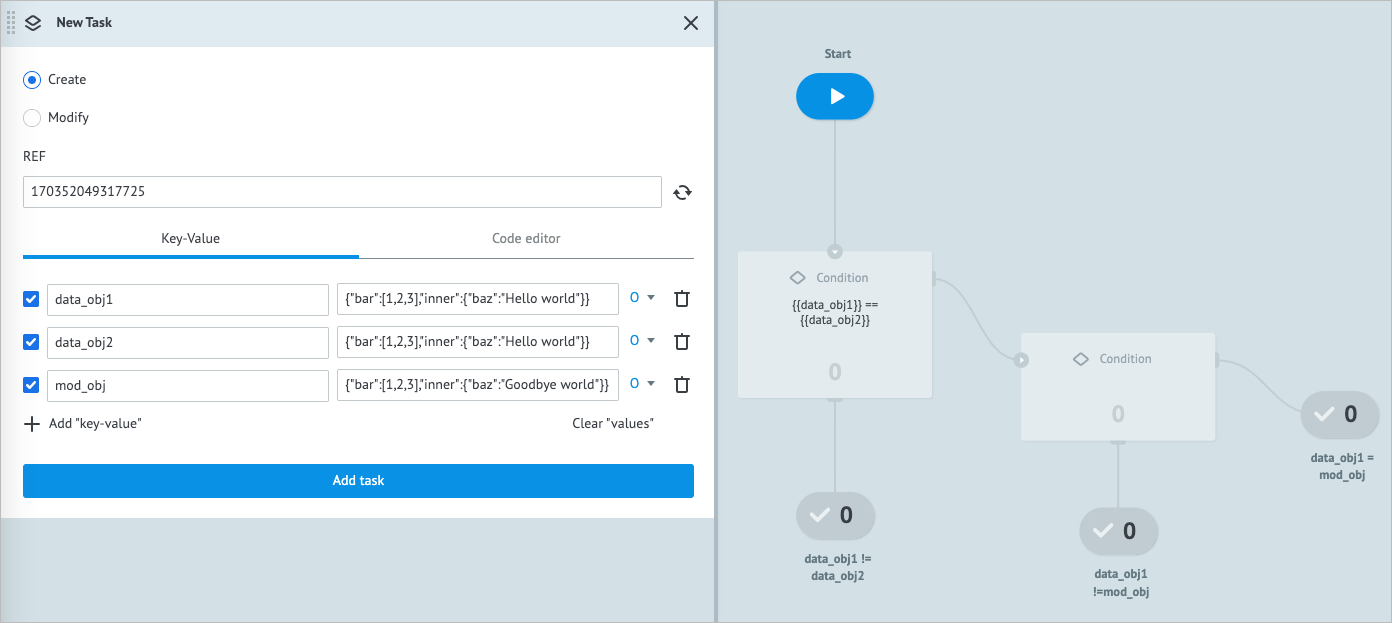
Then, we send the task to our process. It passes through the first Condition node, where the check is performed for the data_obj1 and data_obj2 objects whether they are identical, and proceeds to the second Condition node. In the second Condition node, the data_obj1 and mod_obj1 are compared. As these objects are different, the task ends up in the final data_obj1 !=mod_obj node.
Error handling & troubleshooting
When working with your Process or State Diagram, you may encounter the following issues.
| Issue | Cause | Solution |
|---|---|---|
| The Condition node is not working properly. | There is a typo in the parameter name. | Parameter names are case-sensitive. For example, if the task parameter is “Phone”, but you entered it as "phone" in the Condition node, the node will not recognize them as one parameter. You have to enter task parameter names the same way, either “Phone” or "phone". |
| An incorrect value type was entered. | The compared value types have to be of the same data type. For example, if the task value is "Count": 10 (Number), but the condition is specified as "Count"=10 (String), the value check will always fail. You have to use the same data type when comparing similar values. | |
| Two variables are compared. | If the value is a variable, you must enter it in double braces. For example, the condition “amount == limit” will not work correctly, as by default limit will be considered a string. Use double braces when specifying a variable: {{limit}}. |
Was this article helpful?