- 12 Dec 2023
- 3 Minutes to read
- Contributors

- Print
- DarkLight
- PDF
Alias
- Updated on 12 Dec 2023
- 3 Minutes to read
- Contributors

- Print
- DarkLight
- PDF
Overview
Alias is a type of Corezoid object that is used to replace numeric object identifiers with symbolic ones specified by a user. Aliases can be used to interact with Processes and State Diagrams both in the nodes and via the Corezoid API.
Create alias
You can create an alias:
- At the company level
- At the stage level
To create an alias:
On the Workspace tab of your company:
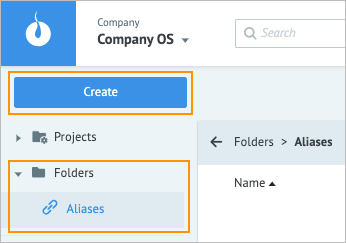
(At the company level) Click the Folders folder, click Aliases, and then click Create.
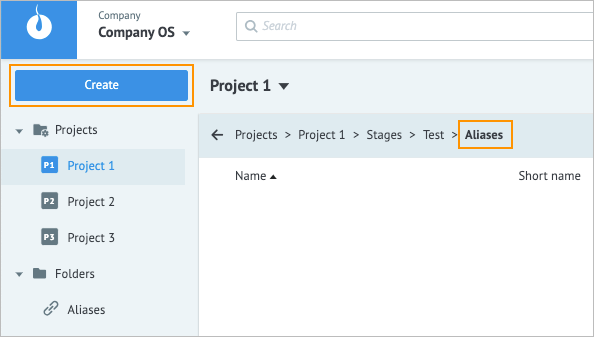
(At the stage level) In the Projects folder, select the needed project and stage, double-click Aliases, and then click Create.
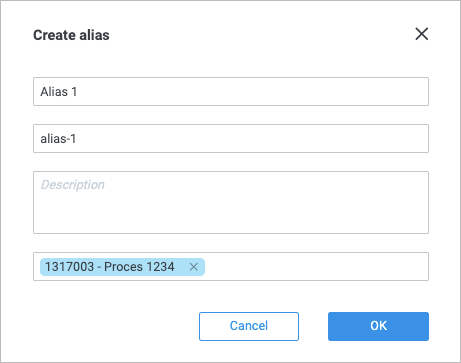
In the Create alias dialog:
In the Name and Description fields, enter your alias name and description (optional).
Note: The Short name field repeats the alias name in the Name field and must be unique within the stage; you can edit it at any time.In the Linked object field, click the directory icon
 and select the needed Process to link the alias to.
Note: You can link a Process later when editing the alias.Click Ok.
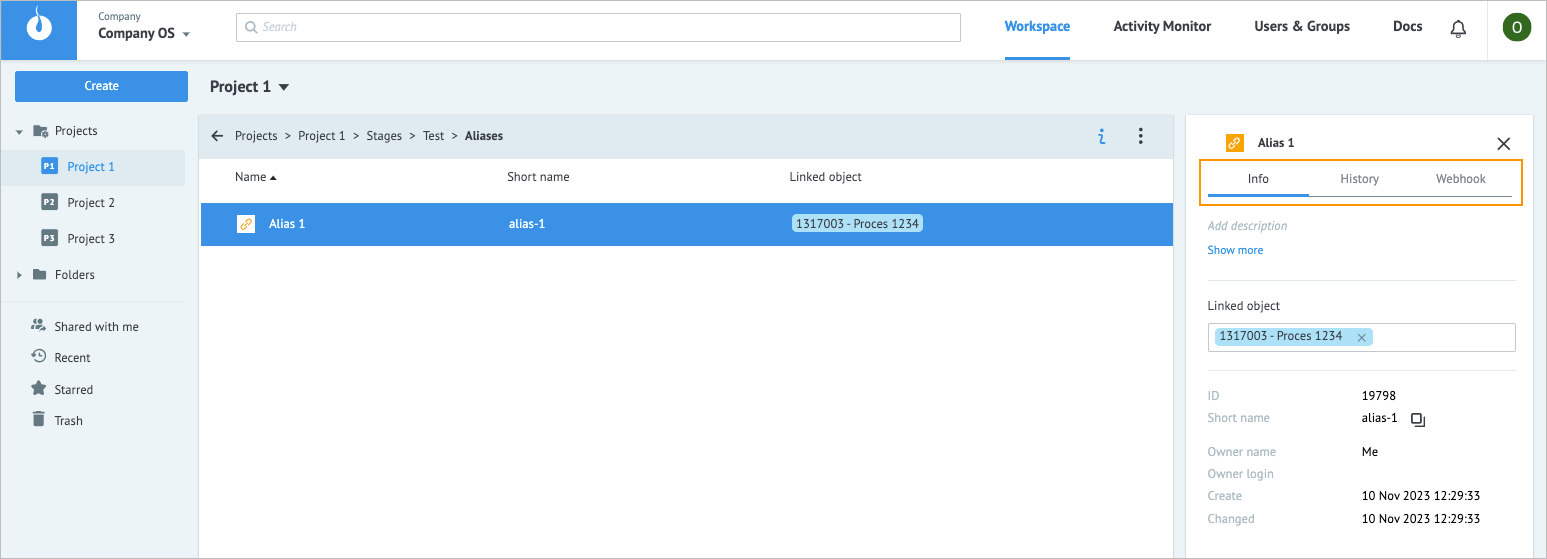
The alias has been created, and you can see its linked Process in the field. By default, the aliases provide the following access rules:
- All users of a company can view the list of all aliases created in the company.
- Only the alias owner can manage the alias linking to a Process or a State Diagram.
- The alias owner can link the alias only to those Processes and State Diagrams to which he/she has task management and editing access.
- The alias owner cannot link Processes or State Diagrams to the alias to which he/she has access only for viewing.
- If the alias owner is denied access rights to a Process or a State Diagram linked to the alias, he/she cannot view the linked object name (the linked object identifier is always displayed regardless of access settings).
- A user can open a linked Process or a State Diagram in the View mode if he/she has the View or Edit access to the object.

Manage alias
To see what additional actions you can perform on your alias, click the needed alias.

Check the alias information:
- In the upper-right corner, click the info icon
 .
. - View alias details by clicking the Info and History tabs.
- Copy the webhook via JSON, XML, or NVP in the Webhook tab.
Warning: The Webhook tab is available to the alias owner only. After clearing and selecting the Direct URL for tasks upload checkbox again, the link changes and you cannot send data via the initial link.
- In the upper-right corner, click the info icon
Peform more actions by using the options icon
 and clicking:
- Edit to change the alias name
- Delete to delete the alias
Note: To perform an action on multiple aliases, press Shift or Command on your keyboard, click the needed ones, and then click the options icon .
.

Import alias
You can import aliases together with your project in a folder. As a result, the project folder will be created with linked aliases in the Aliases tab. There may be a conflict between already existing and aliases you want to import with the message “Aliases already exist” displayed. There are two ways to solve this problem:
When uploading a file, click Upload only processes. Only folders, Processes, State Diagrams, and dashboards will be imported, while the aliases linked to them will be completely ignored.
When a file has been uploaded, click Show conflicts, and then Force upload. You can view all conflicting aliases in the file and import them by replacing the existing linked objects with imported ones.
Examples
You can specify an alias in the Call Process, Copy Task, and Modify Task nodes of a Process. You have several ways to do this in the Basic settings of the node details panel:
- Select an alias by using the directory icon

- Search for an alias by its name by entering the @ symbol at the beginning of the line
- Enter an alias name as a task parameter (for example, @{{alias_name}}) which contains a value equal to the alias short name


