Additional actions on objects
- 14 Dec 2023
- 2 Minutes to read
- Contributors

- Print
- DarkLight
- PDF
Additional actions on objects
- Updated on 14 Dec 2023
- 2 Minutes to read
- Contributors
- Print
- DarkLight
- PDF
Article summary
Did you find this summary helpful?
Thank you for your feedback
On the left panel of the Workspace tab, you can see the following tabs:
- Shared with me
- Recent
- Starred
- Trash

On these tabs (except the Trash tab), you can do similar actions on your Processes, State Diagrams, Dashboards, Databases, and folders by clicking the needed object:
Note: For more information on actions on the Trash tab, go to Trash tab.

Now you can:
Share the object with other users and groups:
In the upper-right corner, click the share icon
 .
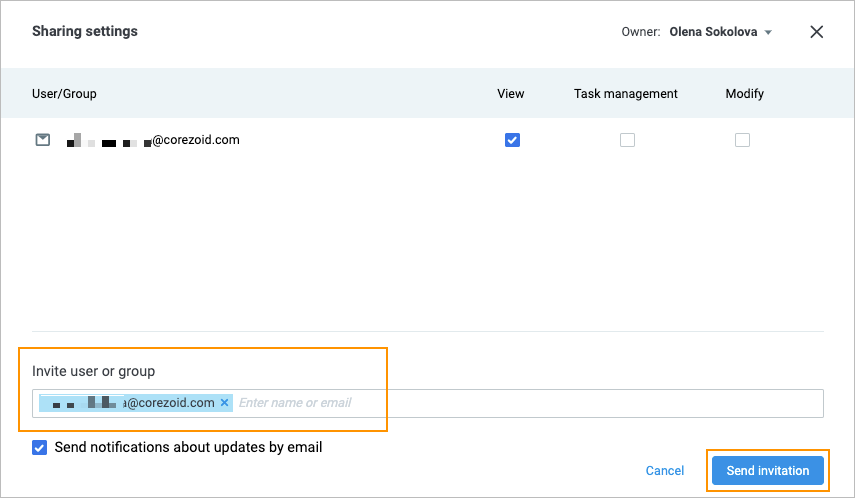
.In the Invite user or group field of the Sharing settings dialog that opens, enter the name or email of the needed user or group, press Enter on your keyboard, and then click Send invitation.
Note: Users and user groups that you want to provide access to the object, must be registered in your company.
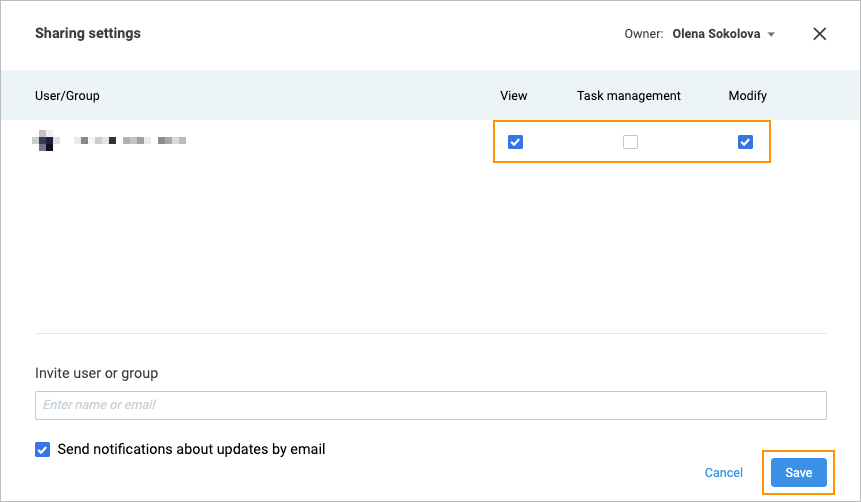
After the selected user confirms the invitation by email, set the needed sharing permissions checkboxes (View, Task management, and Modify), and then click Save.
Note: You can select the permissions for the user you want to share the object with before clicking Send invitation. Setting the permissions for a user after the user has clicked the link in the email sets the new permissions. Every time permissions change, the user receives the corresponding notification by email.
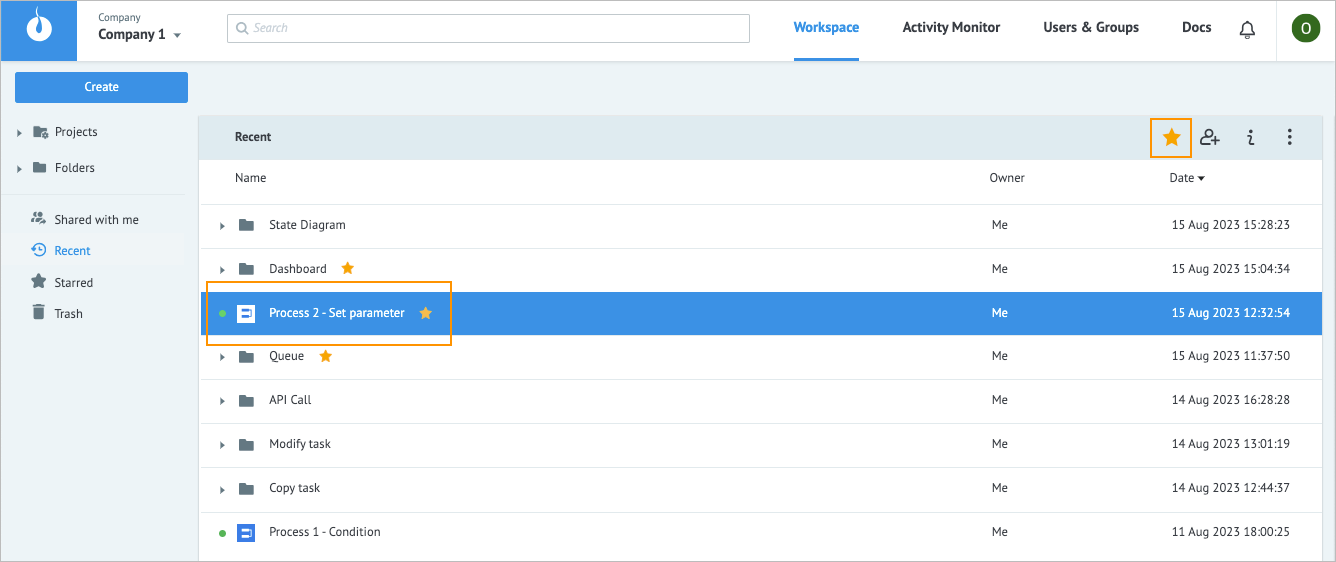
Mark the object as favorite by clicking the star icon
 .
.
Note: On the Starred tab, all the objects are favorites and have the star icon highlighted in yellow . You can remove the star from an object by clicking the star icon highlighted in yellow once again.
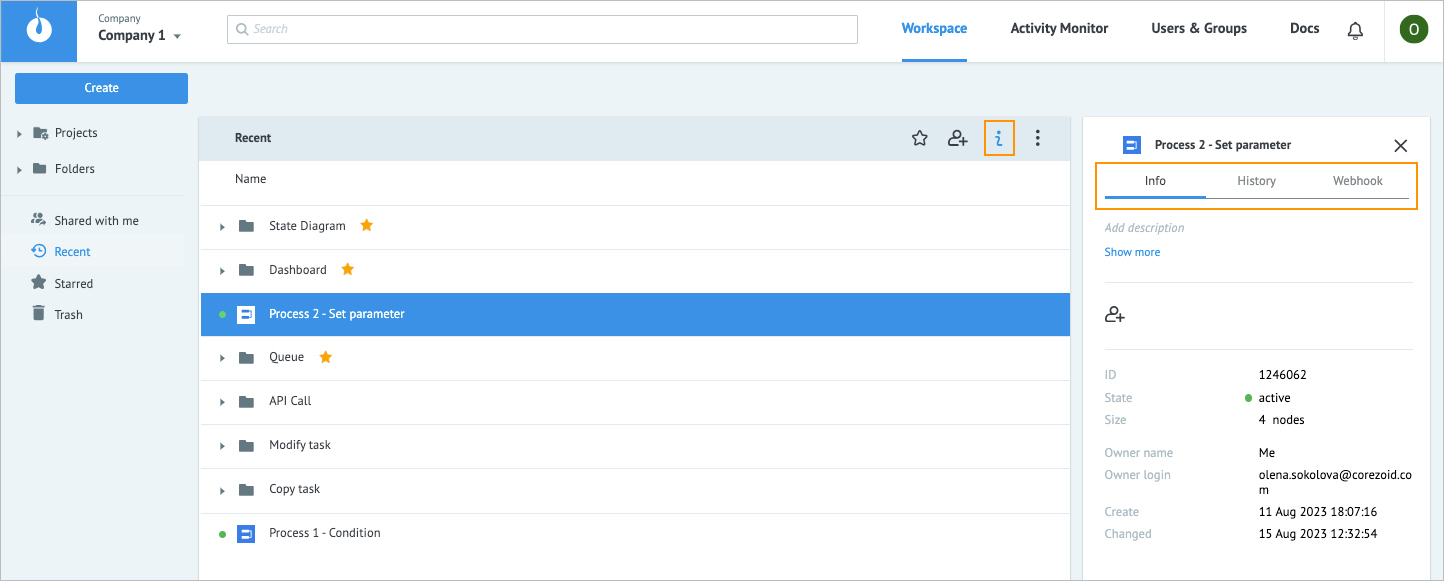
Check the object's information:
- In the upper-right corner, click the info icon
 .
. - View object details by clicking the Info and History tabs.
- Copy the webhook via JSON, XML, or NVP in the Webhook tab.
- In the upper-right corner, click the info icon
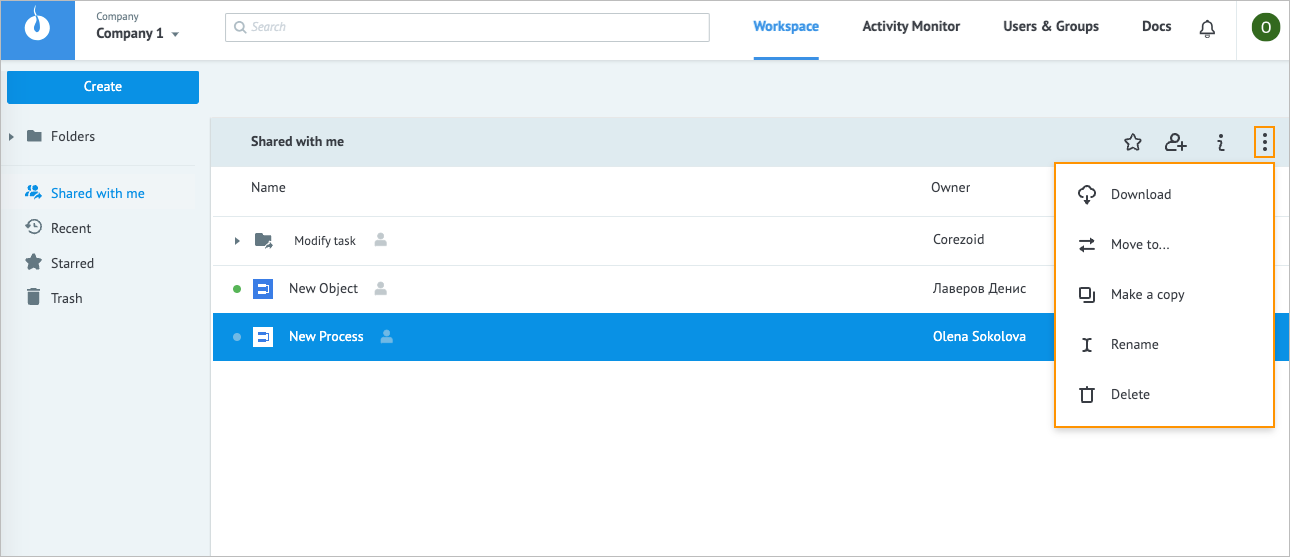
Perform more actions by using the options icon
 and clicking:
- Download to download the object
- Move to… to move the object to another folder
Note: You can drag and drop it to the needed folder. - Make a copy to duplicate the object
- Rename to change the object name
- Delete to delete the object
Note: To perform an action on multiple objects, press Shift or Command on your keyboard, click the needed objects, and then click the options icon
.
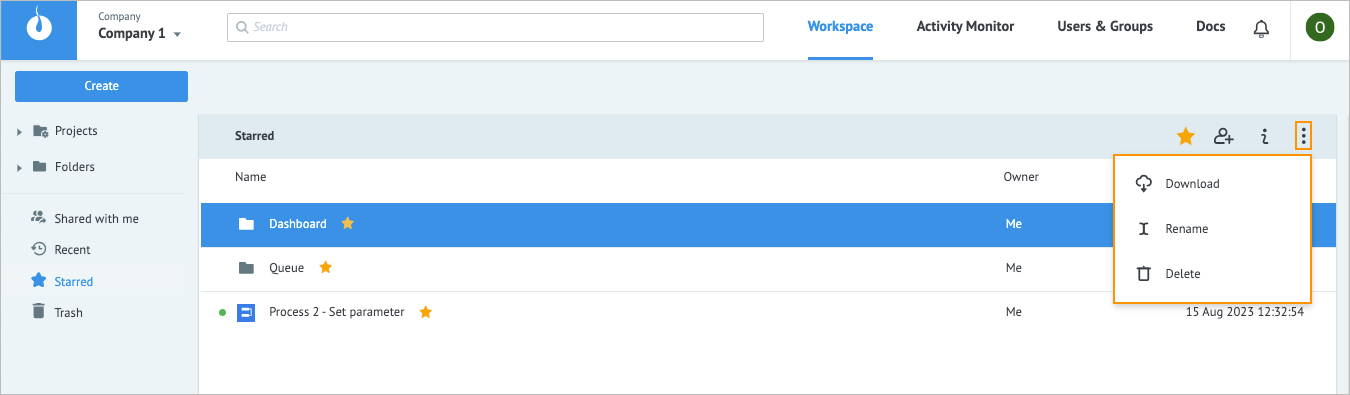
Note: On the Starred tab, when clicking the options icon
, the Download, Rename, and Delete actions are available.
 .
.

 .
. . You can remove the star from an object by clicking the star icon highlighted in yellow once again.
 .
.
 and clicking:

Trash tab
To see what additional actions you can make on the Trash tab, click the needed object.

Now you can:
Restore the needed object by clicking the restore icon

Note: After clicking the restore icon, the object disappears from the Trash tab and appears in the original location.Check the selected object’s information by clicking the info icon
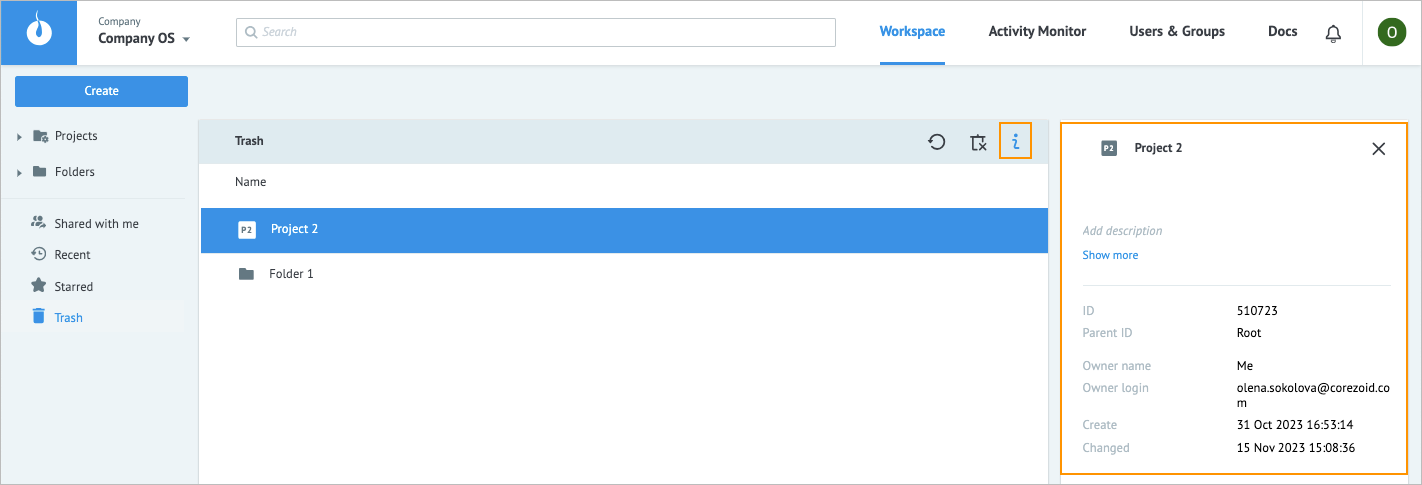
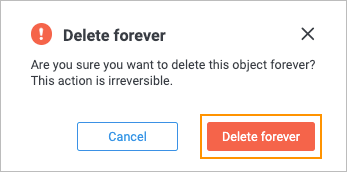
Remove the object from the company, by clicking the crossed-out trash icon
 and confirming the action in the Delete forever dialog that appears


 and confirming the action in the Delete forever dialog that appears
Note: To perform an action on multiple objects, press Shift or Command on your keyboard, click the needed objects, and then click the needed action icon.
Was this article helpful?