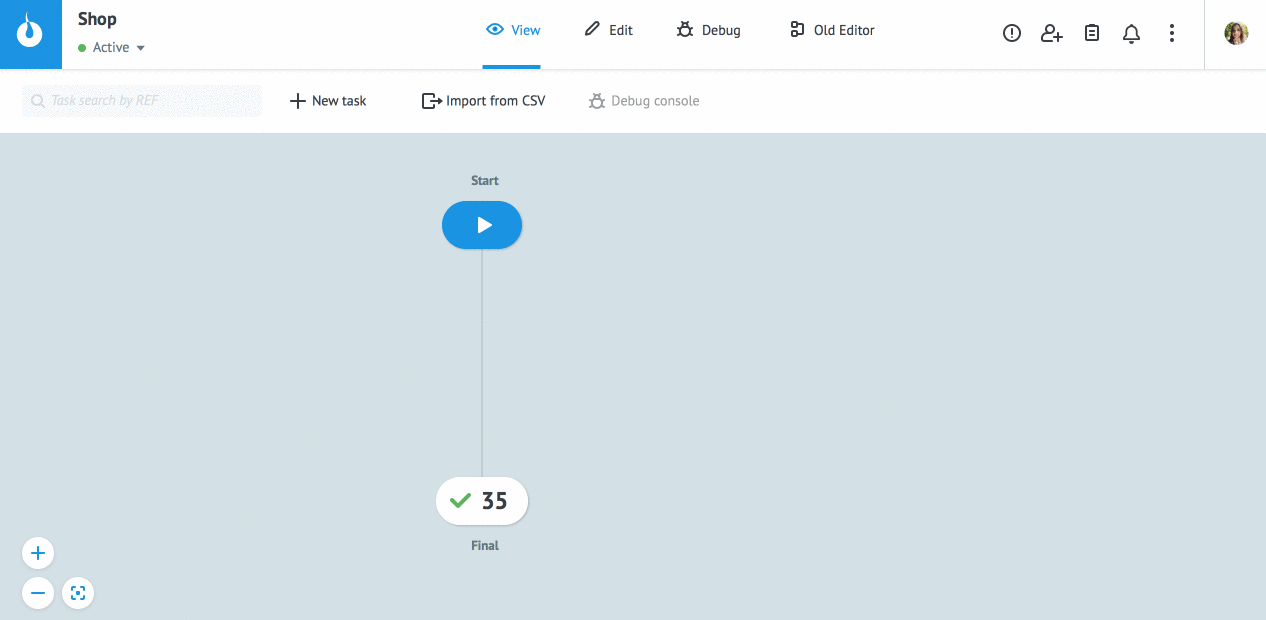
Add task
- 10 Jan 2024
- 6 Minutes to read
- Contributors

- Print
- DarkLight
- PDF
Add task
- Updated on 10 Jan 2024
- 6 Minutes to read
- Contributors
- Print
- DarkLight
- PDF
Article summary
Did you find this summary helpful?
Thank you for your feedback
A task is a set of data in JSON format saved in key-value pairs ("key": "value").
Note: For more information about a task, go to Task management.
You can add a task to a Process in different ways:
- Sending a task manually
- Importing a task from the CSV file
- Loading a task via direct URL
- Using Corezoid API
For one Process, the recommended number of tasks is ⩽100 000.
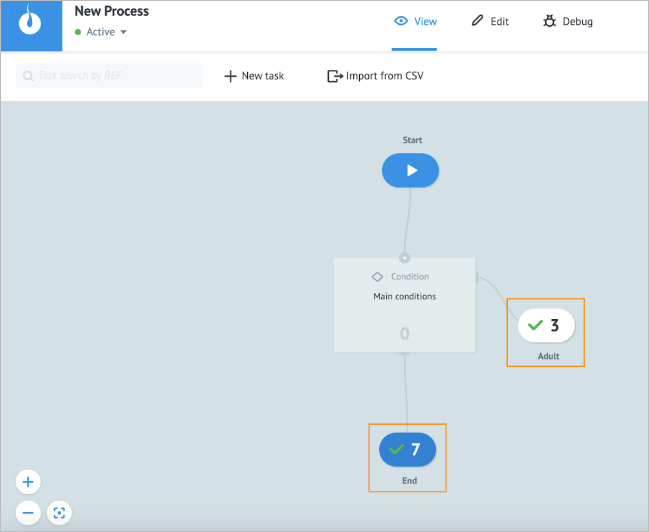
Send task manually
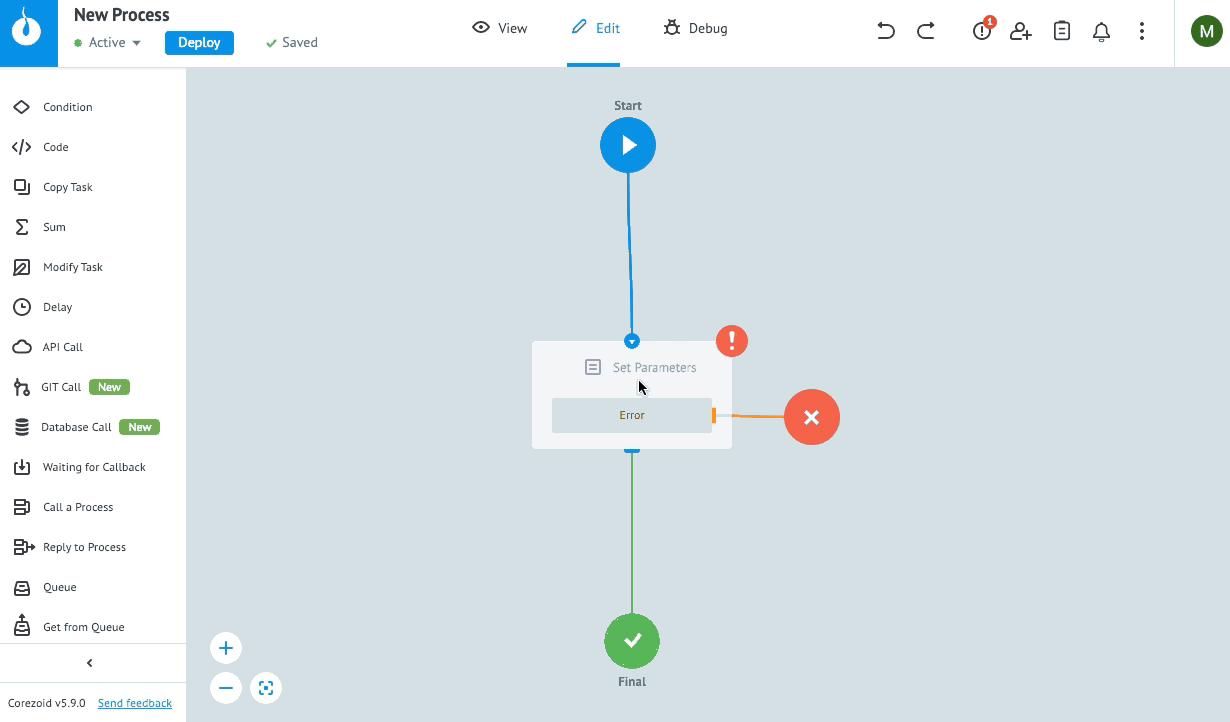
After you have set all the parameters in your Process, you can send the task to it manually. To do so:
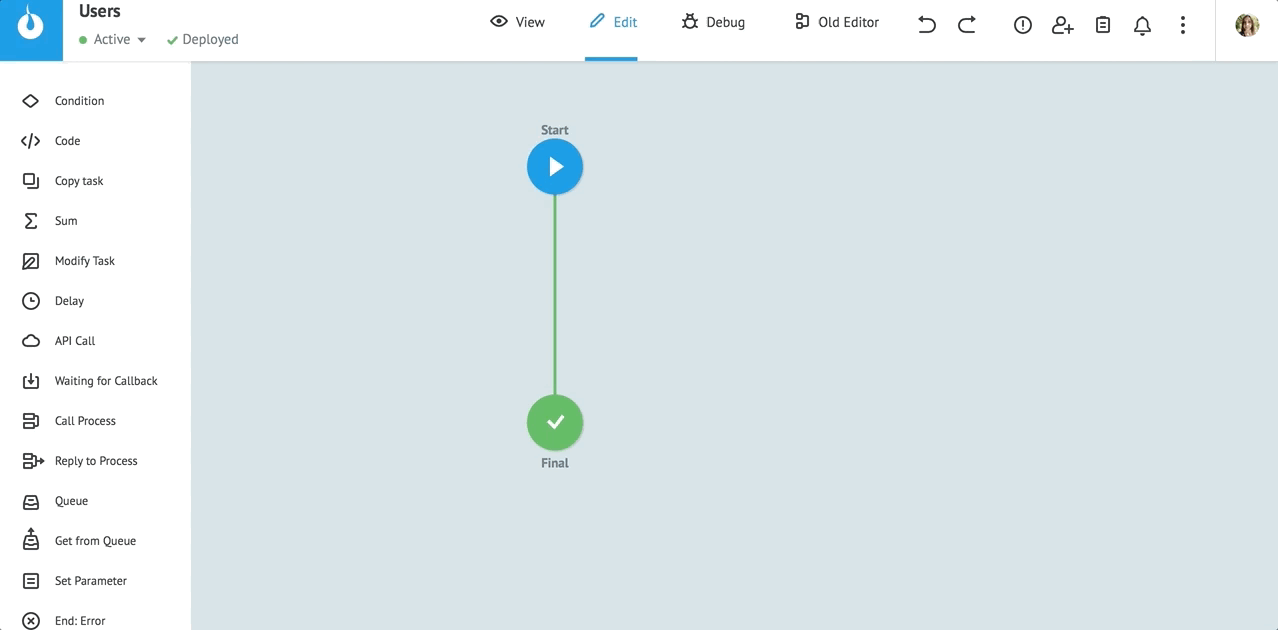
- Switch to the View mode by clicking View on the upper panel.
- In the upper-left corner of the page, click + New task.
- In the New task dialog that opens, enter the key and value in the Key and Value fields correspondingly, and then select the needed type of data in the dropdown list (S (String), N (Number), B (Boolean), A (Array), O (Object)).
- Click Add task.
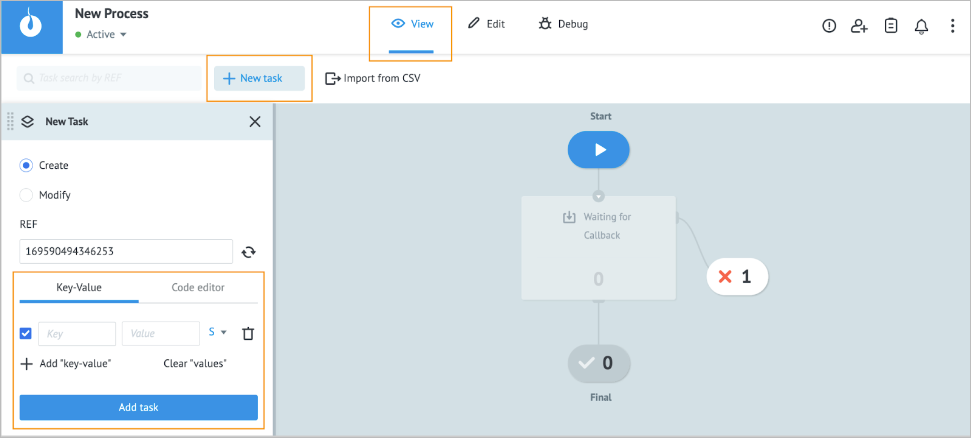

The task goes to:
- The Success End node if it meets the requirements specified in the node.
- The Error End node if it doesn’t meet the requirements specified in the node.
Below you can see a short video about sending a task manually to a Process.
Import task from CSV file
After you set all the parameters in your Process, you can import a task from a file. To do so:
Switch to the View mode by clicking View on the upper panel.
In the upper-left corner of the page, click Import from CSV.
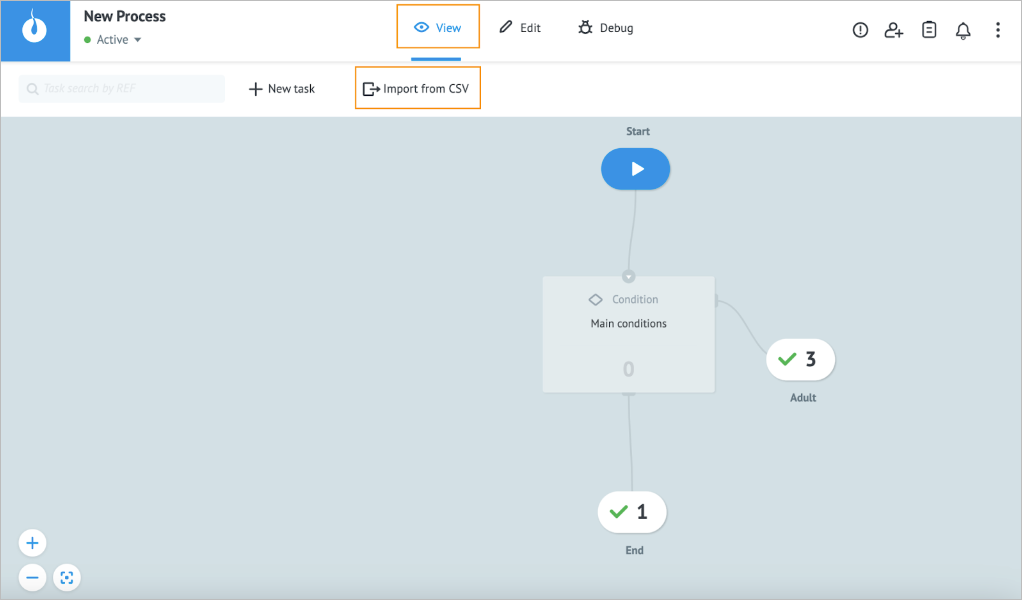
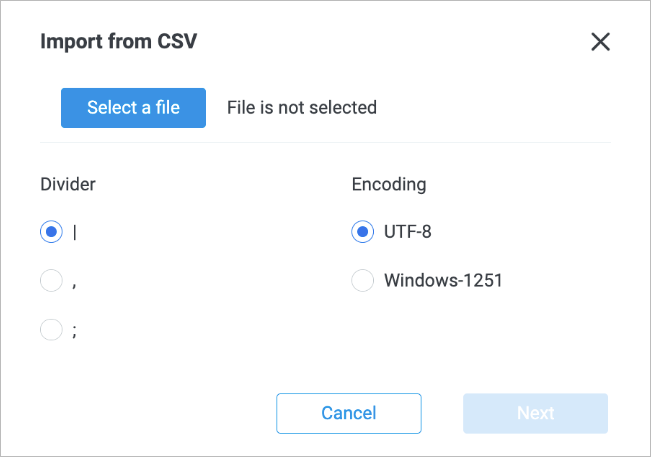
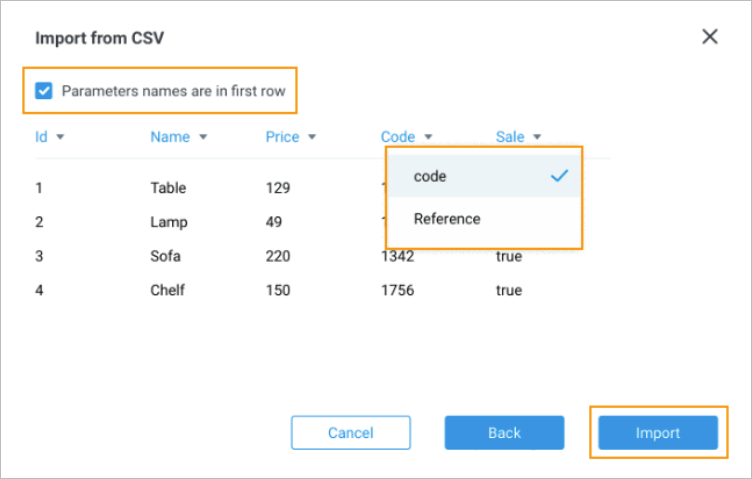
In the Import from CSV dialog that opens, click Select a file to select the needed file, select Divider and Encoding, and then click Next.
In the next Import from CSV dialog that opens, select the Parameters names are in first row checkbox, select the needed column name for each column, and then click Import.
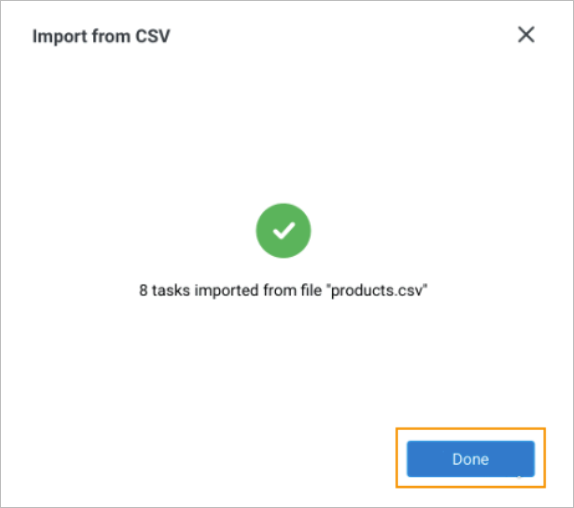
After the file has been imported, click Done.


The task goes to:
- The Success End node if it meets the requirements specified in the node.
- The Error End node if it doesn’t meet the requirements specified in the node.
Below, you can see a short video about importing a task from the CSV file to a Process.
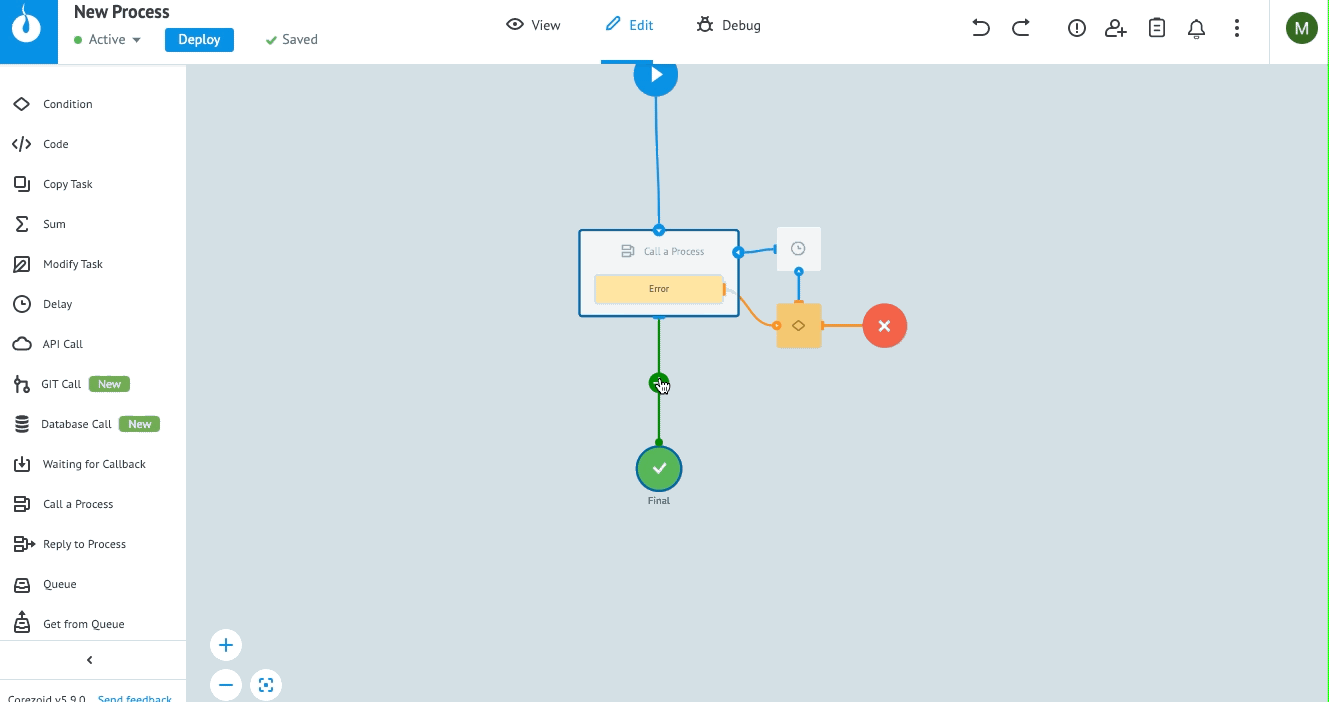
Load task via direct URL
By using the Direct URL option, you can load a task via JSON, XML, or NVP to a Process and enable the authorization for task loading (see Start for details on authorization use). To do so:
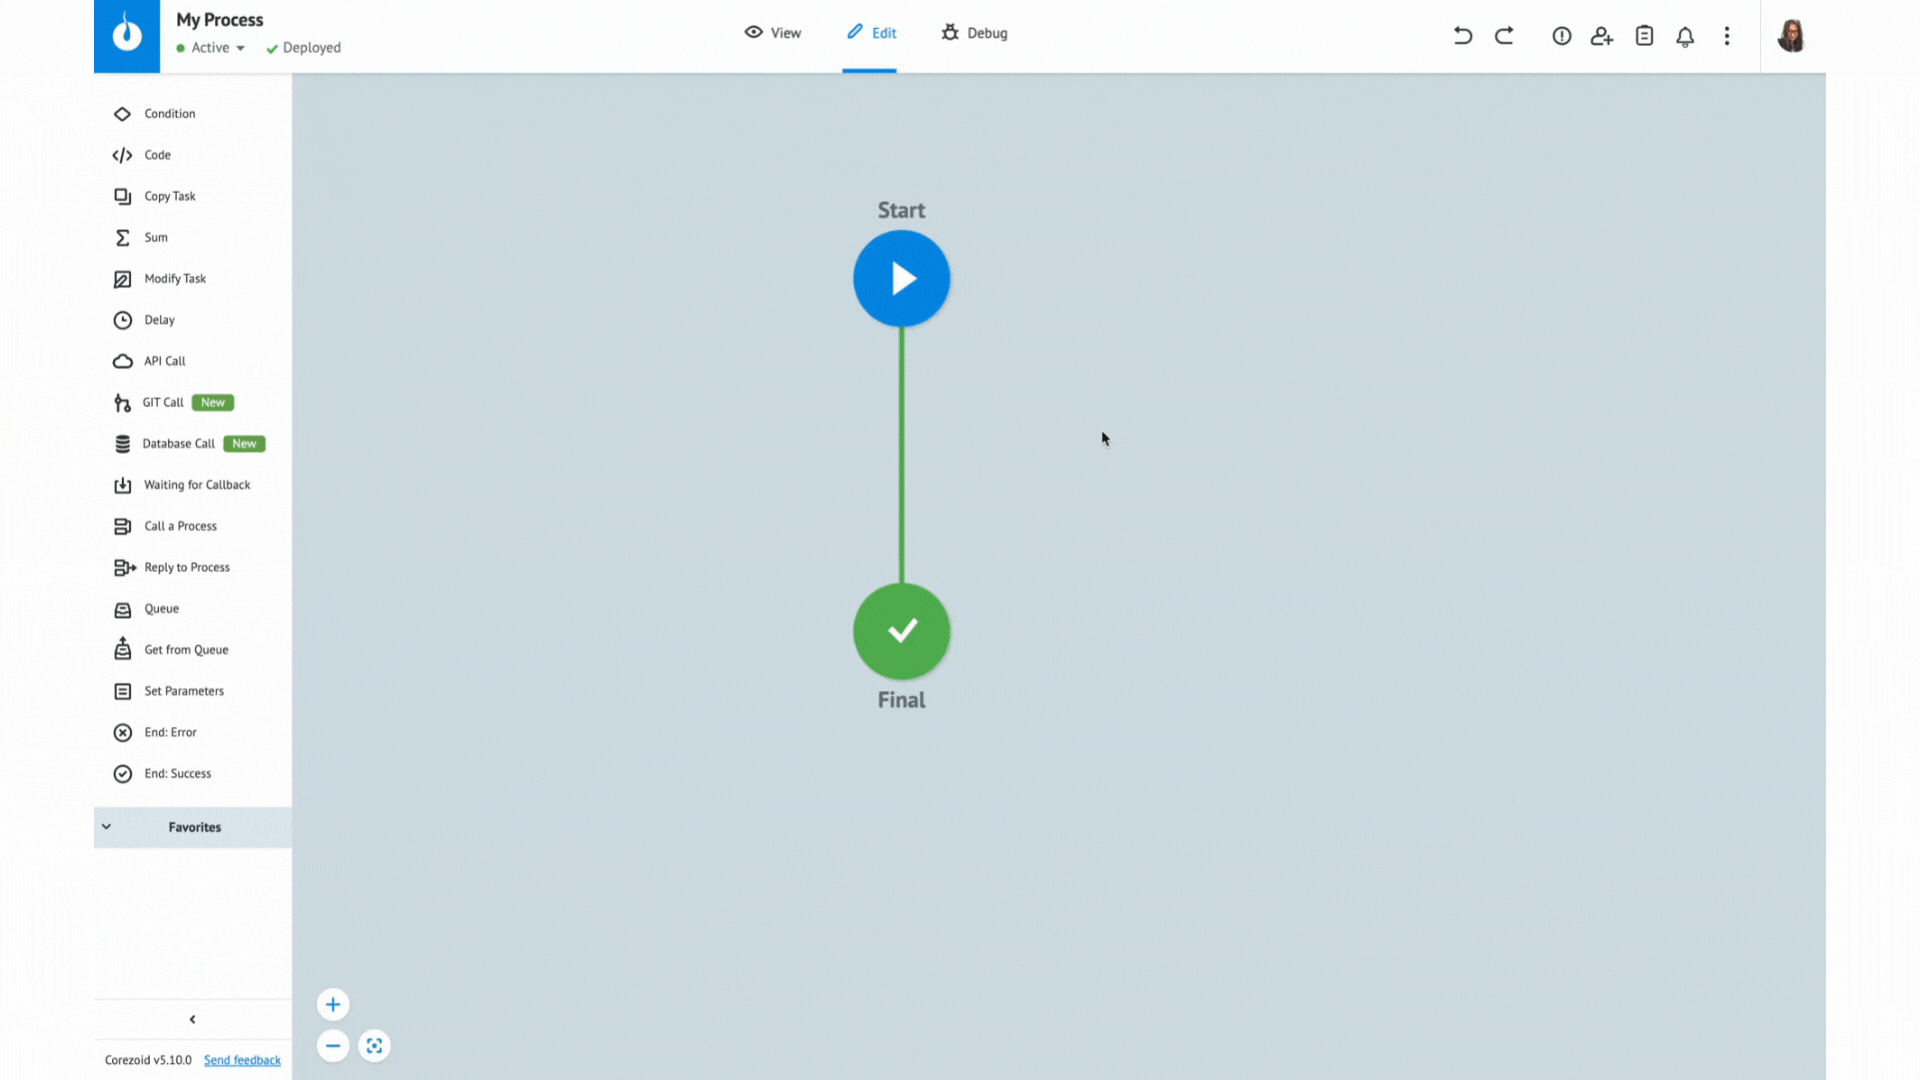
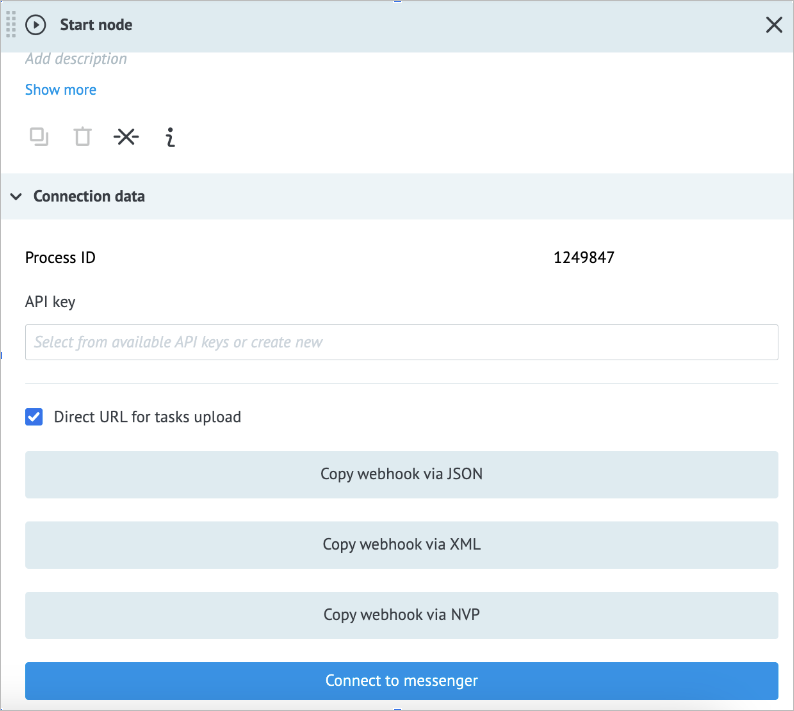
Open the needed Process in the Edit mode, and then click the Start node.
On the Start node details panel that opens, leave the Direct URL for tasks upload checkbox selected by default, and then click the needed way to load a task:
- Copy webhook via JSON
- Copy webhook via XML
- Copy webhook via NVP
Send your payload to the URL by using the POST method.

Below, you can see a short video about loading task data via direct URL.
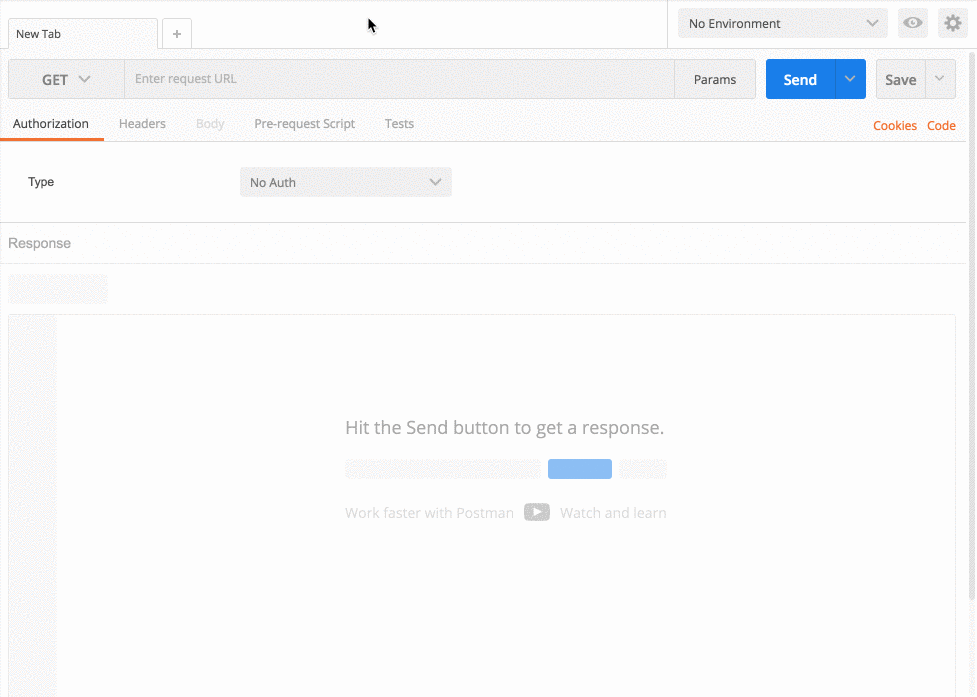
To test how it works, use Postman:
- Type: POST
- URL: Direct URL from the clipboard
- Body: Request body, for example {"text":"Hello!"}
- Type of Body: raw
- Content/type: JSON (application/json)
The response contains the task ID (the obj_id parameter of the ops object). See the video below.
Task management
Task parameter name
The task parameter name must be unique for all tabs and can contain:
- Big and small Latin letters
- Numbers
- Special characters: _, #, @, $, , [, ], .
If the parameter name contains special characters like ".", "[" or "]", they have to be separated with a backslash:
phone[0]: Element of the "phone" arrayphone\[0\]: Parameter "phone[0]"
Task parameter type
The task parameter can be of the following types:
String (text and numbers together)
{
    "name": "John"
}
Number (integer, float):
Note: The maximum value for the Number type is 2ˆ53 = 9 007 199 254 740 992. For larger values, use the String type.{ "card_number": 123456789, "bonus": 10.50 }Boolean (true, false)
{ "send_notifications": false, "subscribed": true }Array:
{
    "phones": [
        "+380991234567",
        "+380661234567"
    ]
}
Object (set of Key-value pairs)
{
    "address": {
        "city": "Odessa",
        "zip_code": 65000
    }
}
Set task parameters
Setting task parameters helps you save time when configuring data in the node or entering parameters in the task before sending it. To set task parameters:
In the upper-right corner of the page of your Process, click the parameters icon
 .
.
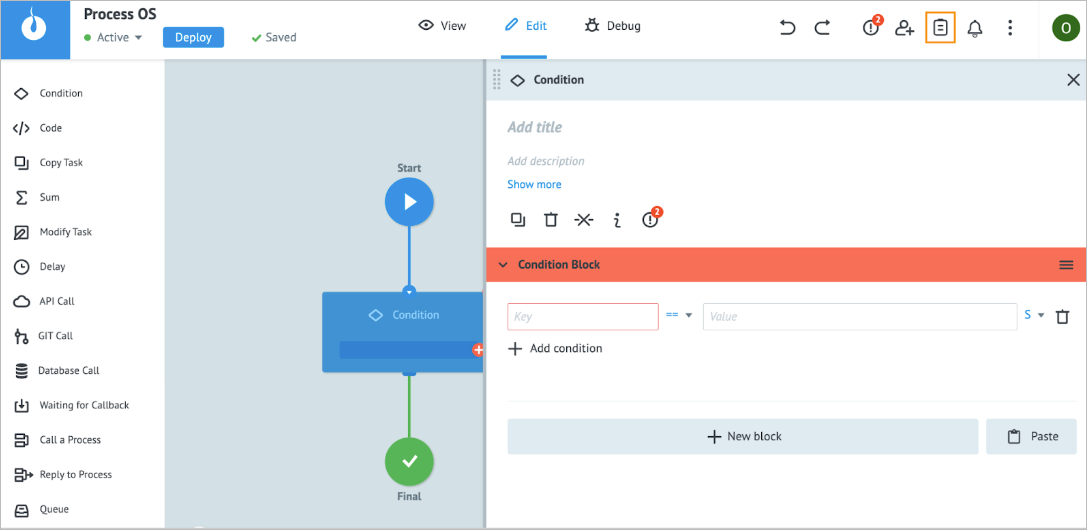
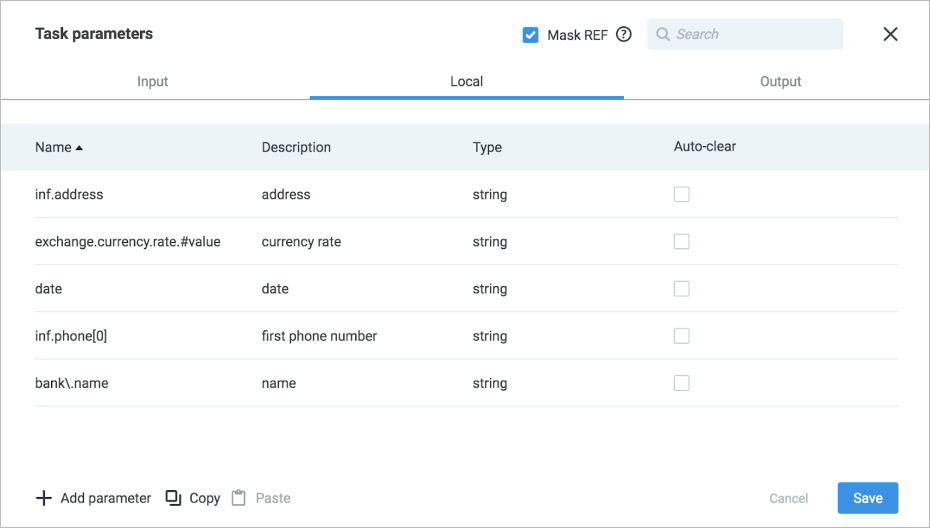
In the Task parameters dialog that opens, click the needed tab (Input, Local, or Output), and then click + Add parameter.
The Task parameters dialog has the following tab with parameters:
- Input: Parameters which go to the Start node of a Process.
- Local: Internal frequently used parameters for fast and convenient use in logic.
- Output: Parameters, which are the result of a Process.
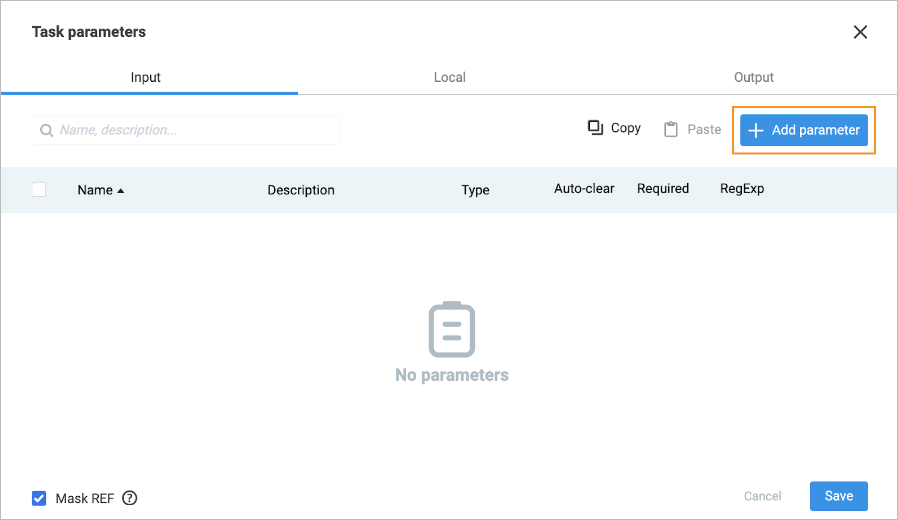
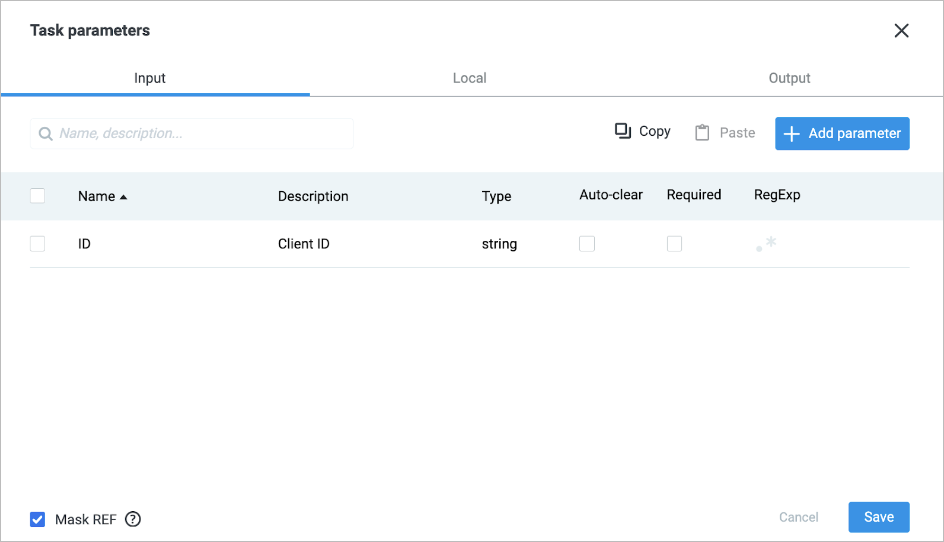
In the table that opens:
- Enter the parameter name in the Name column.
- (Optional) Enter the parameter description in the Description column.
- Specify the parameter type (S (String), N (Number), B (Boolean), A (Array),
O (Object)) in the Type column. - Select the checkbox in the Auto-clear column to hide the parameter value (display as “***") in the Archive tab.
- Select the checkbox in the Required column to set the parameter as required.
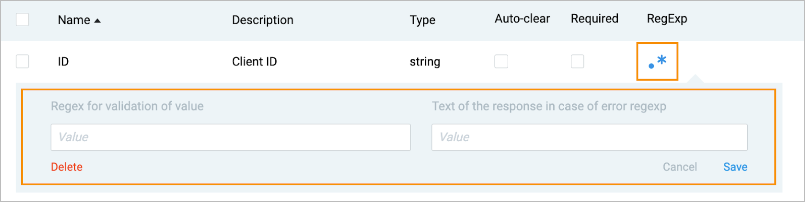
Note: The Required column is only available for the Input and Output tabs. - Click .* in the RegExp column to use Regular Expression: enter the needed values (RegExp for validation of value and Text of the response in case of error regexp), and then click Save.
Note: The RegExp column is available for the Output tab only.
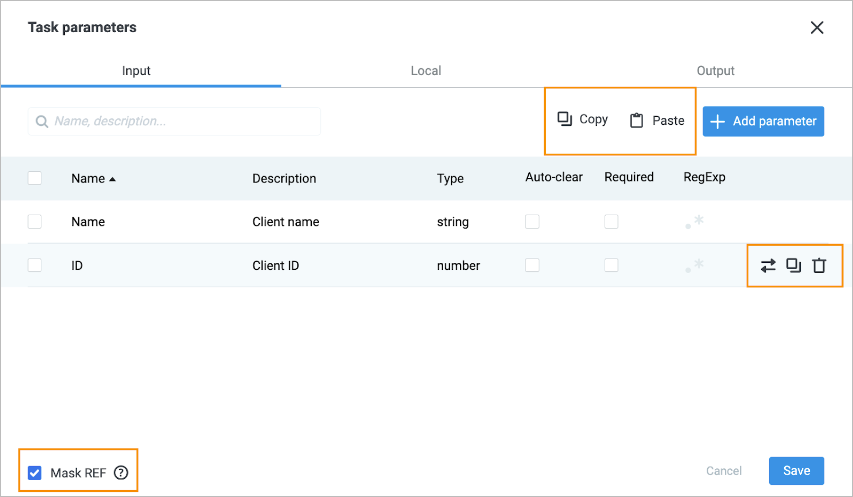
In the Task parameters dialog, you can perform additional actions:
Copy and paste the needed parameter by selecting the checkbox and clicking Copy and Paste consecutively
Move the needed parameter to another tab (Local or Output) by hovering over the needed parameter row and clicking the arrows icon

Copy the needed parameter by hovering over the needed parameter row and clicking the copy icon

Delete the needed parameter by hovering over the needed parameter row and clicking the trash icon

To turn off task reference masking (for 3-digit and 16-digit numbers that fall within the range of possible CVV and PAN pay card numbers), select the Mask REF checkbox.
In the lower-right corner of the Task parameters dialog, click Save.
 .
.


The added parameters are saved, and you can use them when configuring data in the node or sending tasks to a Process.
Below, you can see a short video about adding a task parameter on the node details panel. By default, the parameter is added to the Local tab.
Why set task parameters
Input tab: The task parameters of the Input tab are automatically copied to a new task.
When adding the Call a Process, Copy Task, and Modify Task nodes to a Process, the Input parameters of the selected Process are automatically filled in.
Output tab: The task parameters of the Output tab are used to configure the Reply to Process node.
Local tab: The task parameters of the Local tab are shown in the dropdown list when creating a task.


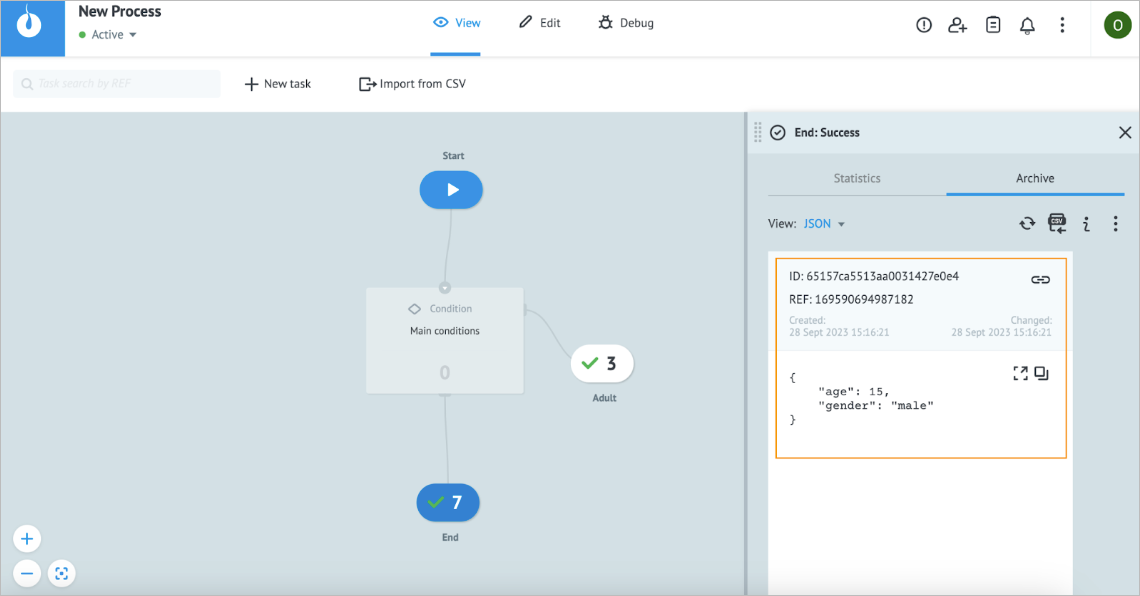
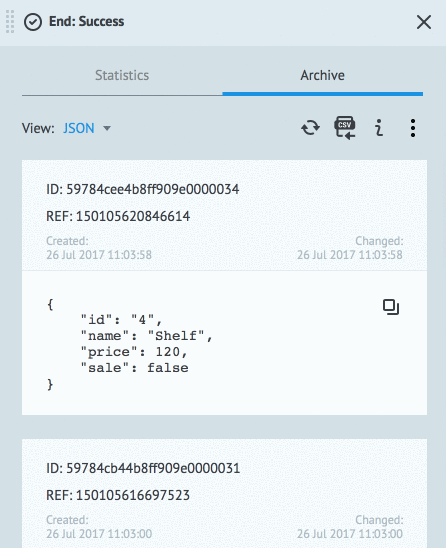
Task details
The node that the task reached has a counter showing the number of received tasks.
The received task has the following data:
- ID: A unique value in the entire system.
- REF: A unique value in the current process.
- Created: Date and time when the task was created.
- Changed: Date and time when the task was changed.
- Task parameters in the JSON or Table format.
Manage task
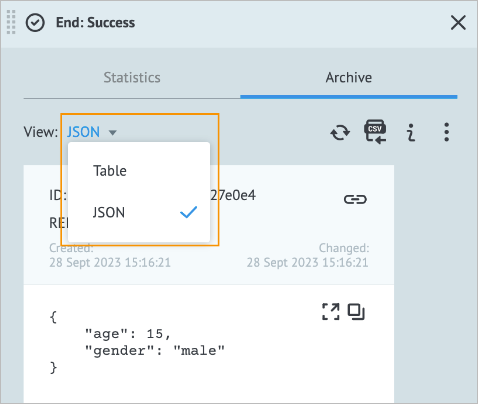
In the task dialog of the End node, you can:
View task data in the JSON or Table formats by clicking the expand icon
 next to View
Renew task data by clicking the refresh icon

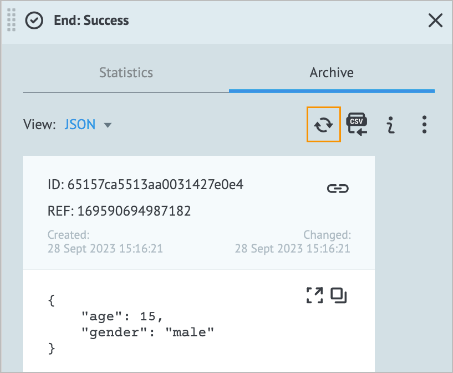
Export a task to a CSV file by clicking the CSV icon

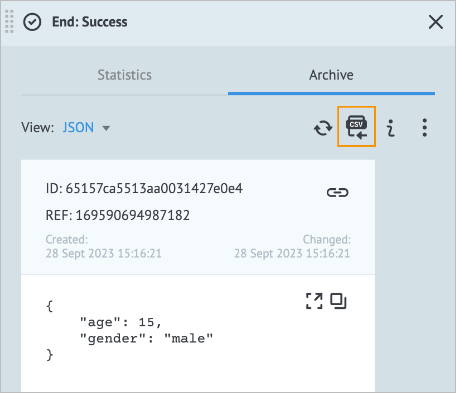
Below, you can see a short video about exporting a task to a CSV file.
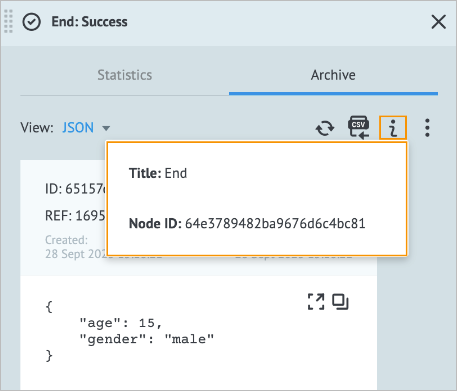
View the node info by clicking the info icon

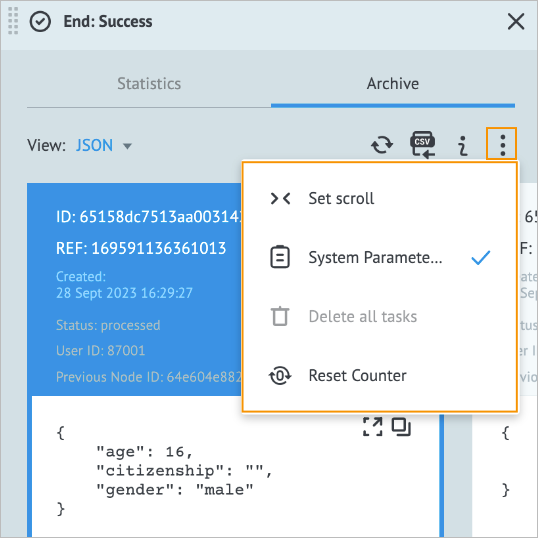
By clicking the options icon
 :
:- Set scroll (vertical or horizontal)
- View system parameters
- Delete all tasks (except Success and Error End nodes)
- Reset counter
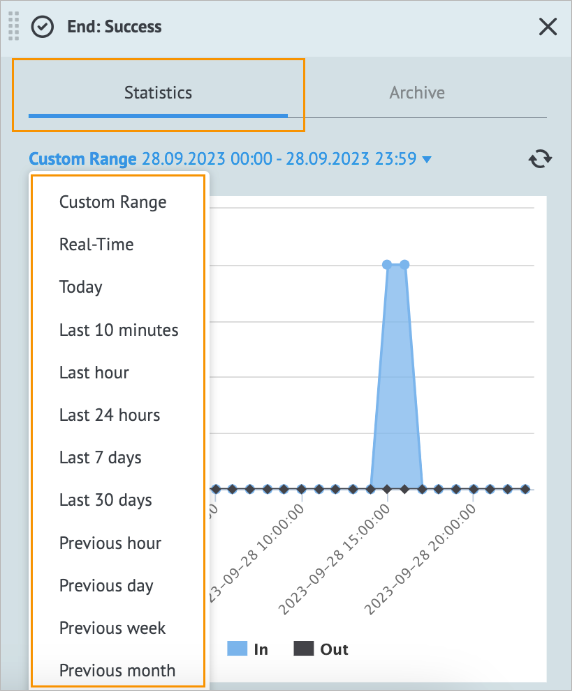
View tasks statistics by clicking Statistics and selecting the needed time range
 next to View


 :
:

Below you can see a short video about viewing task statistics.
Note: The tasks are stored in a Process until the end of the month, and on the first day of each month they are deleted. But, the final node counters always show the total number of tasks received.
Was this article helpful?