- Print
- DarkLight
- PDF
On the Accounts tab, you can:
- Find the needed accounts by using the Search field.
- Filter accounts by clicking the filter icon
 .
.

Create a new account:
Click the "+" plus icon.
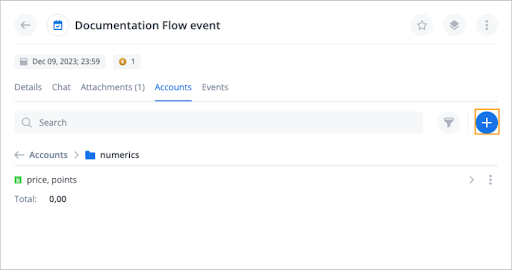
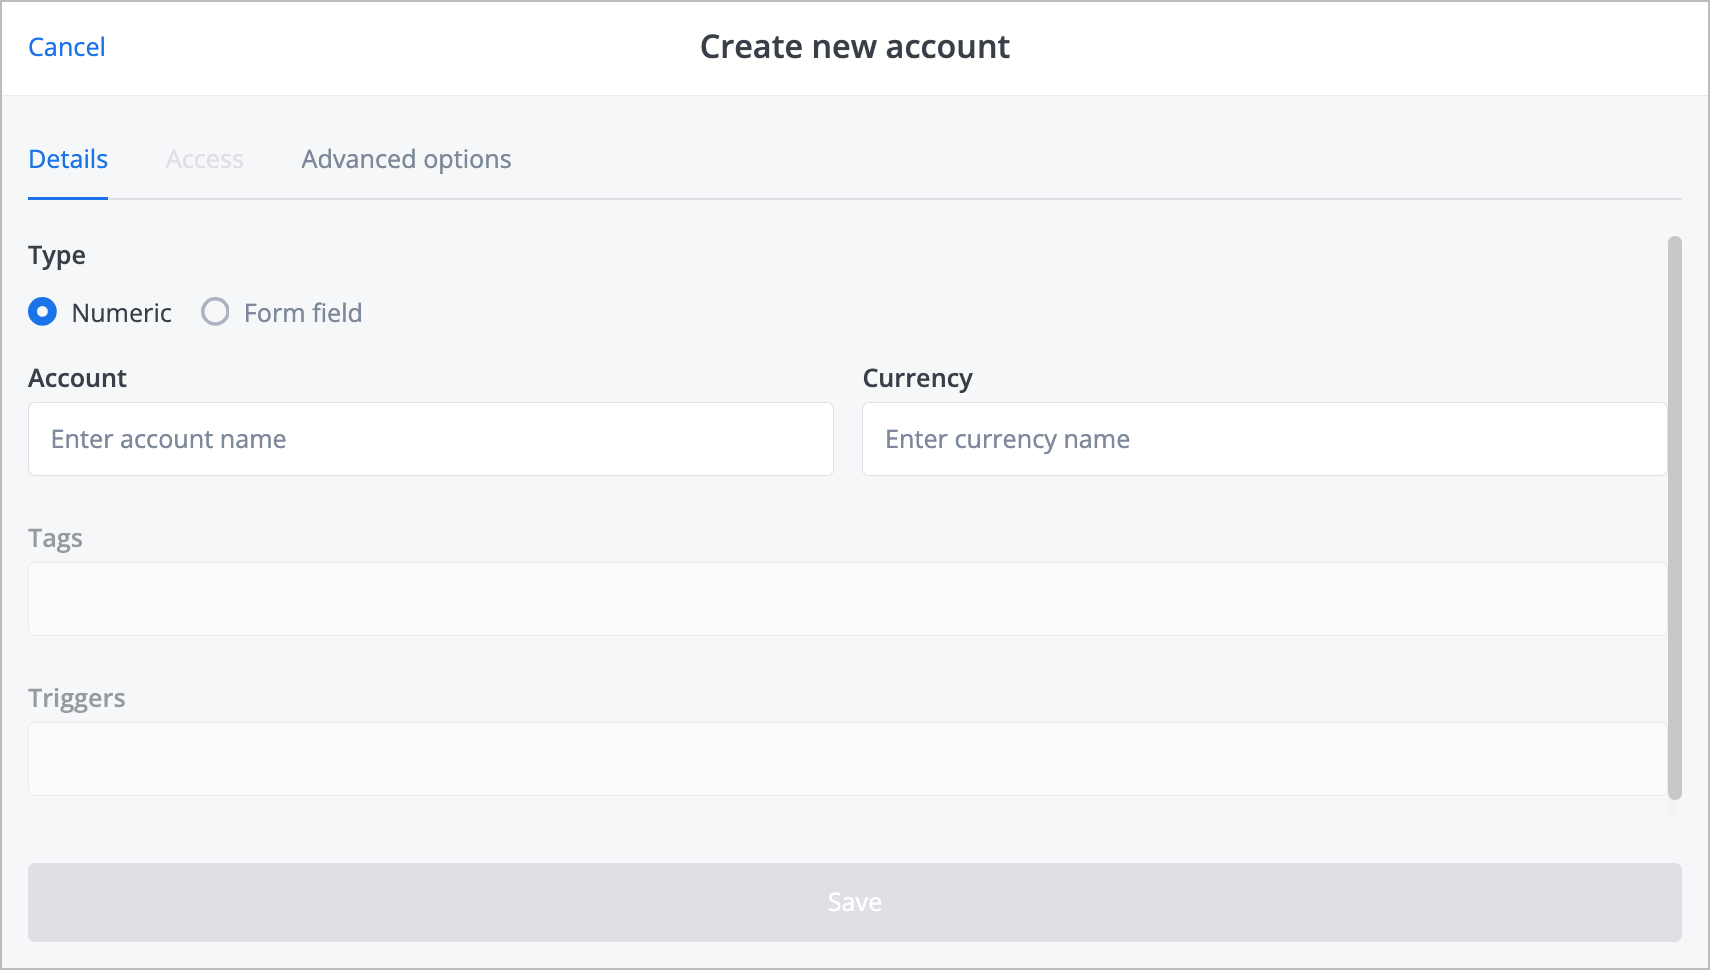
In the Create new account dialog:
Select the needed type (Numeric, String, or Actor ID) and enter an account and currency, (optional) tags and triggers on the Details tab.
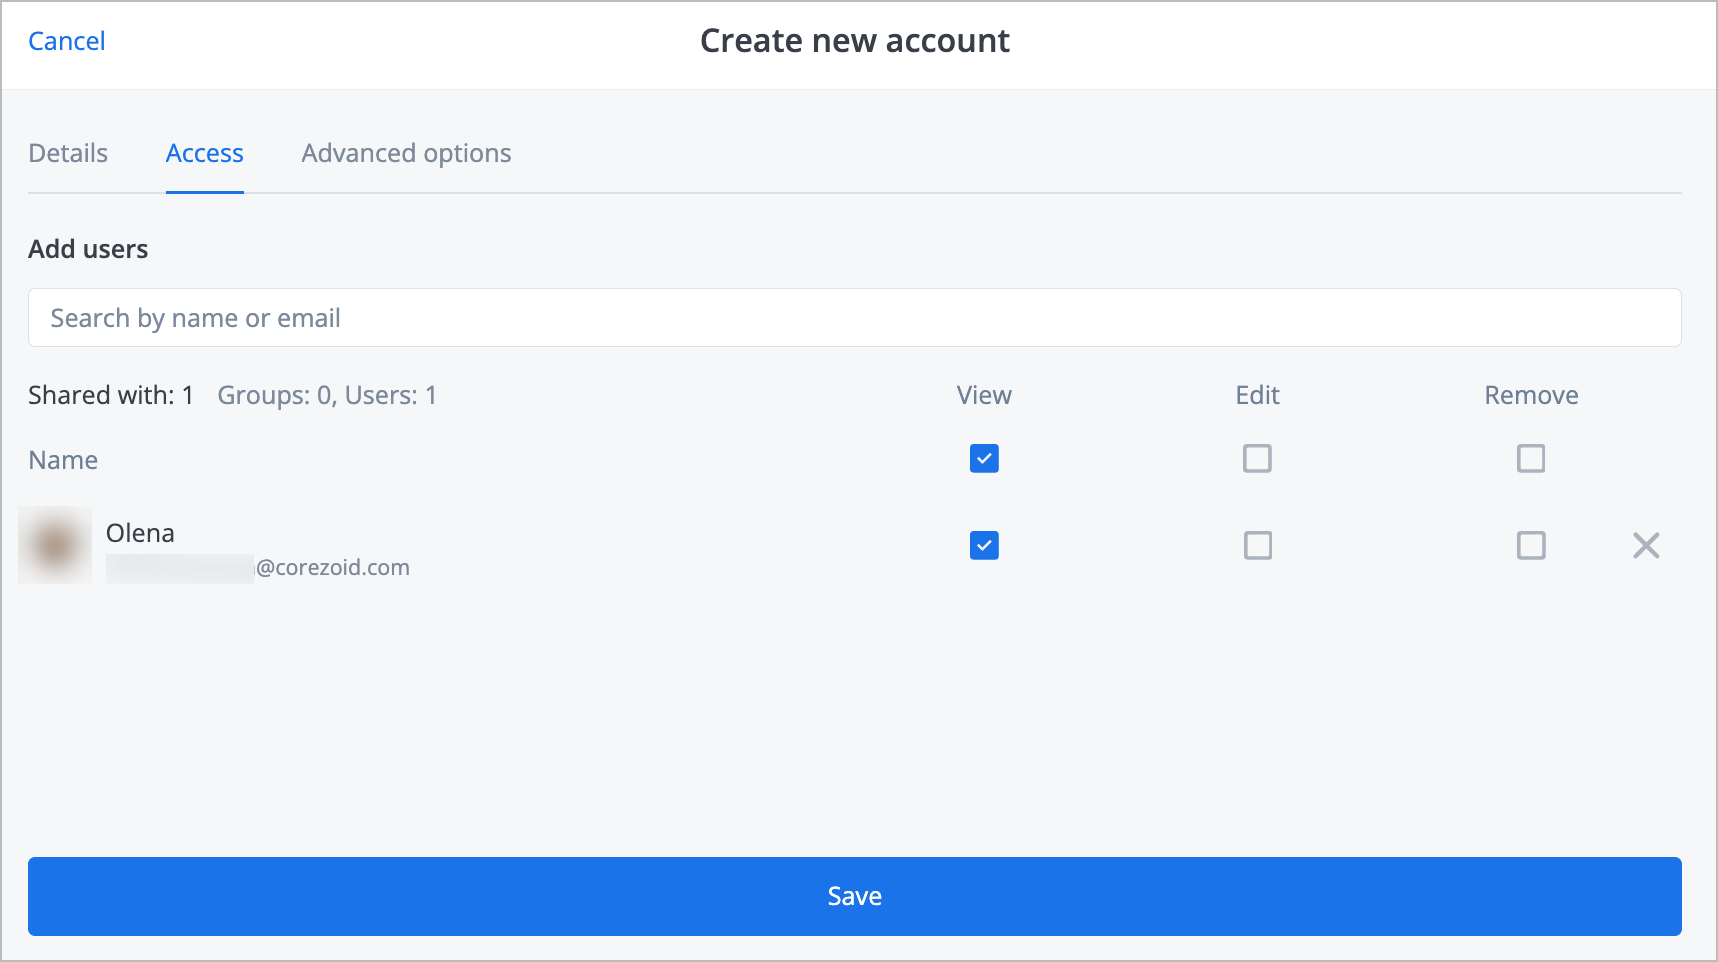
(Optional) Enter the needed user’s name or email in the Add users field and select the needed permission checkboxes (View, Edit, and Remove) on the Access tab.
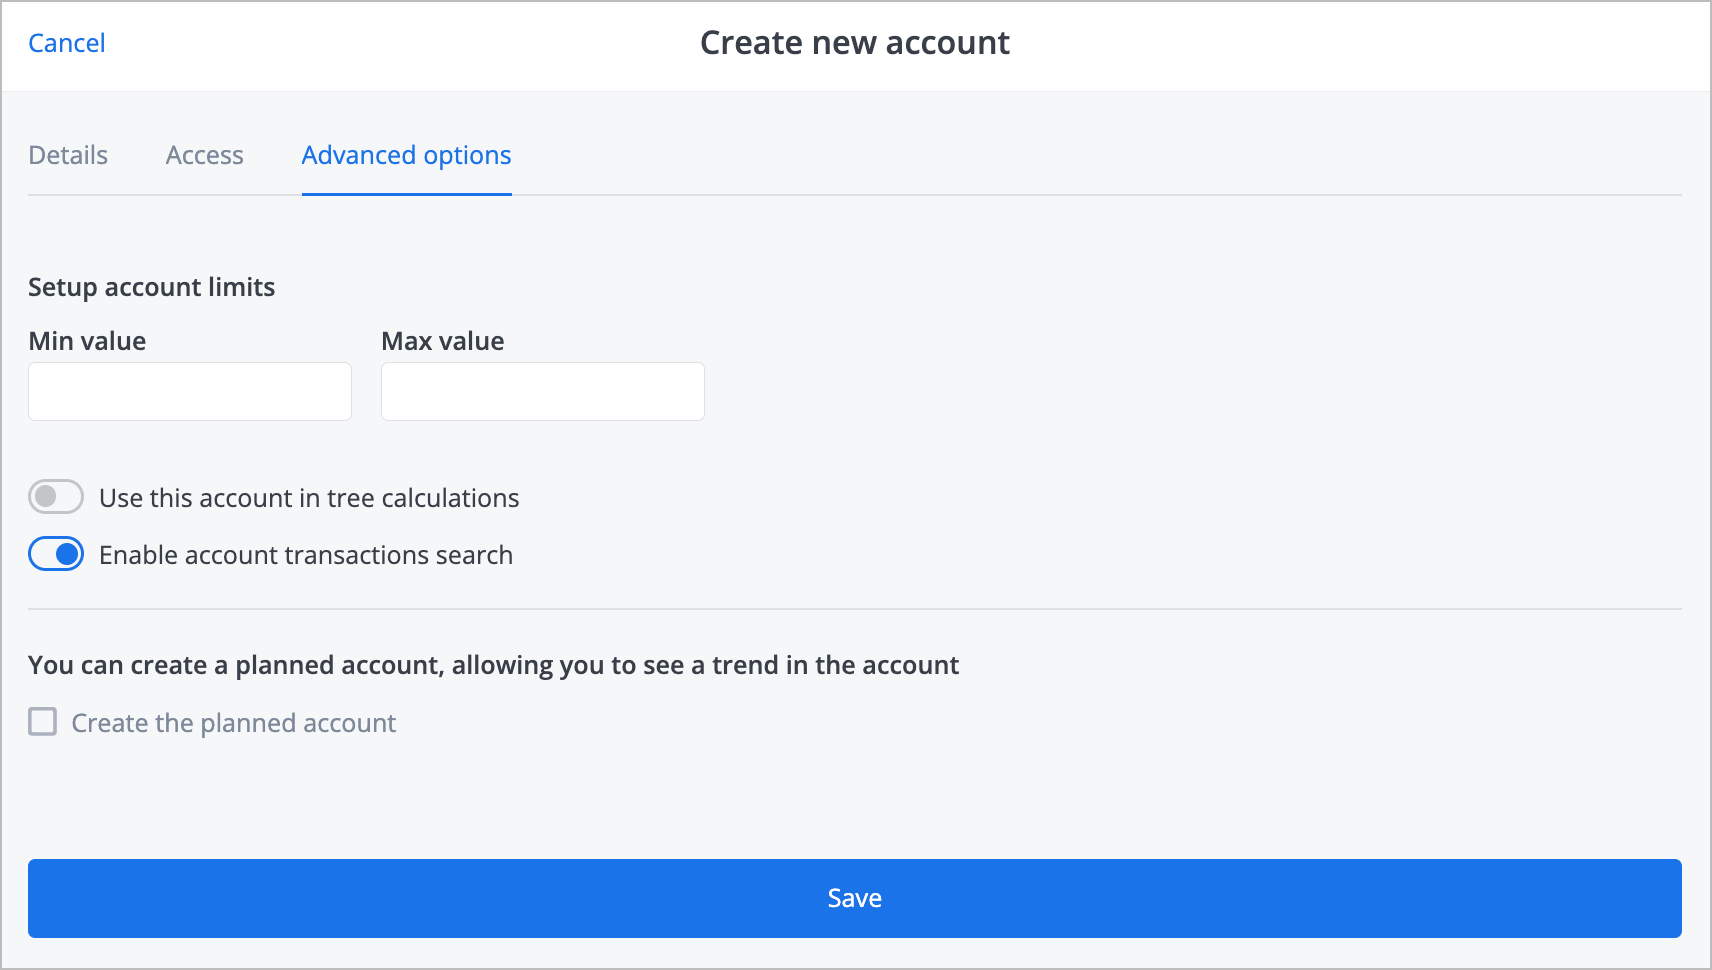
(Optional) Enter the minimum and maximum values in the Min value and Max value fields correspondingly, turn the Use this account in tree calculation and Enable account transactions search on or off, select the Create the planned account checkbox and click Save on the Advanced options tab.
View and manage folders: System, Form Fields, tagged and untagged numeric accounts.
System folder

Select the System folder to:
View Actor ID, actor creation and modification dates, actor owner parameters
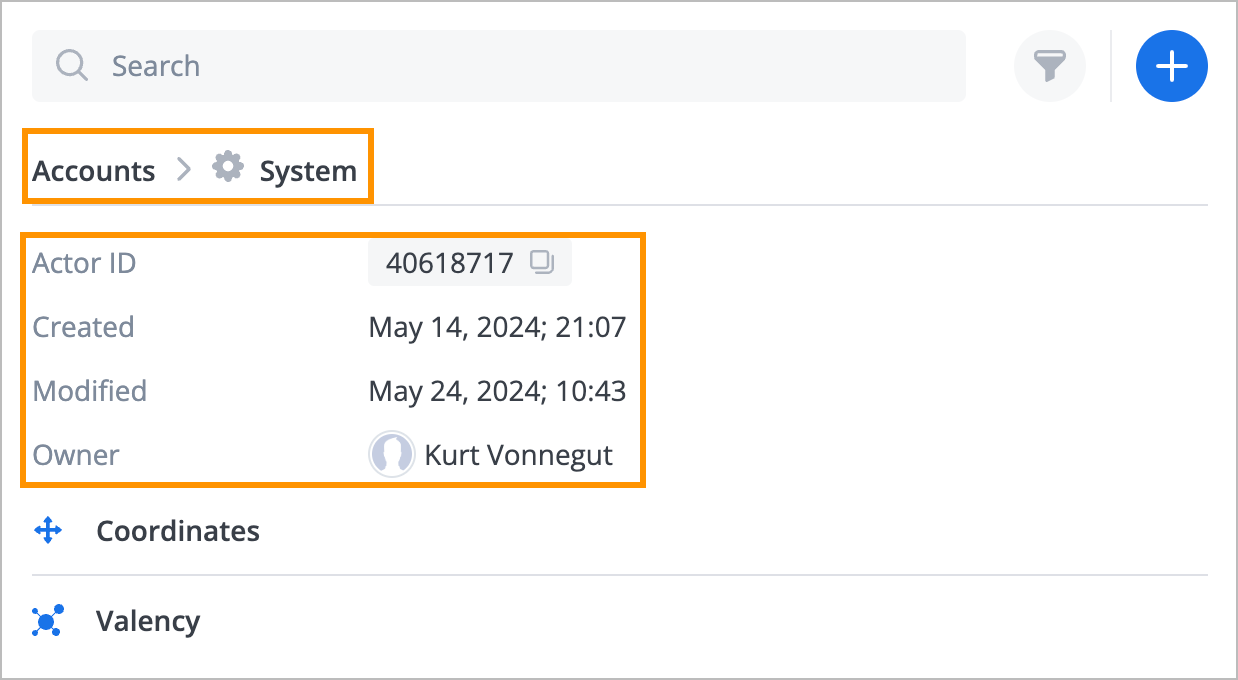
View the Coordinates actor system account:
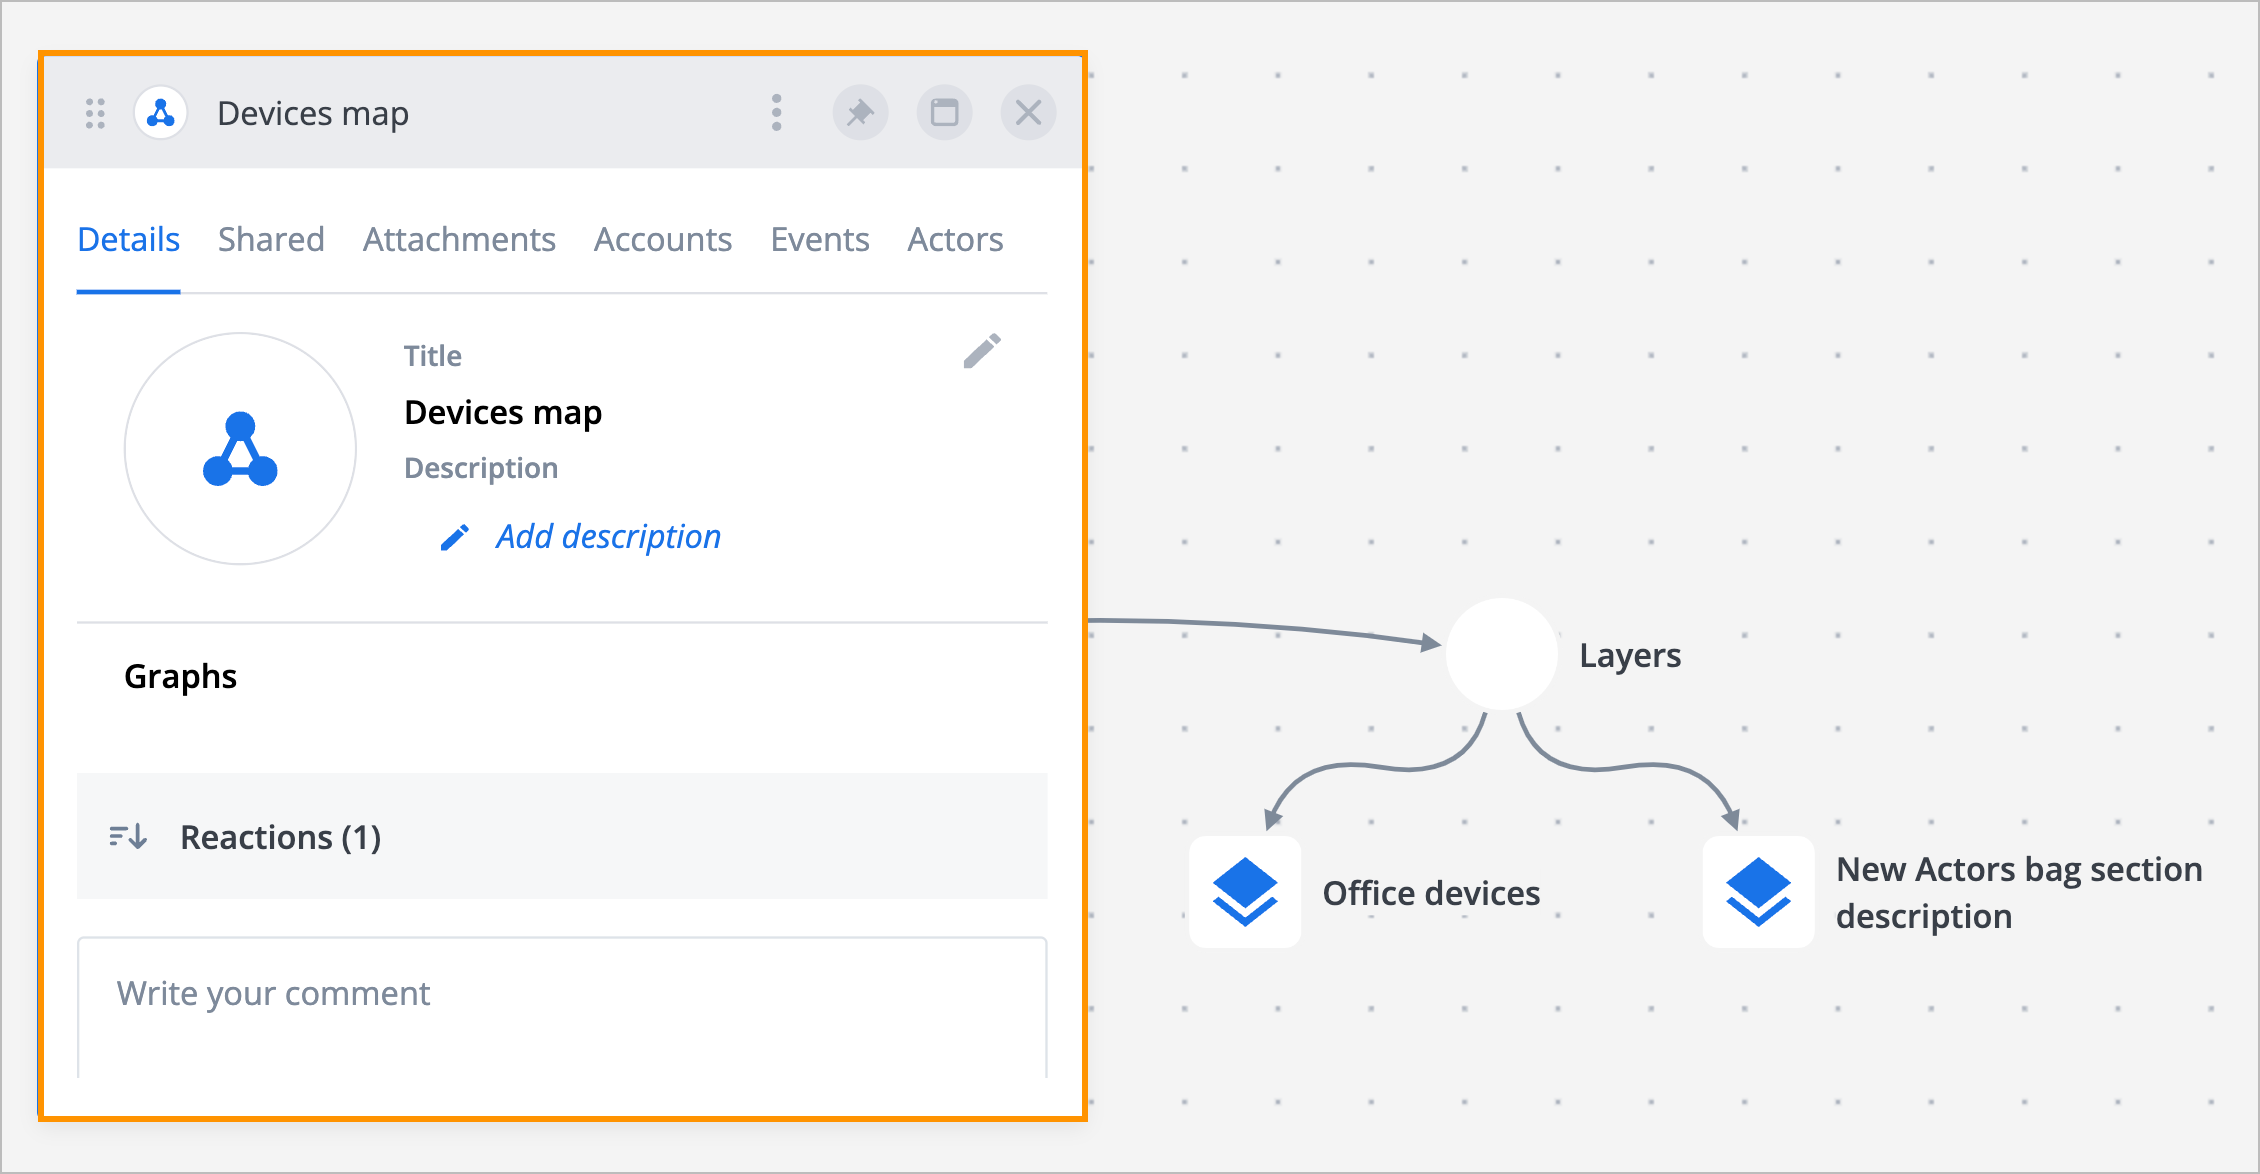
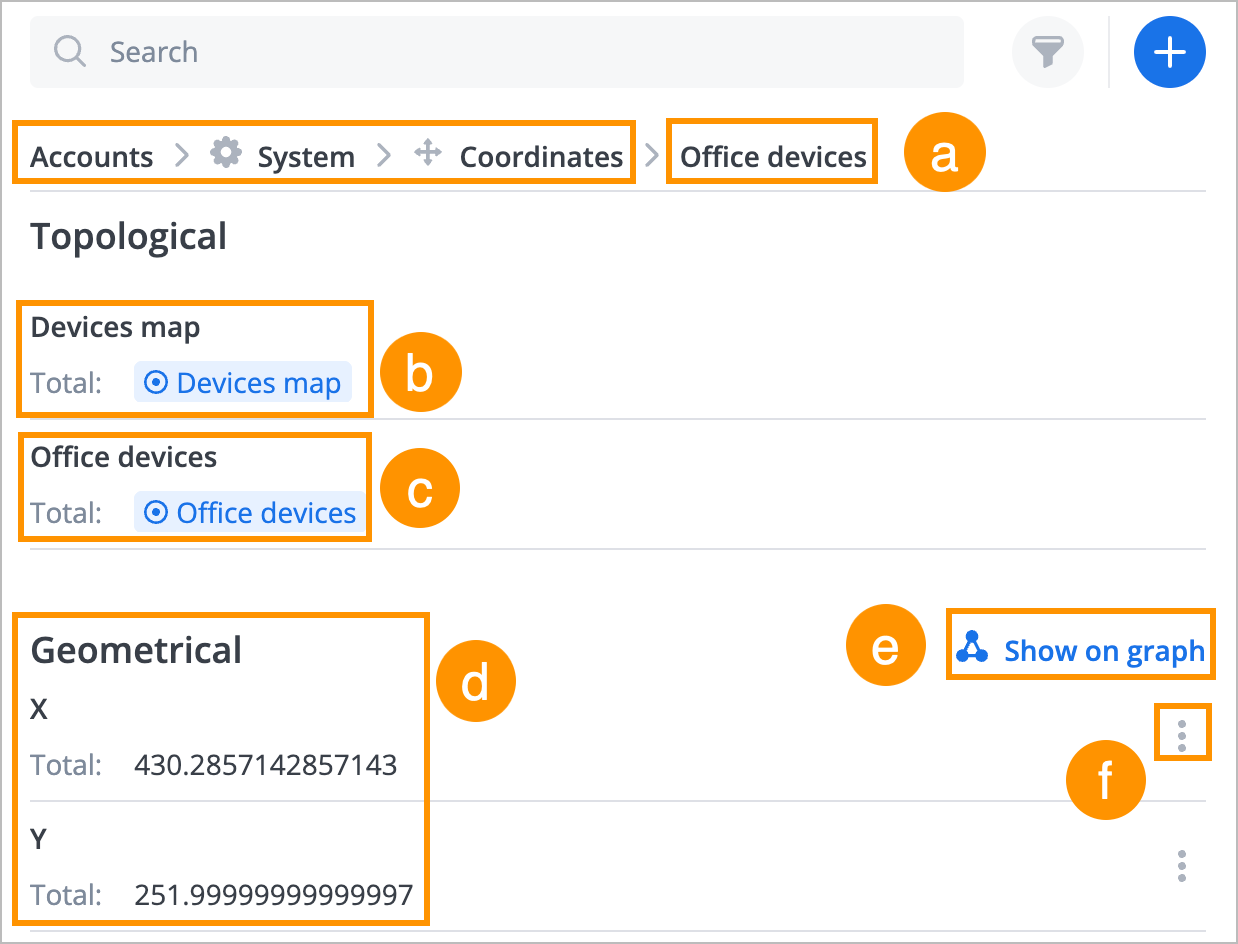
The name of a graph layer, to which the actor was added.
Note: If the actor was added to multiple layers, each layer will be displayed in the corresponding folder in the Coordinates system account.View the name of the graph with the layer to which the actor was added (a) and open the graph actor details dialog in another browser tab by clicking the graph name.
Note: The graph quick edit panel, which you can drag around, opens on a layer in the scheme that shows the hierarchy of the graph and the layers to which the actor was added.
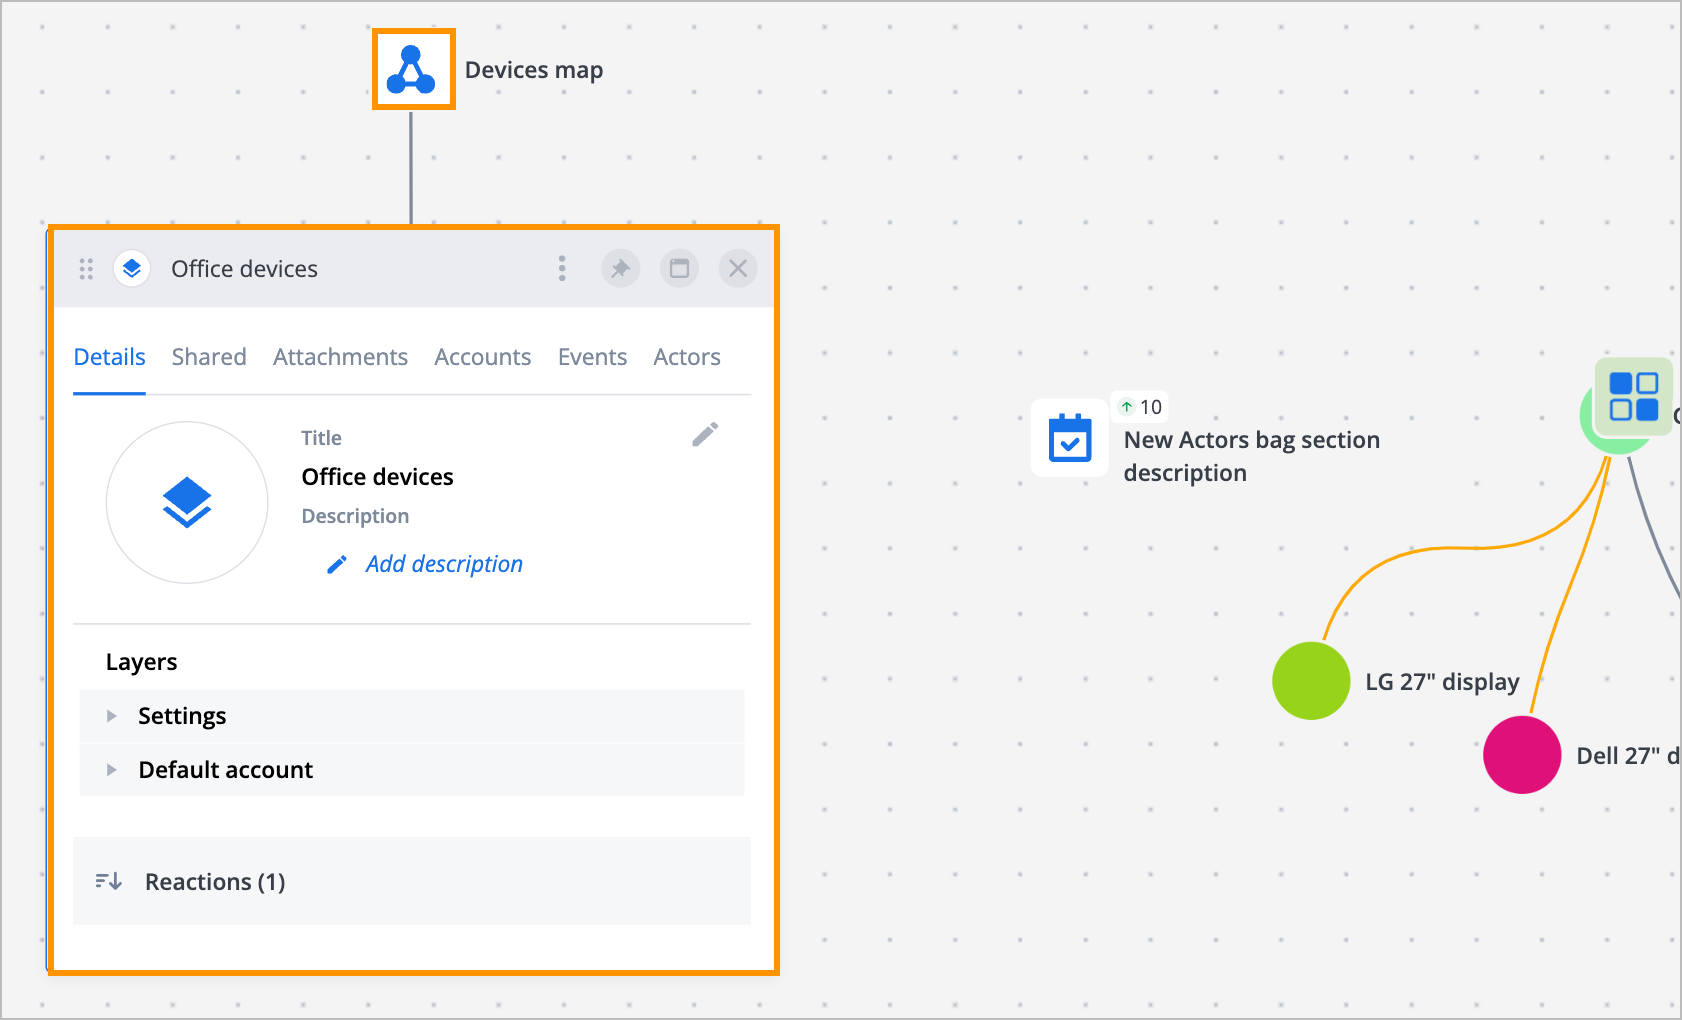
View the name of the layer to which the actor was added and open the layer in another browser tab by clicking the graph name.
Note: The layer actor details dialog, which you can drag around, opens on a layer in the scheme that shows the hierarchy of the graph and the layers to which the actor was added.
View the x and y-axis coordinates of the actor's location on the layer.
Click to view the actor on the layer that opens in another browser tab.
Open the Show transactions menu by clicking the
 options icon , to view the history of transactions for the actor's geometrical coordinate changes.
Note: These transactions show how the actor was moved around the layer.
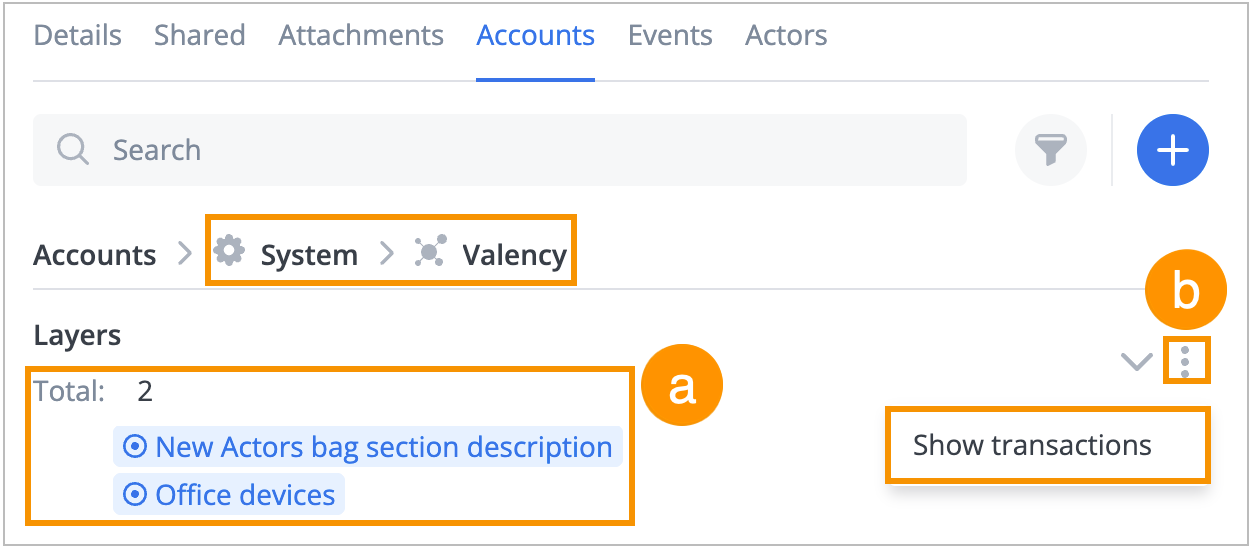
View the Valency actor system account to:
- View and open the graph’s layers or graphs with the layer by clicking the layer or graph name.
- Open the Show transaction menu by clicking the icon to view the history of linking layers to a graph (for layer actors) or creating a parent graph (for graph actors).
Note: For a layer, the Valency system account shows the list of graphs with the layer, and for a graph, it shows the layers of this graph. The Valency system account is empty for any actors other than graphs and layers.
Form Fields folder

Select the Form Fields folder to:
View the details on those fields of the form used for creating the actor whose default values were changed.
Open the transactions menu by clicking the
 options icon, where you can:
- Create transaction against the form field account
- View transactions against the form field account
- Edit the form field in the form
- Remove the form field account from the actor
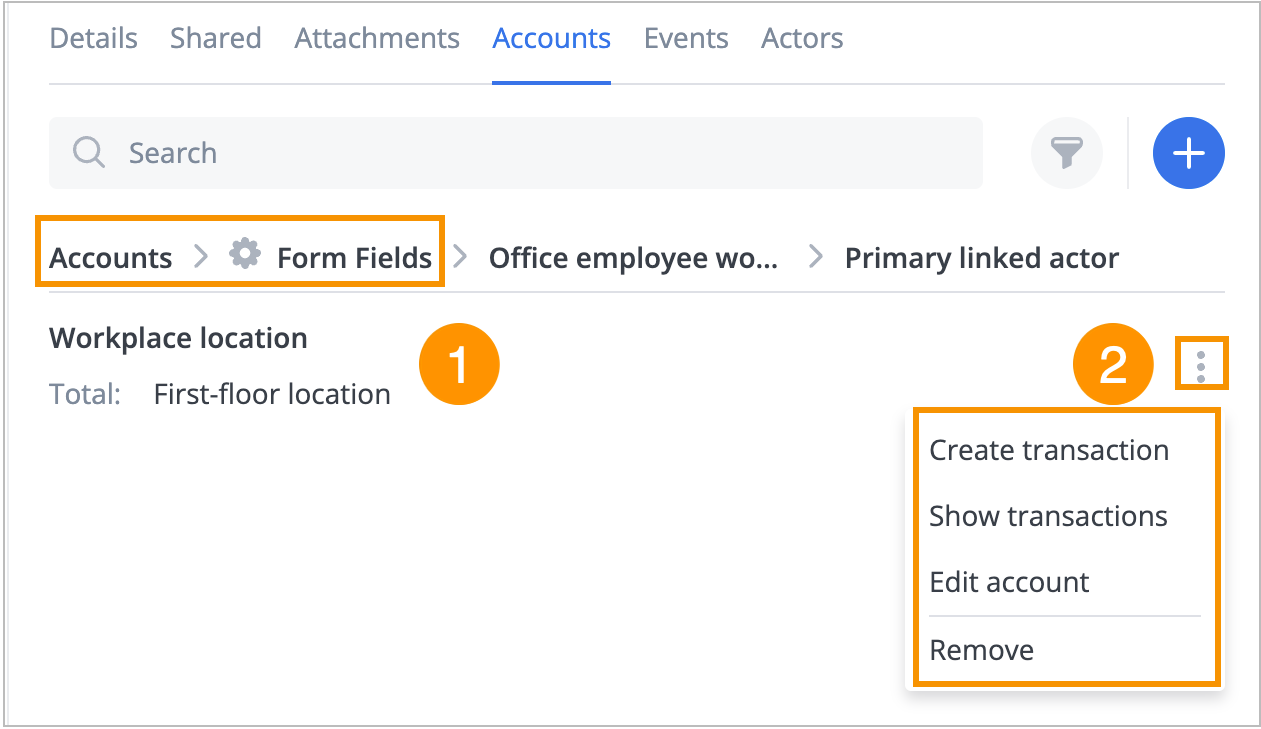
You can edit and remove only the form field accounts you've created or shared with you with the corresponding permissions.
Numeric accounts folder

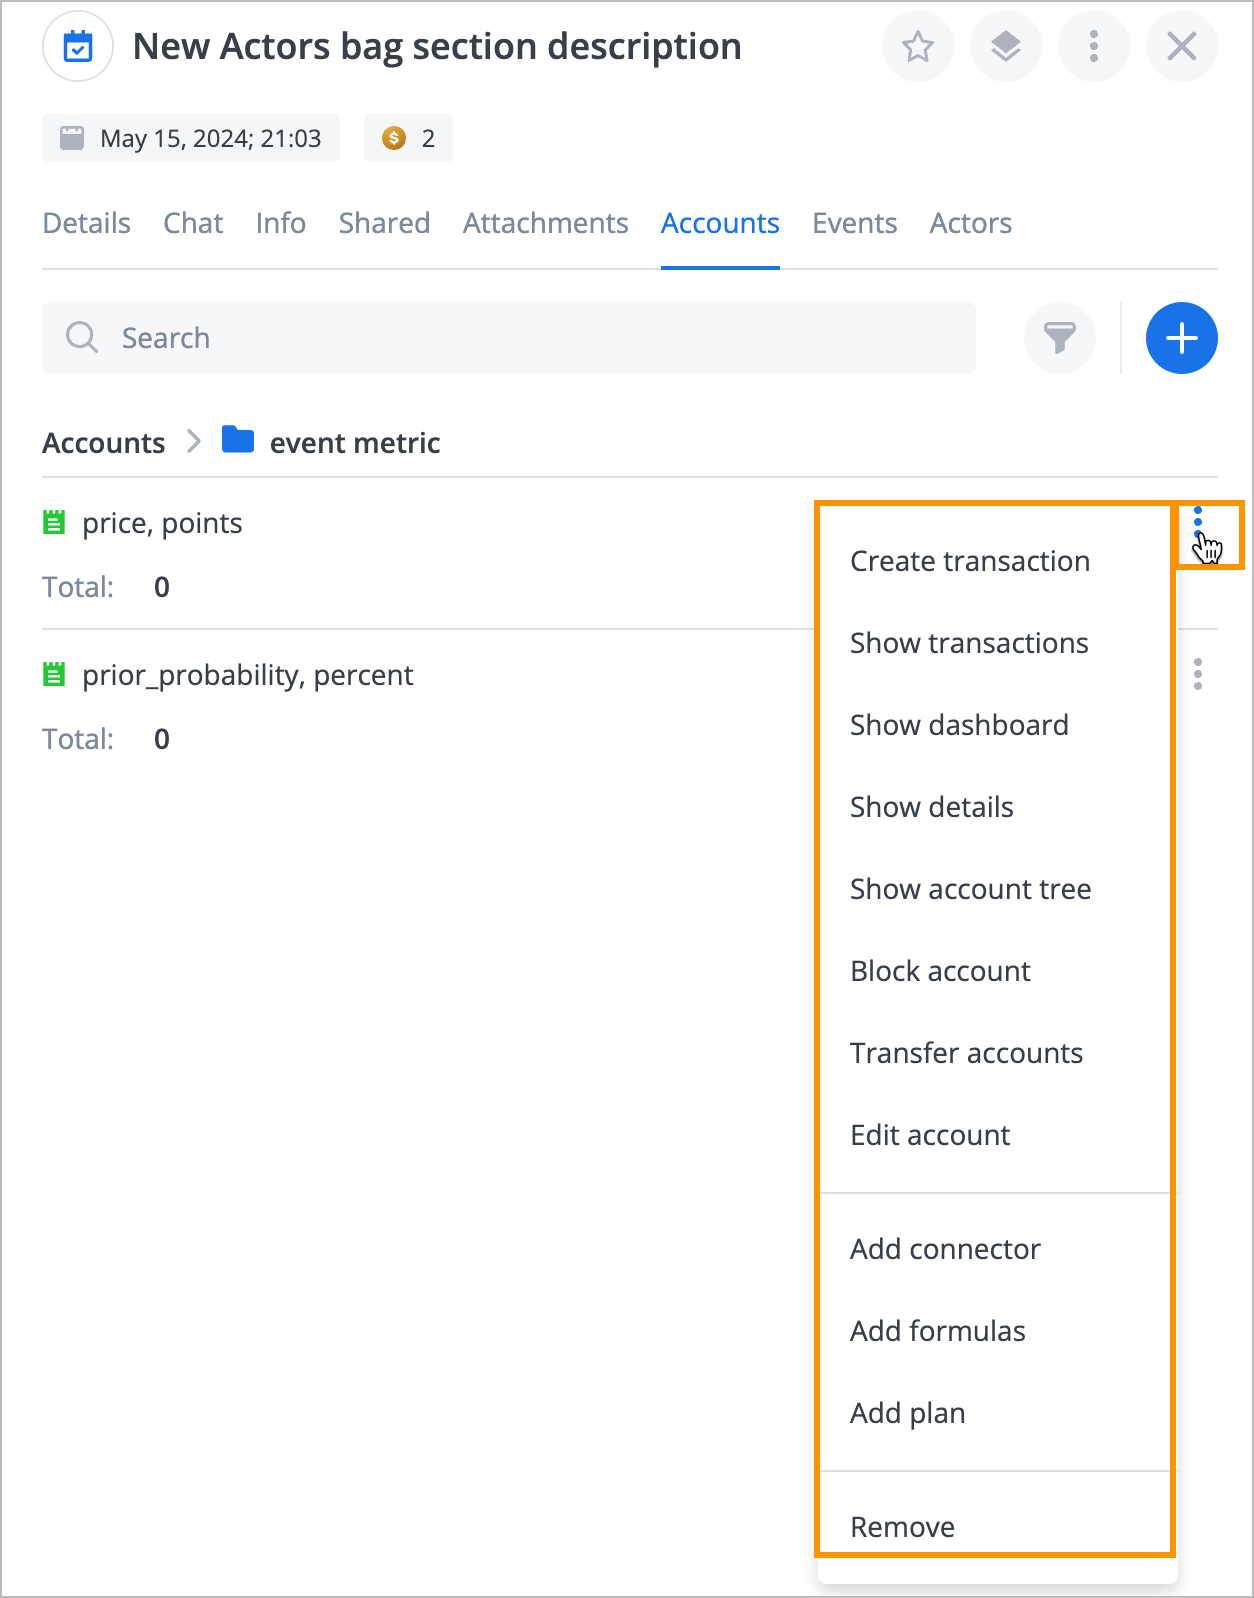
Select the numeric account folder named according to the account tag (untagged numeric accounts are located in the Untagged directory) to:
View numeric account details and perform additional actions by clicking the options icon
 .
.
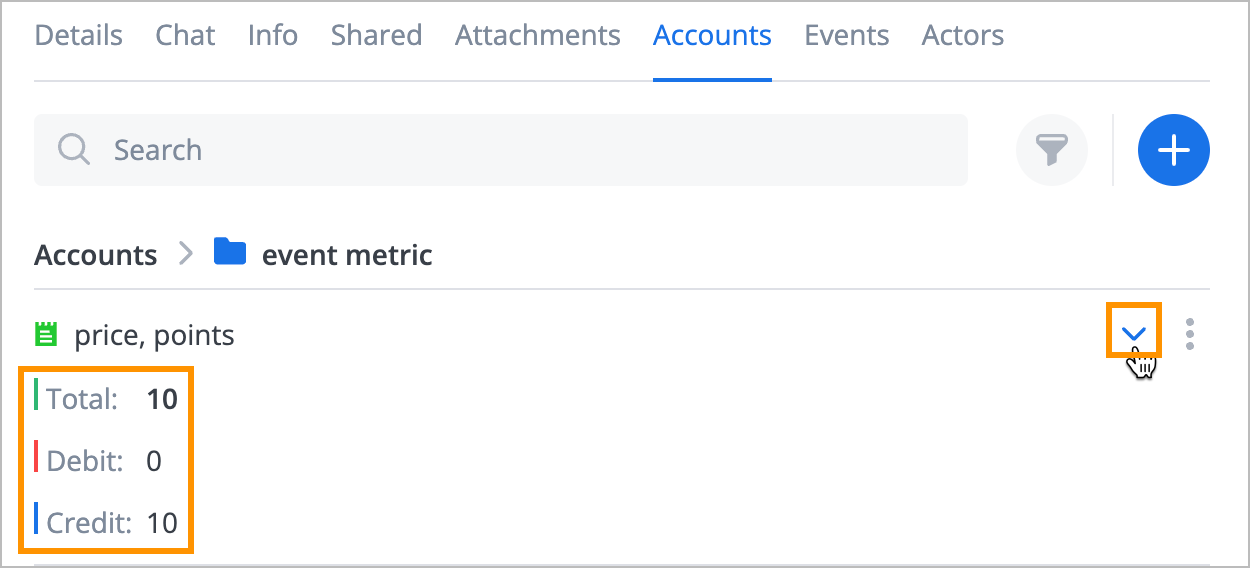
View numeric account Total, Debit, and Credit details by clicking the expand icon
 in the account line.


 .
.


