Google OAuth 2.0
- 11 Apr 2024
- 8 Minutes to read
- Contributors

- Print
- DarkLight
- PDF
Google OAuth 2.0
- Updated on 11 Apr 2024
- 8 Minutes to read
- Contributors
- Print
- DarkLight
- PDF
Article Summary
Share feedback
Thanks for sharing your feedback!
Google OAuth 2.0 is an authorization protocol that allows a service (application) to be granted access rights to user resources at another service. The protocol can prevent the need for the application to be entrusted with login and password information and grant only a restricted set of rights rather than all of them at once.
Before making any process setup, we recommend you to read and understand Google OAuth 2.0 documentation available at https://developers.google.com/identity/protocols/OAuth2
Before you start, let’s create a project that uses OAuth 2.0 to connect to Google API under the user’s authority.
Creating a project in Google
- Go to console.developers.google.com and create a new project.


- Assign a name to your project.

- Go to the Library, find the Google APIs you would like to use in your application, and activate them.

We will use Gmail API as an example.


All queries to Google APIs require authorization via the OAuth 2.0 protocol.
A general flowchart illustrating interactions between Google services via OAuth 2.0 is as follows:

Each request to API must contain the following parameters in the Header:
Authorization: Bearer {{ACCESS_TOKEN}}
ACCESS_TOKEN is used for authorization of queries and storage of additional information about the user (user_id, user_role, or any other; this information is also called payload). In other words, the token is required to verify your account data before requesting the Google API.
ACCESS_TOKEN storage process should be made unified so that you could use the ACCESS_TOKEN in other projects.
You will be able to obtain ACCESS_TOKEN by adding a Set Parameter node with a structure of
{{conv[process_id].ref[reference_of_request].name_of_the_parameter_the_ACCESS_TOKEN_is_located_in}}
in the process required, for example:
{{conv[4].ref[gmail].ACCESS_TOKEN}}
To do this, you must create 2 unified processes in Corezoid:
- Token Storage: a state diagram to store and refresh ACCESS_TOKEN obtained.
- Сreate/Refresh Token: a process for calling API to create/refresh ACCESS_TOKEN.
Their interaction with Google OAuth 2.0 is shown in the figure below:

You have completed the preparation stage for the creation of a Google project. Now, you will learn how to set up processes in Corezoid to obtain ACCESS_TOKEN following the instruction below.
Obtaining an Access Token
- Create a folder named Google OAuth 2.0 for more convenient work with projects.

- Go to the folder and create a Create/Refresh Token process which will generate and refresh ACCESS_TOKEN using Google API.

- In the process created, add an API Call node, which will call Google OAuth 2.0 API for generating ACCESS_TOKEN.

3.1. After you have added the node, click it and fill in the URL field as well as required request parameters in the Parameters section.
Values of parameters {{client_id}}, {{code}}, {{client_secret}} will be generated in the Google API call setup of this tutorial when you obtain access keys to the Google account.
3.2. Add the following in the API Call settings:
URL: https://www.googleapis.com/oauth2/v4/token
Request format: Default
Request method: POST
Content-Type: Application/X-Www-Form-Urlencoded
3.3. Add the following in the Parameters section:
{
    "redirect_uri": "urn:ietf:wg:oauth:2.0:oob",
    "grant_type": "authorization_code",
    "client_id": "{{client_id}}",
    "code": "{{code}}",
    "client_secret": "{{client_secret}}",
    "access_type": "offline"
}

- To ensure automatic parameter entry upon manual request for ACCESS_TOKEN generation, click the Task parameters icon and add 3 parameters:
client_id,code,client_secret.


- The API Call you have set up in Step 3 is ready to request a call which will result in obtaining ACCESS_TOKEN from Google OAuth 2.0 API.
After creating a Corezoid process with an API Call node, you can set up a Google API call to obtain ACCESS_TOKEN.
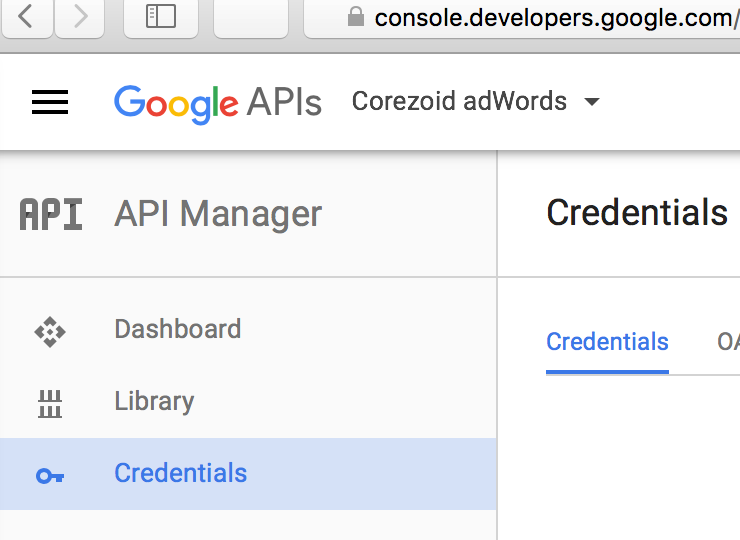
Google API call setup
Go to a Credentials section in console.developers.google.com.
List of available Google APIs
Create Client ID and Client Secret.


- Enter parameters in URL and call it in the browser:
https://accounts.google.com/o/oauth2/v2/auth?redirect_uri=urn%3Aietf%3Awg%3Aoauth%3A2.0%3Aoob&response_type=code&access_type=offline&scope={{scope}}&client_id={{client_id}}
where:
- {{client_id}} - is a client id obtained at step 2.
- {{scope}} - is the Google API you would like to gain access to. For example, for Gmail, it would be https://mail.google.com/. List of available Google APIs: https://developers.google.com/identity/protocols/googlescopes
- In the window, select an account you would like to gain access to.
4.1. Click the Allow button in the following window.

4.2. Copy the CODE, appearing on the page. You will need it at the next step.

Go to the Create/Refresh Token process, and click the New task button in the View mode.
5.1. Fill in the fields below in the Task window and click the Add task button:
Reference- assign a name to the key you are going to get.
For example, if this is a key to “gmail”, enterReferenceasgmailin the field.client_id- you obtained it at step 2client_secret- you obtained it at step 2code- you obtained it at step 3

If ACCESS_TOKEN is created successfully, your request will be in the Final node. Click it to look through the contents of the request that contains access_token as one of its parameters
Refreshing the token
According to the Google OAuth protocol, the token expiration time is 1 hour; therefore, a Google API call must be set up for token refresh.
To refresh ACCESS_TOKEN, add two nodes - Condition and API Call - in the Create/Refresh Token process.
Condition is required to transfer a request to the API Call node for the token to be refreshed under the
grant_type == refresh_tokencondition.Add
refresh_tokenreceipt verification to thegrant_typeparameter in the Condition node to do this.
- The API Call node is required to call Google API for a token refresh after this condition.
To do this, enter https://www.googleapis.com/oauth2/v4/token in the API URL
and set the following values in the API Call node settings:
Request format: Default
Request method: POST
Content-Type: Application/X-Www-Form-Urlencoded
Add the following in the Parameters section:
{
    "refresh_token": "{{refresh_token}}",
    "grant_type": "refresh_token",
    "client_id": "{{client_id}}",
    "client_secret": "{{client_secret}}"
}

The process for generation and refresh of the ACCESS_TOKEN is created successfully!
Token Storage State Diagram setup
- A mechanism for storing the generated/refreshed ACCESS_TOKEN should be created to avoid calling the Create/Refresh Token process each time a request is made to Google API. You can use a state diagram for this purpose.
1.1. Create a state diagram named Token Storage

Token Storage state diagram is designed for storage of a request with active ACCESS_TOKEN.
You will call a Create/Refresh Token process for ACCESS_TOKEN refresh from this state diagram.
1.2. Add a Copy Task node in the Token Storage state diagram to call the Create/Refresh Token process.
1.3. Enter the following in the Reference field:
{{root.ref}}
1.4. Add the following in the Parameters section:
{
    "refresh_token": "{{refresh_token}}",
    "grant_type": "refresh_token",
    "client_id": "{{client_id}}",
    "client_secret": "{{client_secret}}",
    "code": "{{code}}"
}

You will create a request for ACCESS_TOKEN generation in the Create/Refresh Token process, and a copy of this request will be transferred to the Token storage state diagram.
When it is time to refresh ACCESS_TOKEN during the Token storage process, the request will be passed through the Copy Task node for ACCESS_TOKEN refresh and wait for modification in the next Set State node.

1.5. In the Set state node, add Condition access_token == to check the presence of the access token parameter after modification of the request. If an empty parameter is received, the request will be transferred to the final node Token is not refresh (you may assign another name to the node).

1.6. Add a wait-for-response timer in the same Set State node. To do this, click Additionally and set up a checkmark next to the Limit the time of the task in the node. Set a minimal time of 30 seconds as shown below. If a response from the Create/Refresh Token is not received in the state diagram within 30 seconds, the request will be passed to the Final node called Timeout create token.

- According to the Google OAuth protocol, token expiration time is 1 hour, therefore it is necessary to set up a token refresh cycle in the prescribed time.
To do this, click the Limit the time of the task in the node in the Active token node and set a timer for 1 hour.
Final view of the Token Storage process with nodes involved is shown below

- In order to transfer the ACCESS_TOKEN generated, go to the Create/Refresh Token process in the Token Storage state diagram. Add the Copy Task node after the Create access token node.
3.1. In the Copy Task node, activate the Token Storage state diagram in the Process field.
3.2. In the Reference field, enter the following: gmail
3.3. Add the following in the Parameters section:
    {
        "access_token": "{{access_token}}",
        "expires_in": "{{expires_in}}",
        "client_secret": "{{client_secret}}",
        "code": "{{code}}",
        "client_id": "{{client_id}}",
        "refresh_token": "{{refresh_token}}"
    }

In order to refresh ACCESS_TOKEN in the Token Storage state diagram, add the Modify Task node next to the Refresh access token node in the Create/Refresh Token process.
4.1. In the Modify Task node, activate the Token Storage state diagram in the Process field.
4.2. In the Reference field, enter the following:
{{root.ref}}4.3. Transfer the following in the Parameters section
    {
        "refresh_token": "{{refresh_token}}",
        "access_token": "{{access_token}}",
        "expires_in": "{{expires_in}}"
    }
Where:
- `refresh_token` - token to refresh **ACCESS_TOKEN**.
- `ACCESS_TOKEN` -  token to access Google API.
- `expires_in` - **ACCESS_TOKEN** expiration time.

After the entire project consisting of 1 process and 1 state diagram is assembled, you can work with active ACCESS_TOKEN.
To do this, repeat the point of getting CODE and create a new request for ACCESS_TOKEN generation in the Create/Refresh Token process, thereby launching a process of the token storage and refreshing in the Token Storage state diagram.
If ACCESS_TOKEN is created successfully, your request will be in the Active token state. Click it to review the request that contains access_token as one of its parameters.

Interaction of the Corezoid processes with the unified Token Storage state diagram and Google APIs is shown in the figure below

You can use the ACCESS_TOKEN obtained in all the processes of your company to work with any Google APIs by adding it to the Header as follows:
Authorization: Bearer {{conv[DIAGRAM_ID].ref[REFERENCE].access_token}},
where:
DIAGRAM_ID - ID of the Token Storage state diagram.
To obtain the DIAGRAM_ID proceed as follows:
- Go to the Edit mode in the Token Storage state diagram
- Click the Start node inside the diagram
- Copy the number in the ID process line in the Connection data section

REFERENCE - assigned by you at step 5. In our case, this will be “gmail”.
Example of Google API call via API Call node using Google OAuth 2.0:

Congratulations! You have learned to create processes for Google OAuth 2.0 authorization using state diagram.
Was this article helpful?