View and manage your license
- 20 Jun 2024
- 5 Minutes to read
- Contributors

- Print
- DarkLight
- PDF
View and manage your license
- Updated on 20 Jun 2024
- 5 Minutes to read
- Contributors
- Print
- DarkLight
- PDF
Article summary
Did you find this summary helpful?
Thank you for your feedback
On the Licenses & Billing page of the Account space, you can:
- View your current license details
- Buy a license
- Change RPS
- Buy extra state changes
- Change payment method
- Download a license
- Cancel a license
View license details
To view your license details:
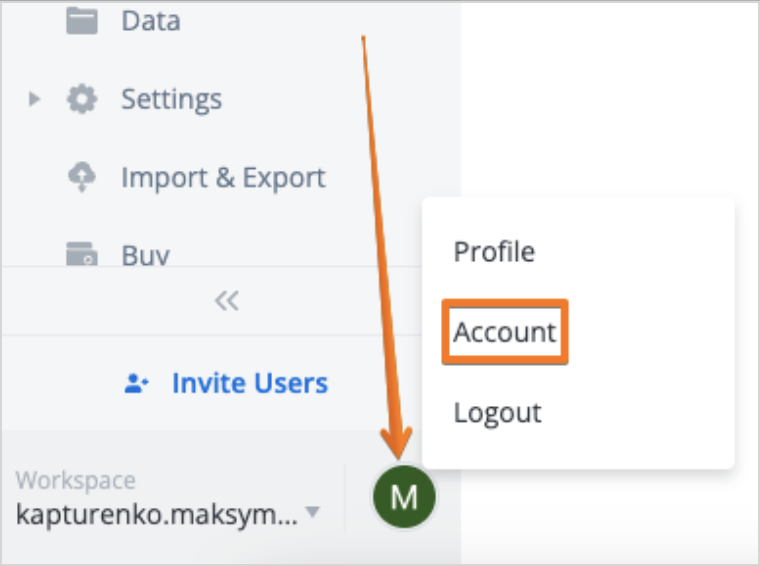
In the lower-left corner of the Simulator Navigation panel, click your user icon, and then in the drop-down list, select Account.
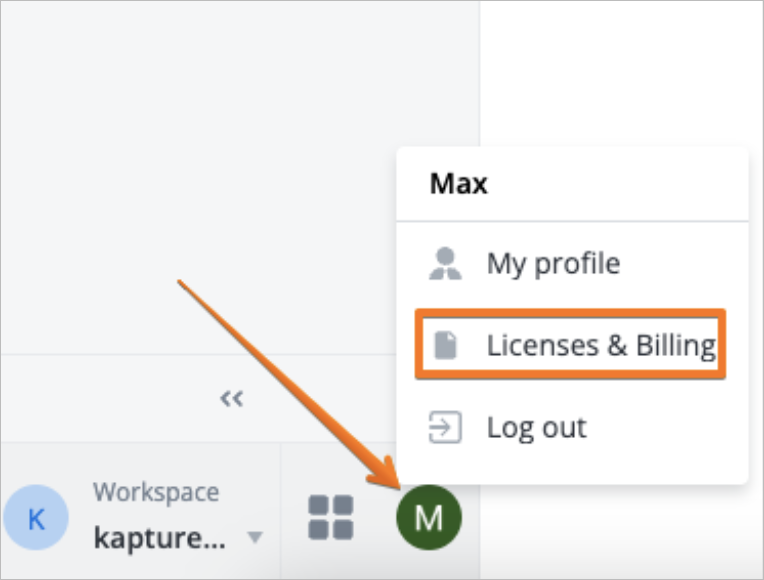
In the lower-left corner of the Account space, click your user icon, and then in the drop-down list, select Licenses & Billing.


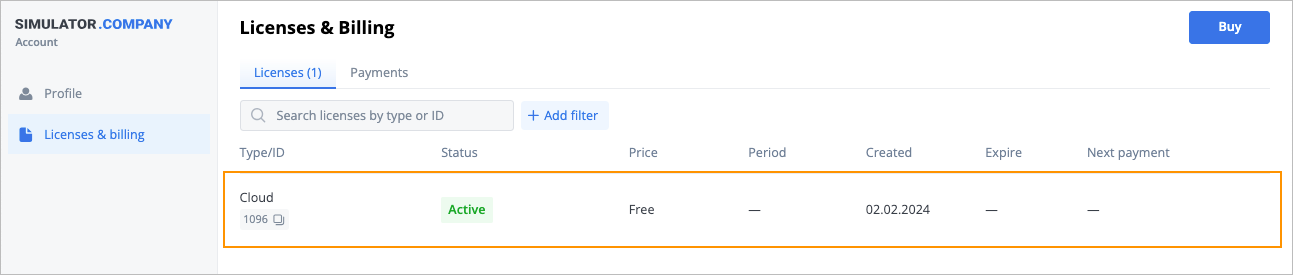
On the Licenses & Billing page that opens, you can view your license details on the Licenses and Payments tabs.

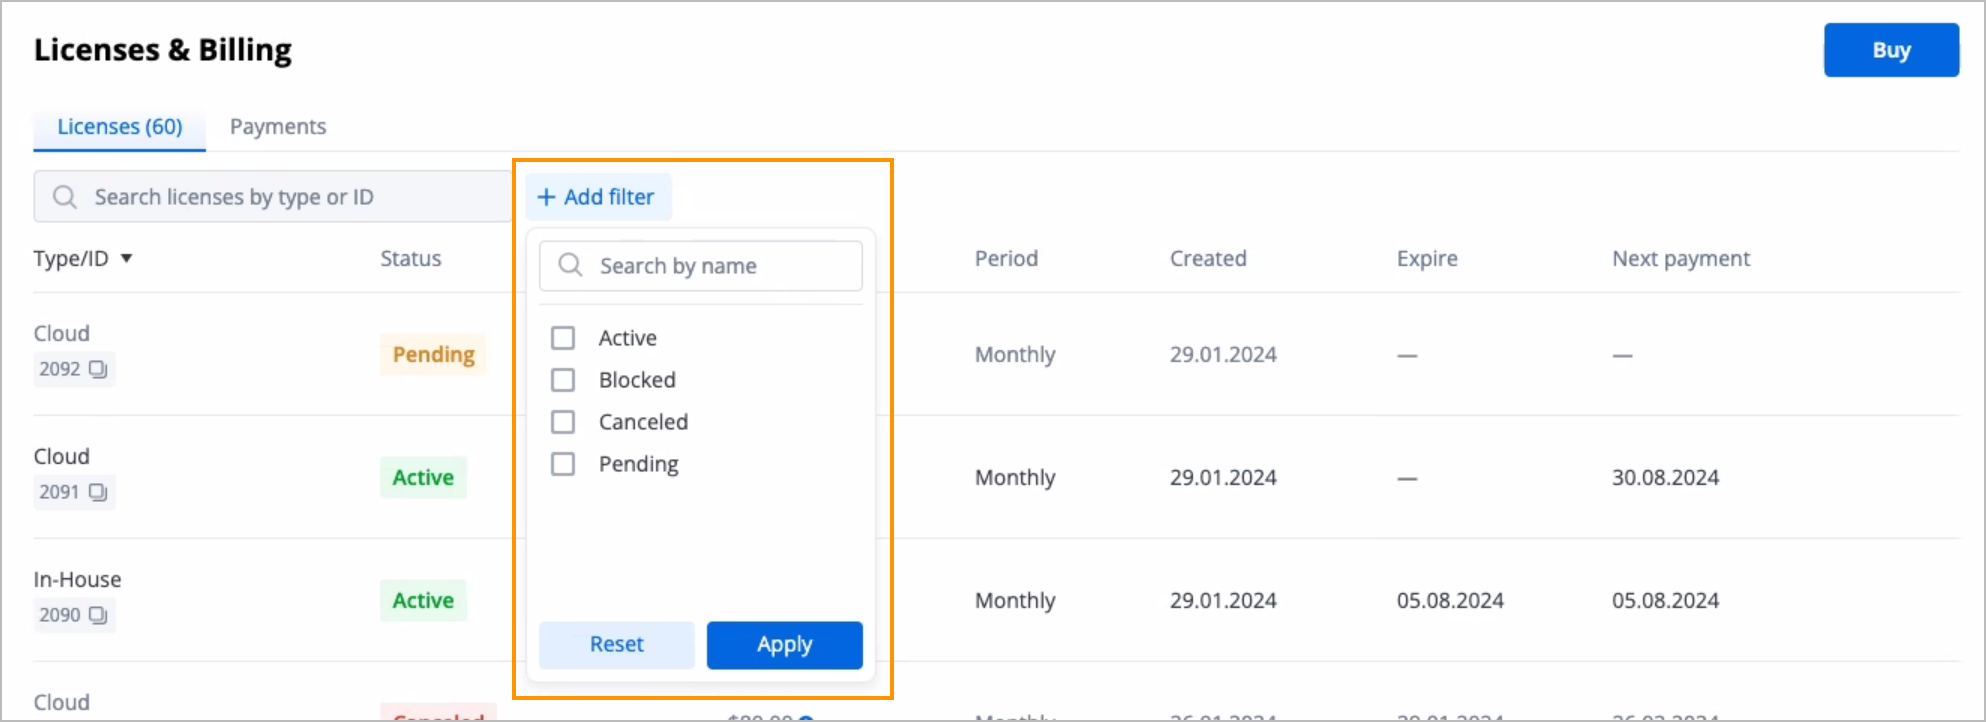
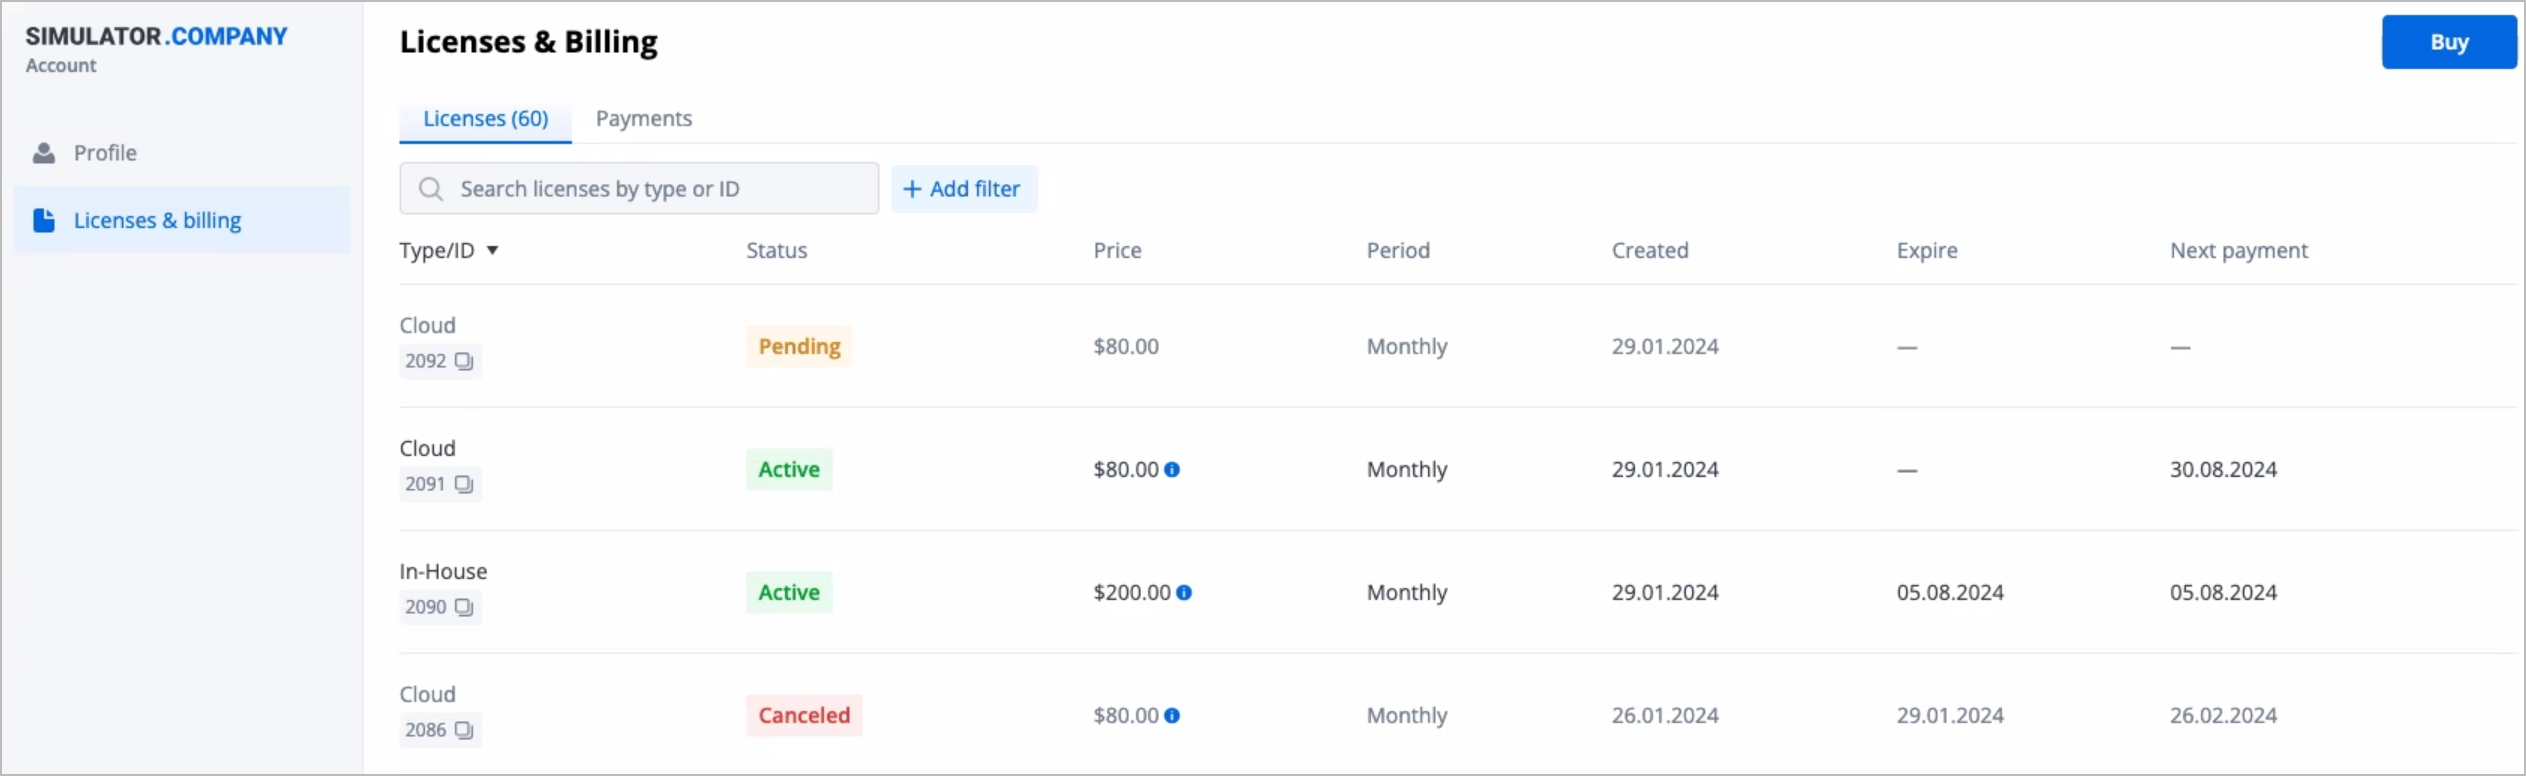
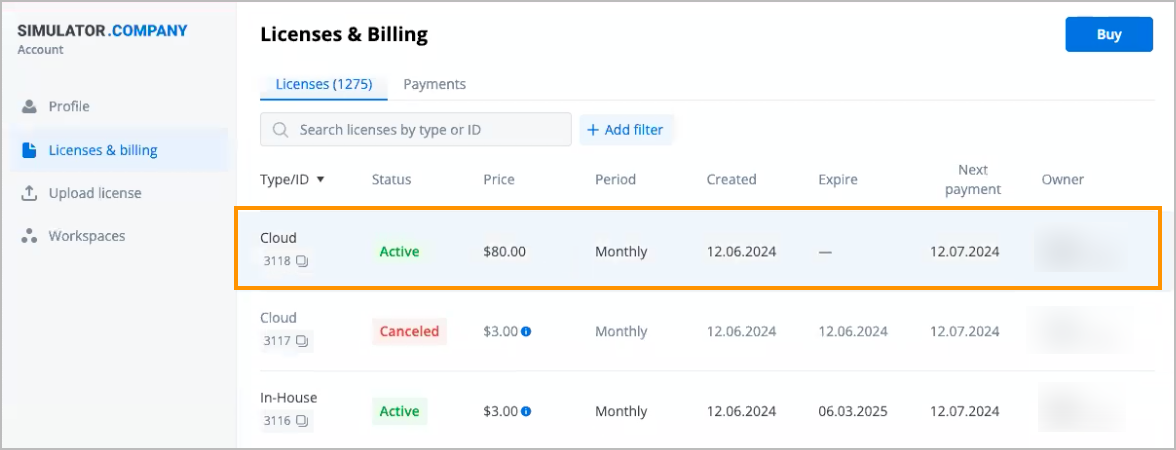
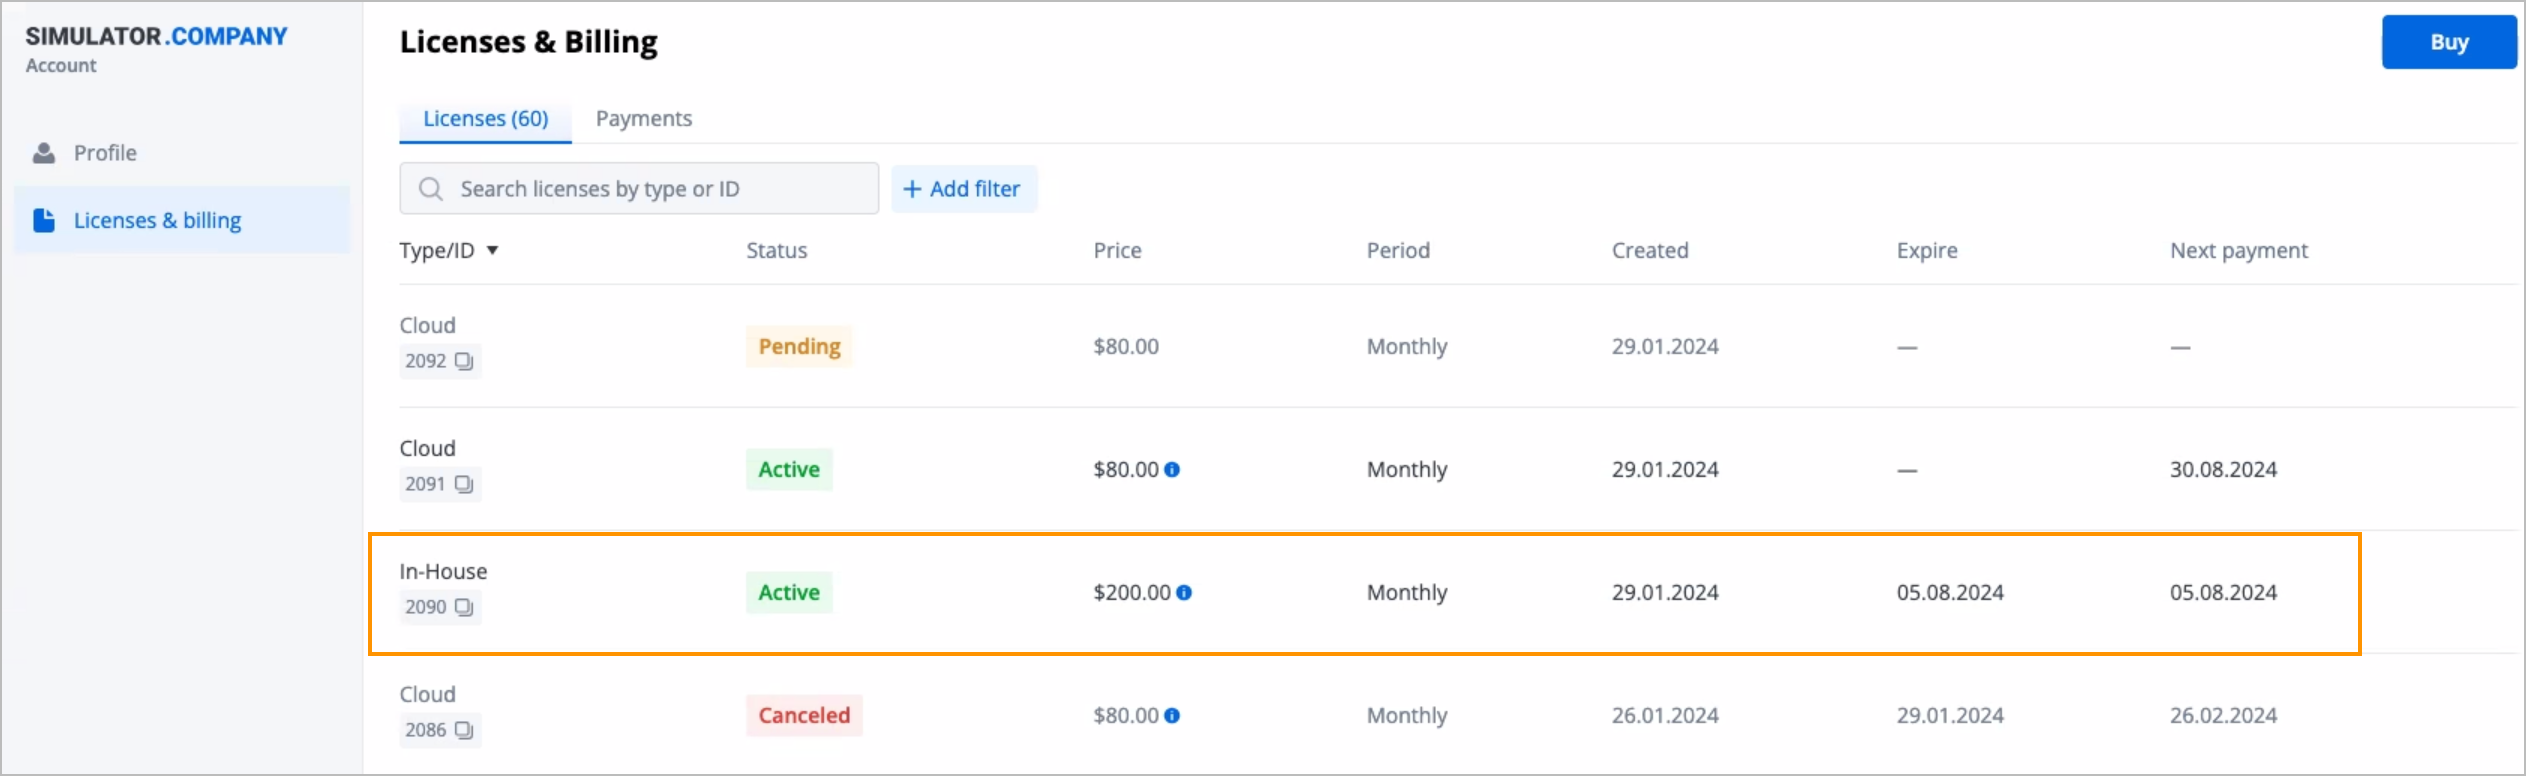
Licenses tab
On the Licenses tab, you can:
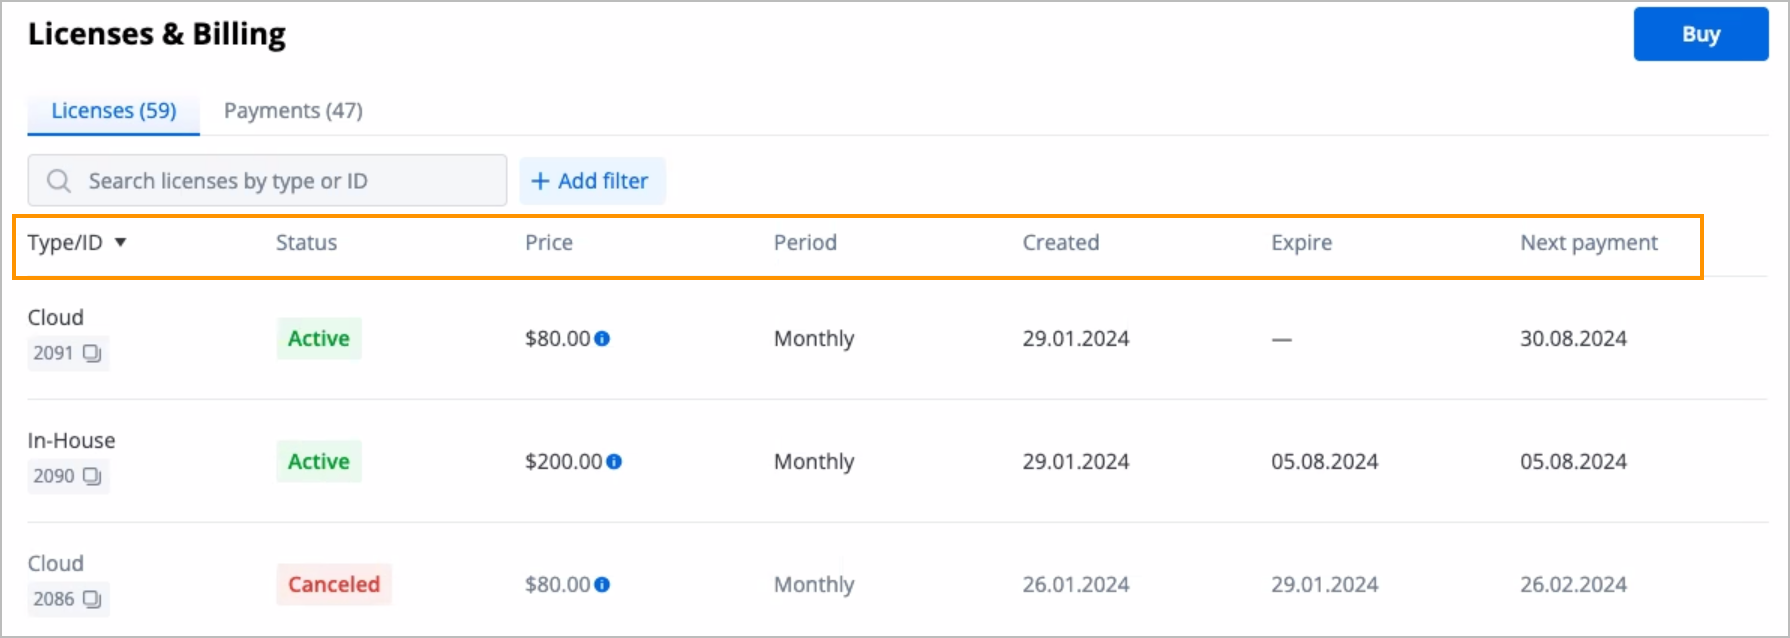
View the table with all your licenses and their details:
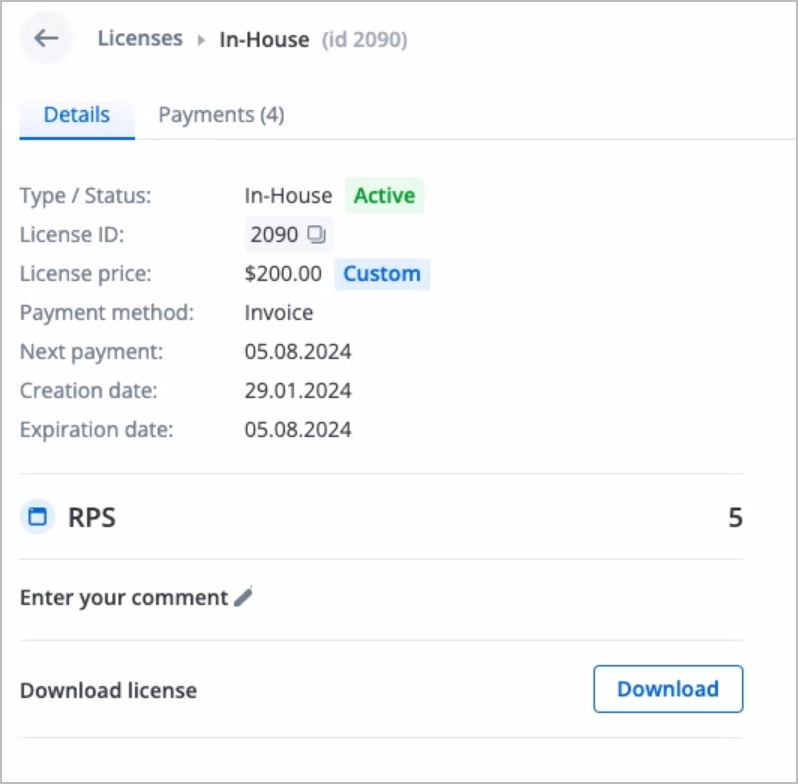
- Type/ID: License type (Cloud, In-House) and ID.
- Type: License type (Cloud, In-House).
- Status: License status (Active, Pending, In Cancellation, Canceled, Expiring, Blocked).
- Price: License purchasing price.
- Period: License payment charging period (Monthly, Annually).
- Created: License creation date.
- Expired: License expiration date.
- Next payment: Next license payment due date.
Search for licenses by their type or ID by using the Search licenses by type or ID field
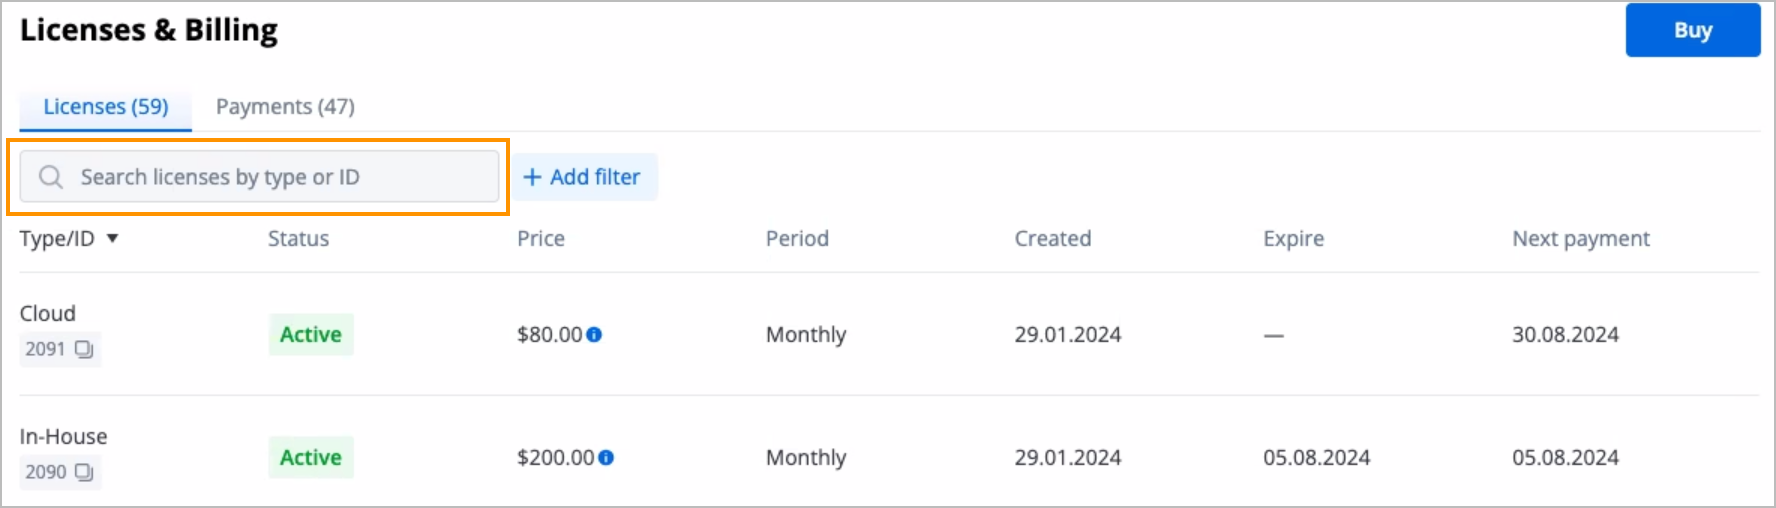
Filter licenses by their status by clicking + Add filter and selecting the needed status from the dropdown list that appears
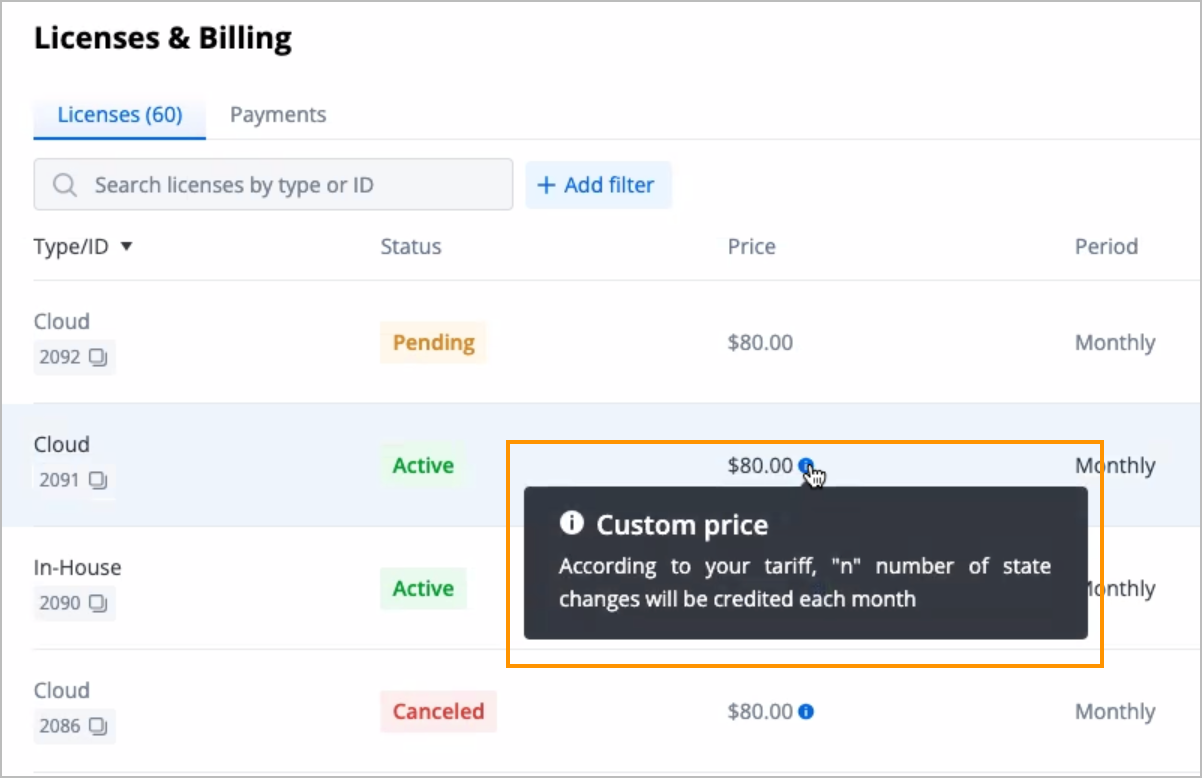
View the current price details on the amount of state changes by clicking the info icon next to the price
Note: The info icon is available only for custom licenses.
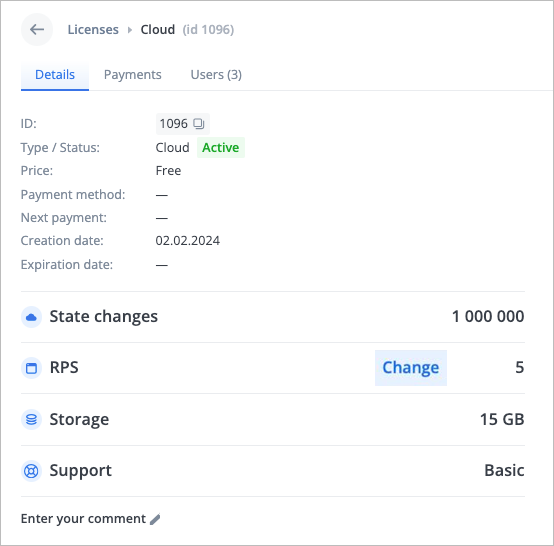
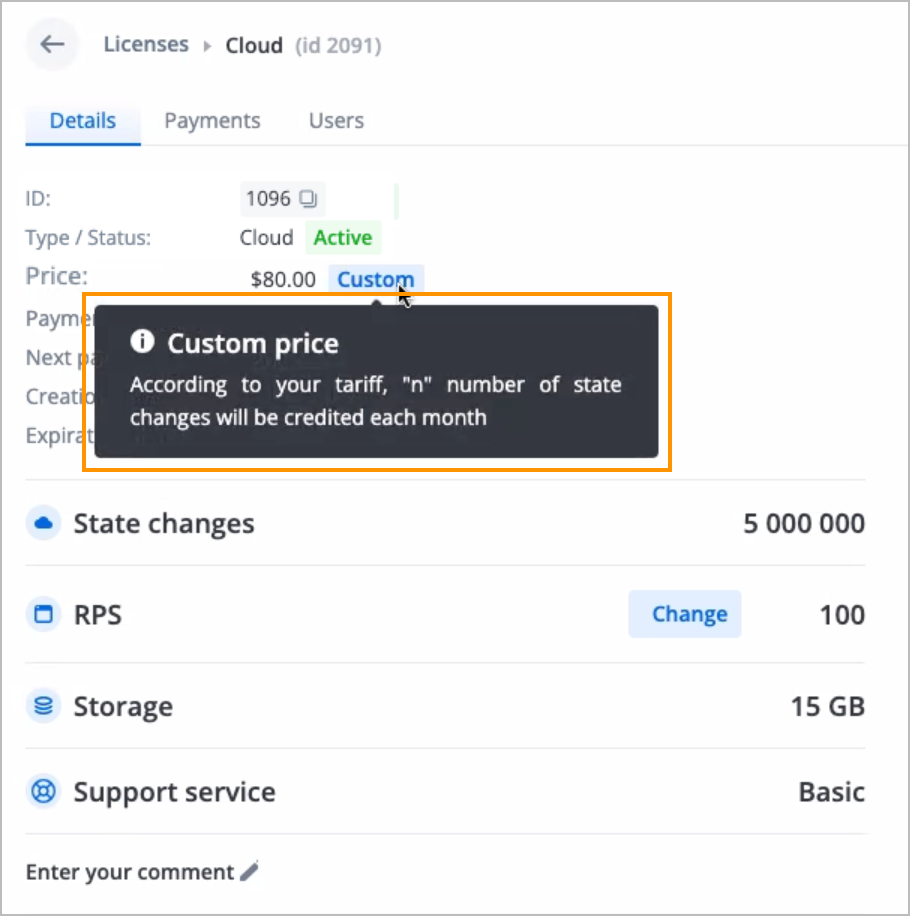
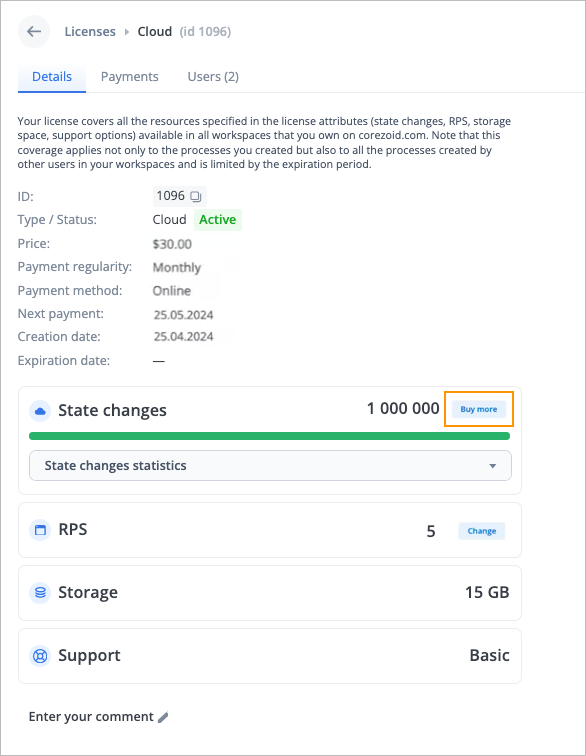
View the needed license details by clicking the needed license:
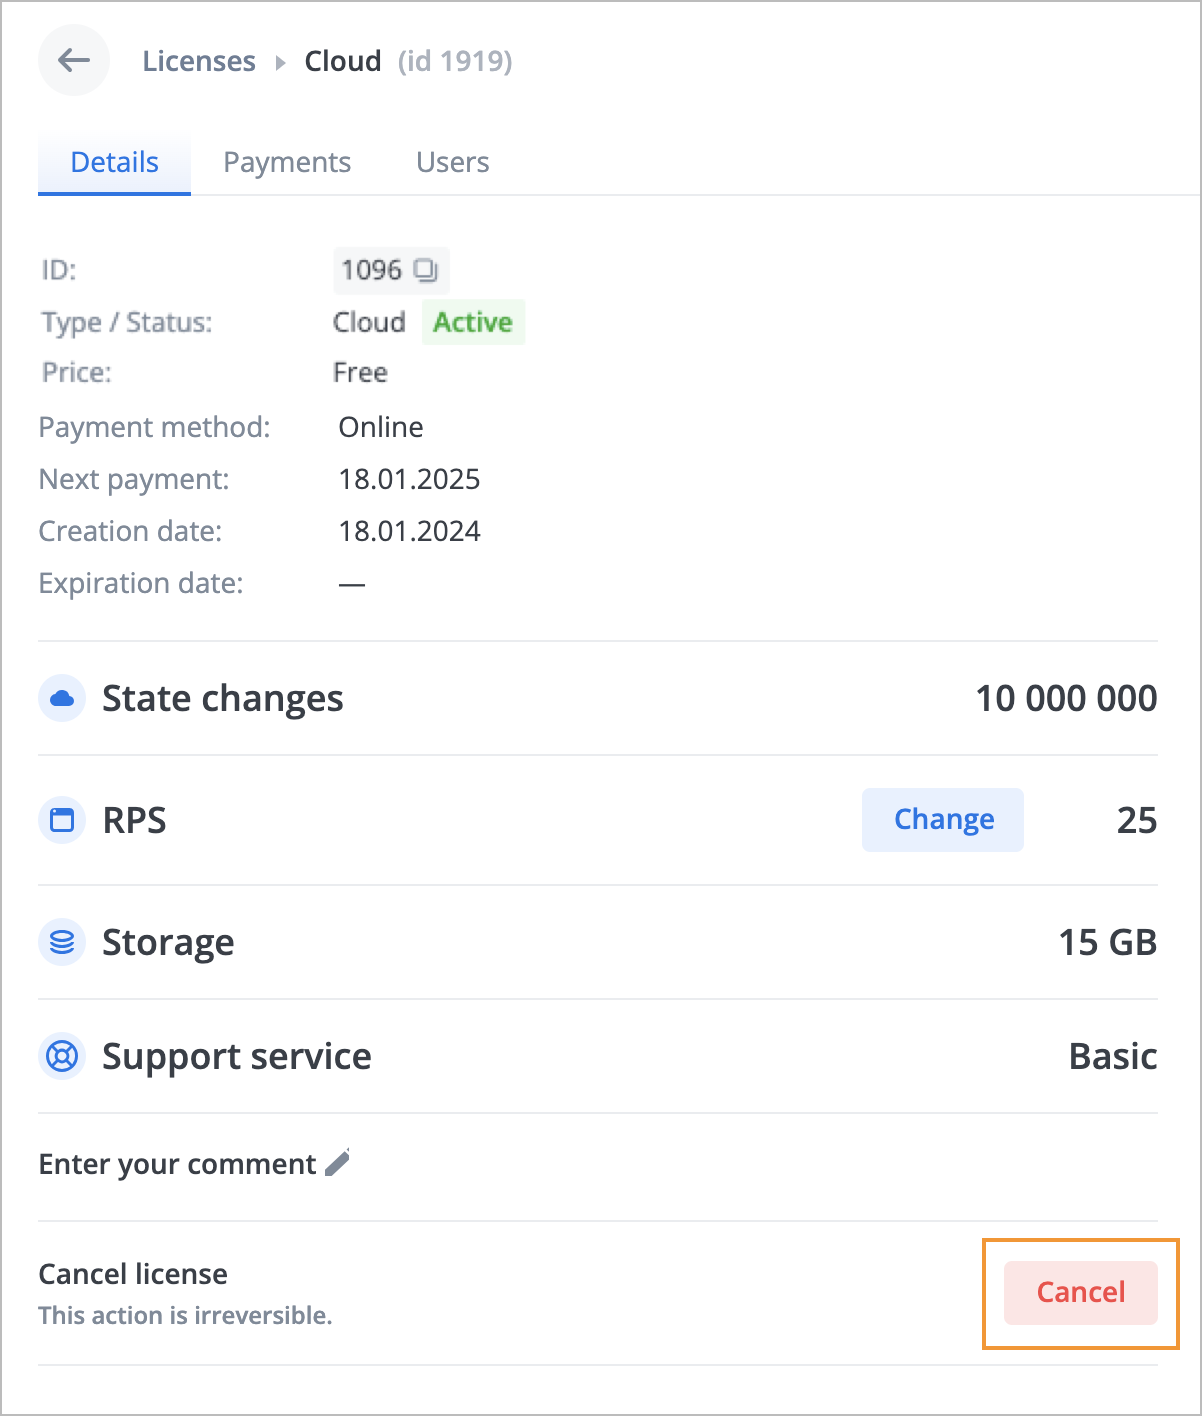
Details tab (for the Paid Cloud License):
- Detailed information
- State changes balance
- Number of RPS
- Storage volume
- Support type
- Comments
Note: For the custom license, view the current price details on the amount of state changes by clicking the info icon next to the price.
Details tab (for the Paid In-House License):
- Detailed information
- Number of RPS
- Comments
Payments tab:
- ID: Payment ID
- Amount: Payment amount
- Period: Payment period
- Created: Payment creation date
- Status: Payment status (Paid, Pending, or Expired)

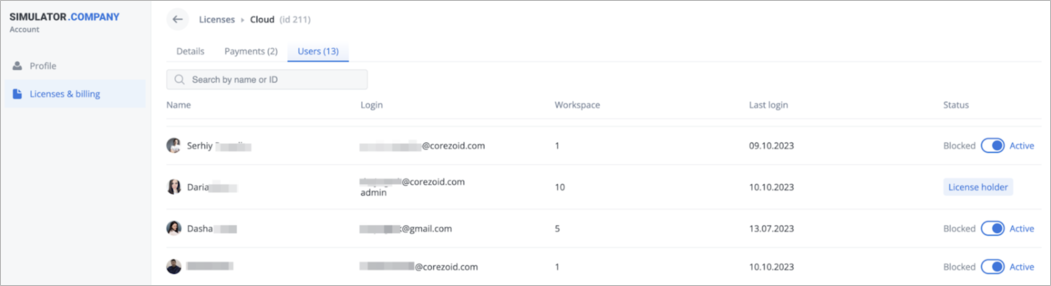
Users tab:
Note: The Users tab is available for the Cloud license in the Active status. The In-House license doesn’t have the Users tab.Name: User name
Login: User login
Workspace: Number of License holder workspaces in which the user is registered
Last login: The date of the user last login to the system
Status: User status (Active, Blocked, License holder)
Note: For one license, there is always one License holder user that can block or make active the needed user by turning the toggle to Blocked or Active correspondingly.


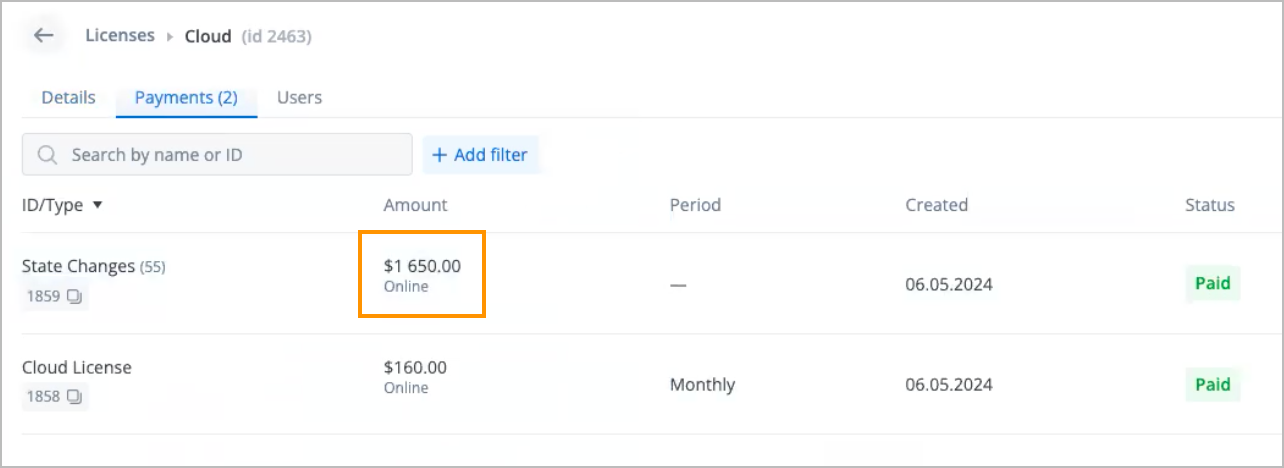
Payments tab
On the Payments tab, you can view payment details:
- Type/ID: License type and ID
- Amount: License purchase amount
- Period: License payment charging period (Monthly, Annually)
Note: You can select the period in which the license is to be purchased. - Created: Payment creation date
- Status: Payment status (Paid, Pending, or Failed)

Buy license
To buy a new license, in the upper-right corner of the Licenses & Billing page, click Buy, and then follow the instructions on the site where you are redirected.

After you’ve bought a new license, it appears on the Licenses tab with the Active status. For more information on license statuses, go to License statuses.
Change RPS
This functionality is available for the Paid Cloud License.
To change the RPS amount:
On the Licenses & Billing page, click the needed license.
On the Details tab of the selected license, click Change.
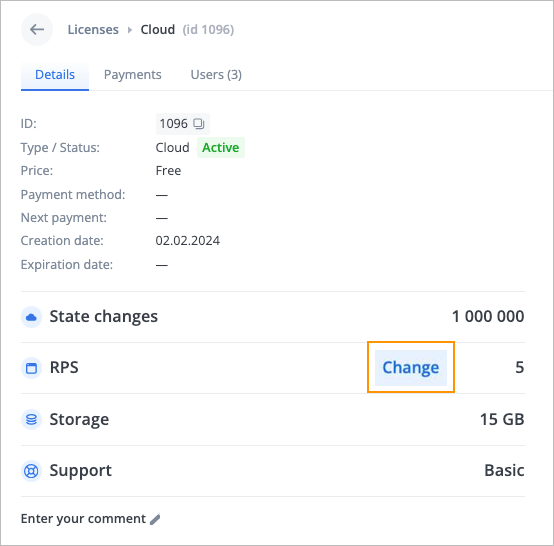
In the Get more RPS dialog, select the needed amount of RPS and click Save.
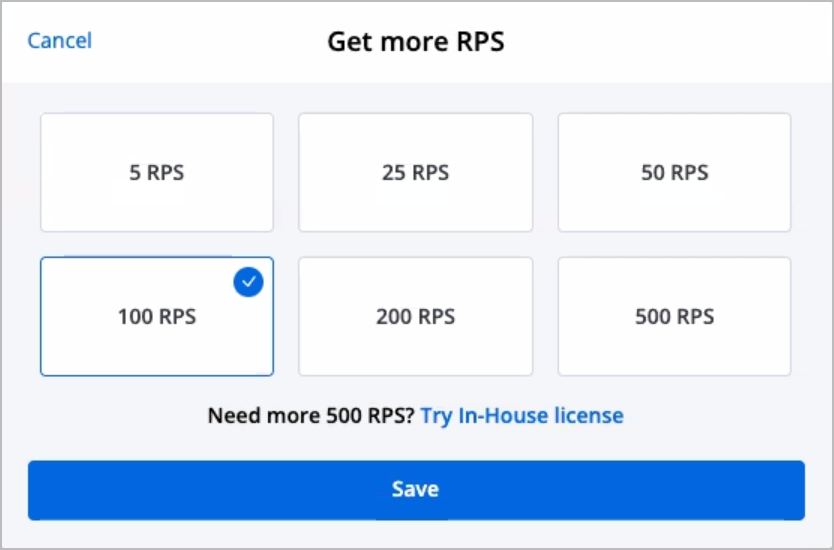


The amount of RPS is changed, and you can see it on the Details tab of your license.
Buy extra state changes
This feature is available for licenses purchased online on the Simulator.Company website.
To buy extra state changes:
On the Licenses & Billing page, click the needed license.
On the Details tab of the selected license, click Buy more.
In the Select state changes dialog, select the needed number of state changes by clicking the plus button and click Buy state changes.
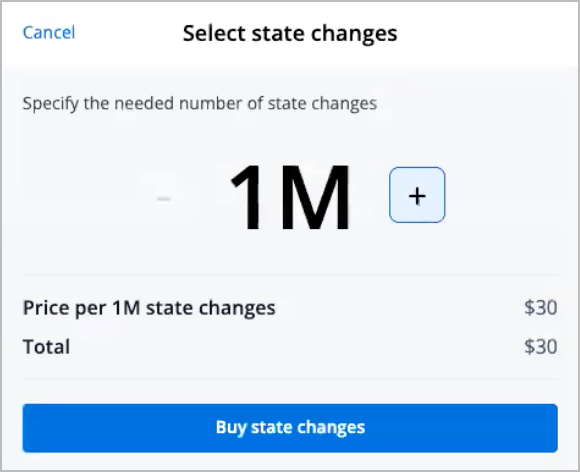
On the Contact information page, fill in all the required fields and click Pay.
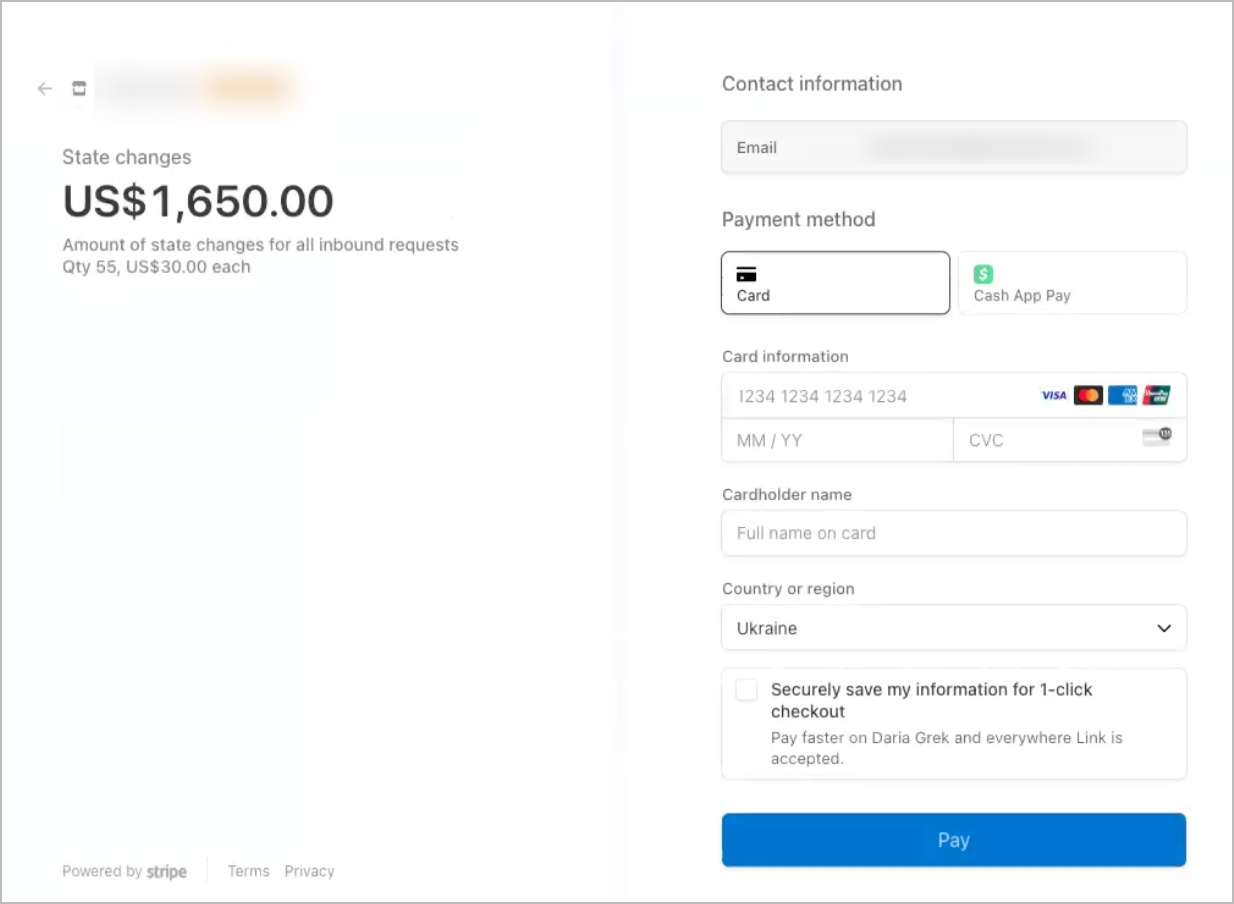


You have bought extra state changes, and you can see them in Extra by clicking State changes statistics.

Note:
When your Regular balance reaches 0, your extra state changes start to be spent in the order they were purchased: from the ones bought earlier to the ones bought lately. The remaining extra state changes are not canceled at the end of the regular period. After buying a regular license, you start to be billed for your Regular balance.

On the Payments tab, you can see all your payments including the ones for extra state changes.


Change payment method
This feature is available for the Cloud license owners who paid the license on the website.
To change the payment method:
On the Licenses & Billing page, click the needed paid license with the Active status.
On the Details tab of the selected license, click Change next to Payment method.
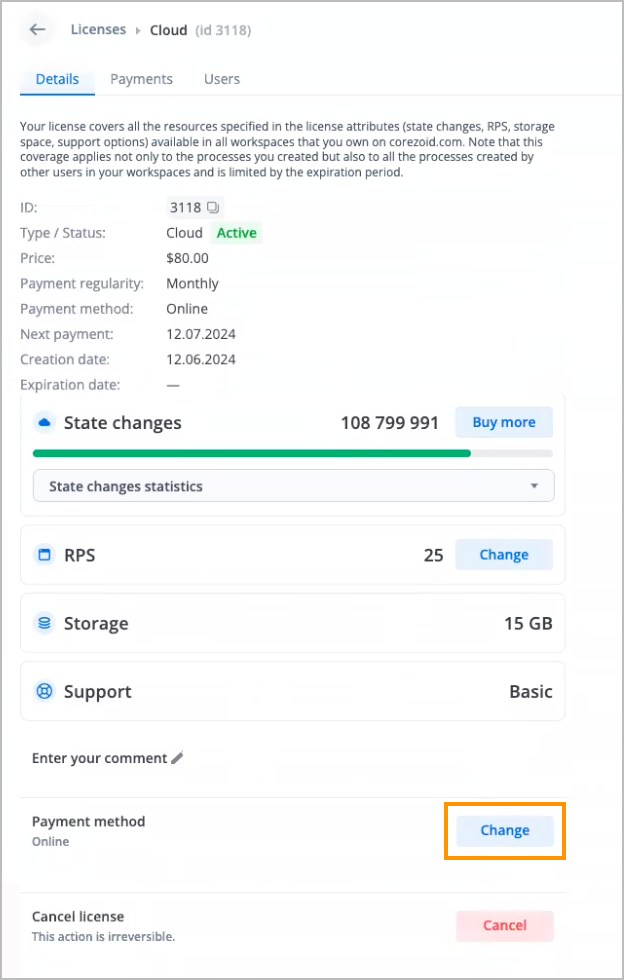
In the Update payment method dialog, enter the new card details and click Add.
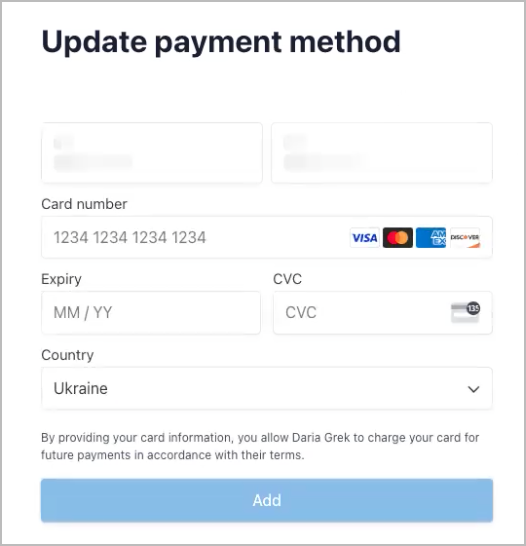


The payment method has been updated.

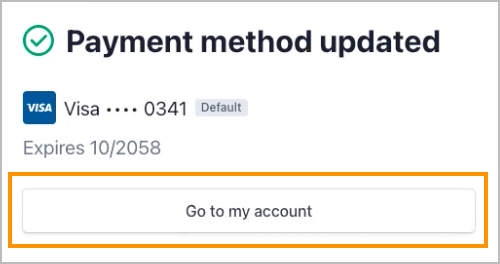
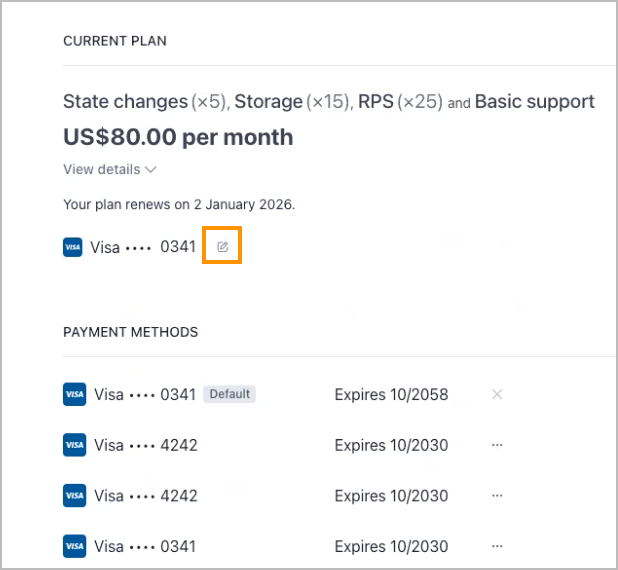
Select default payment card
To select the default payment card among the others:
Click Go to my account.
Next to the set default card, click the edit icon.
On the Select a payment method page, select the needed payment card and click Update.
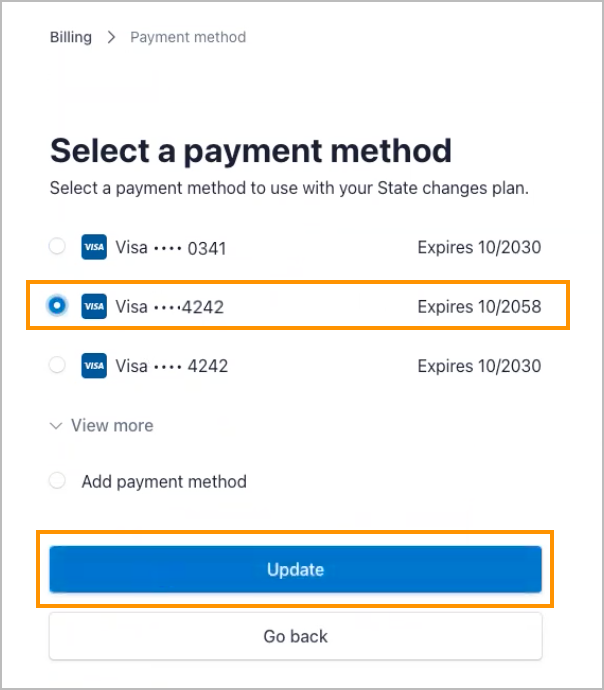


The new default payment card has been selected, the Default label appears next to the payment card, and the next payment will be performed using the card.
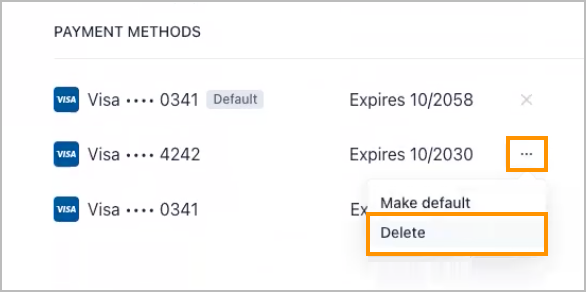
You can also change the payment method by clicking the options icon next to the needed card and selecting Make default.

Delete payment card
To delete a payment card from your card list:
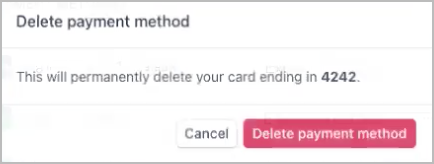
Click the options icon next to a card and select Delete.
In the Delete payment method dialog, click Delete payment method.


The payment card has been deleted and doesn't appear in your card list.
Download license
This functionality is available for the Paid In-House License.
To download an In-House license:
On the Licenses & Billing page, click the needed In-House license.
On the Details tab of the selected license, click Download.
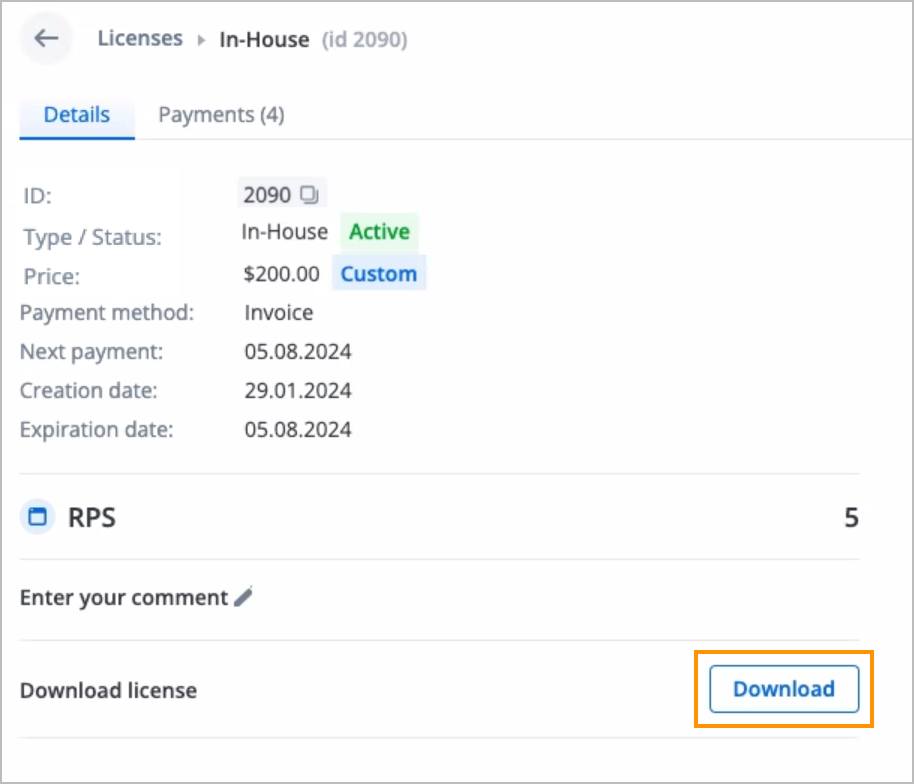


The In-House license is downloaded, and you can upload it to your environment.
Cancel license
This functionality is available for the Paid Cloud License.
To cancel a license:
On the Licenses & Billing page, click the needed license.
On the Details tab of the selected license, click Cancel.
In the confirmation Cancel license dialog, click Submit.
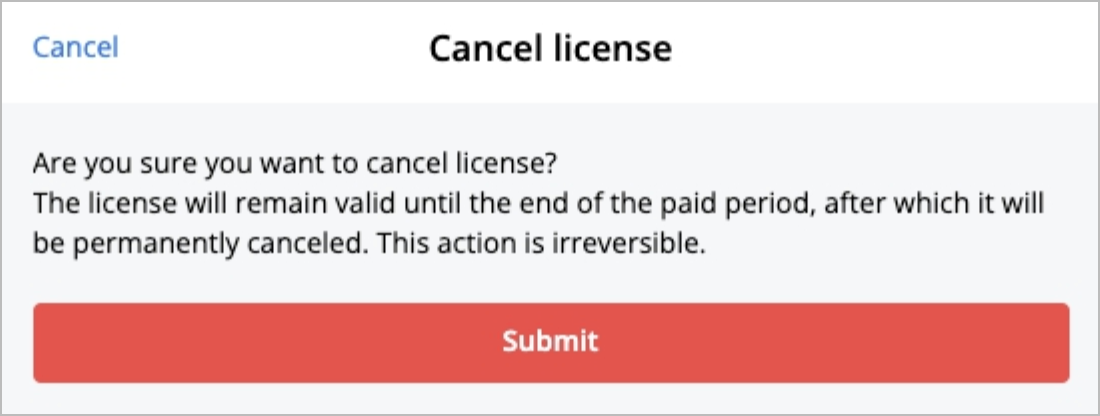


The license gets the In Cancelation status. After the paid period ends, the license gets the Canceled status.

Was this article helpful?