Roles
- 02 Jul 2024
- 4 Minutes to read
- Contributors

- Print
- DarkLight
- PDF
Roles
- Updated on 02 Jul 2024
- 4 Minutes to read
- Contributors
- Print
- DarkLight
- PDF
Article summary
Did you find this summary helpful?
Thank you for your feedback
On the Roles page, you can:
- Find a role.
- View the roles in two different ways.
- Create a role.
- Check user role details and manage permissions.
Note: For more information about permissions, go to Permissions. - Perform additional actions on a role.

Find role
To find a role, in the Search field of the Roles page, enter the needed role name, and in the list that appears, select the role you are looking for.

View roles
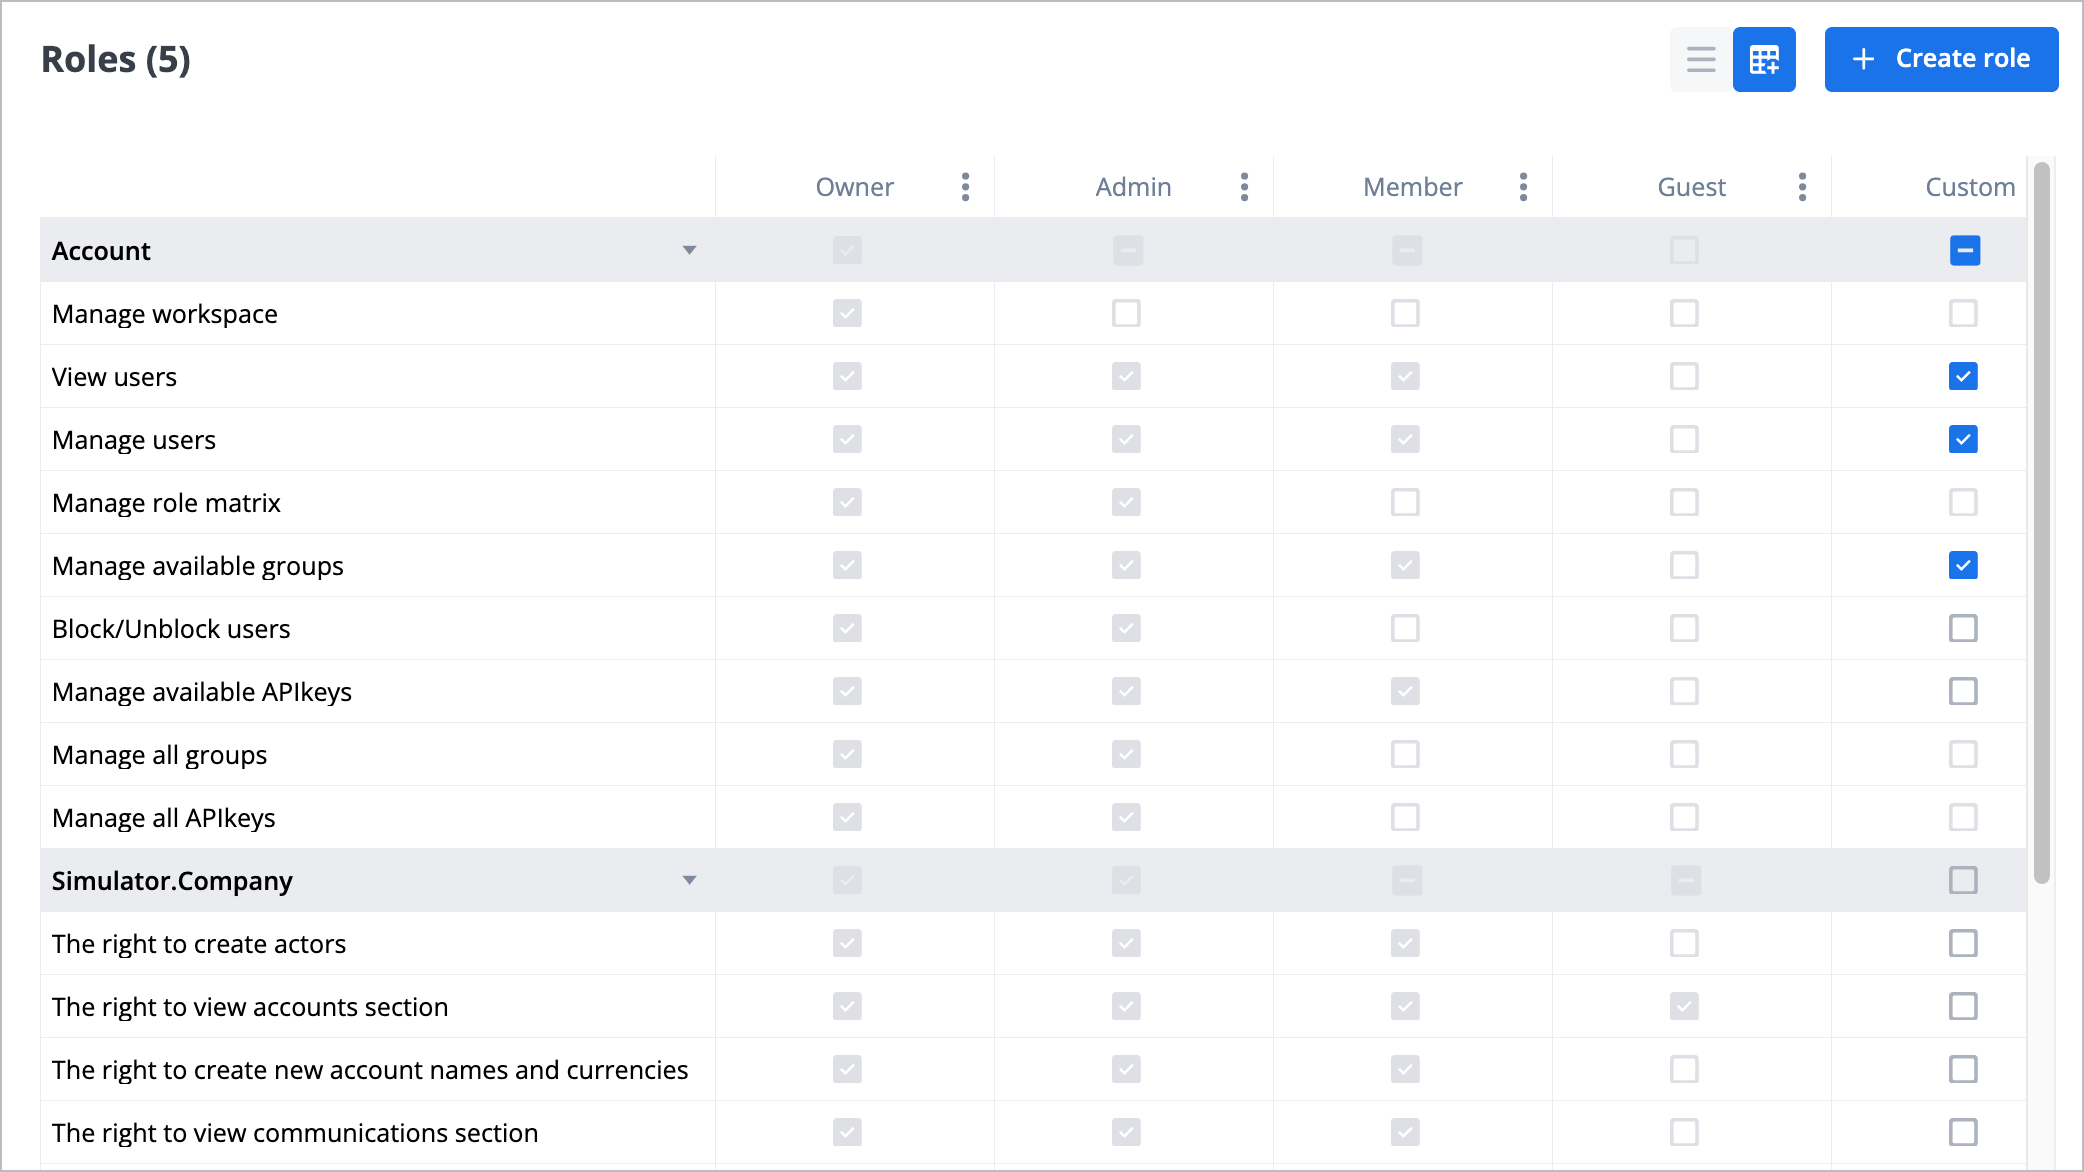
On the Roles page, you can view the roles in two different ways:
Click the table icon
 to view the table with role permissions and corresponding roles.
Click the row icon
 to view the role list with a number of permissions and users for each role.
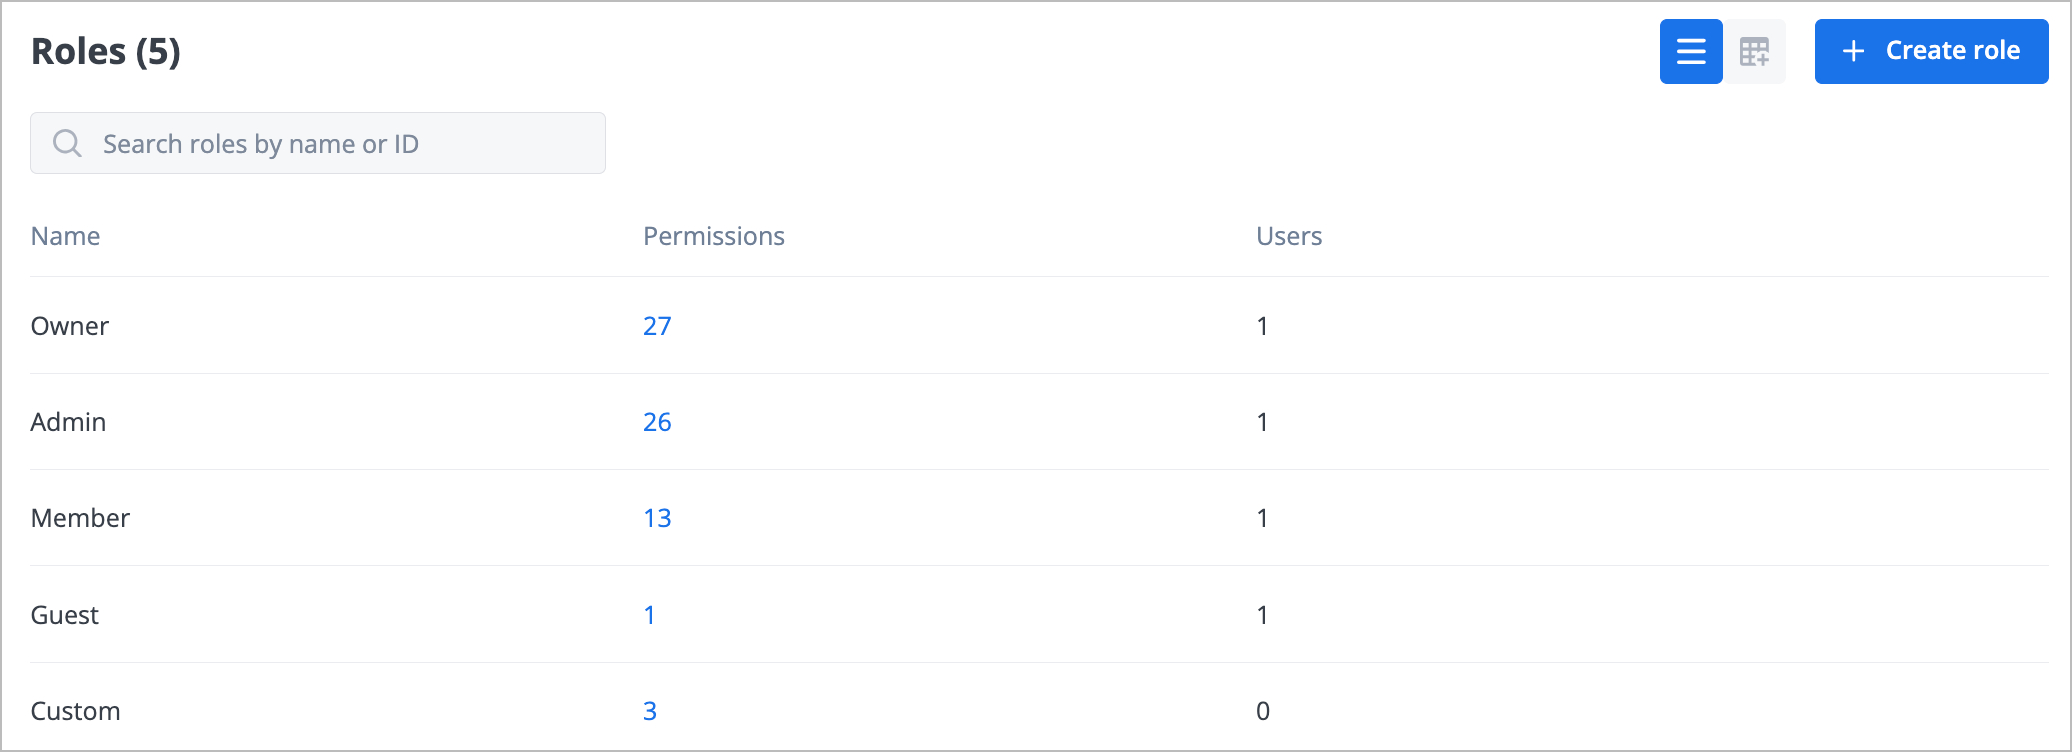

 to view the role list with a number of permissions and users for each role.
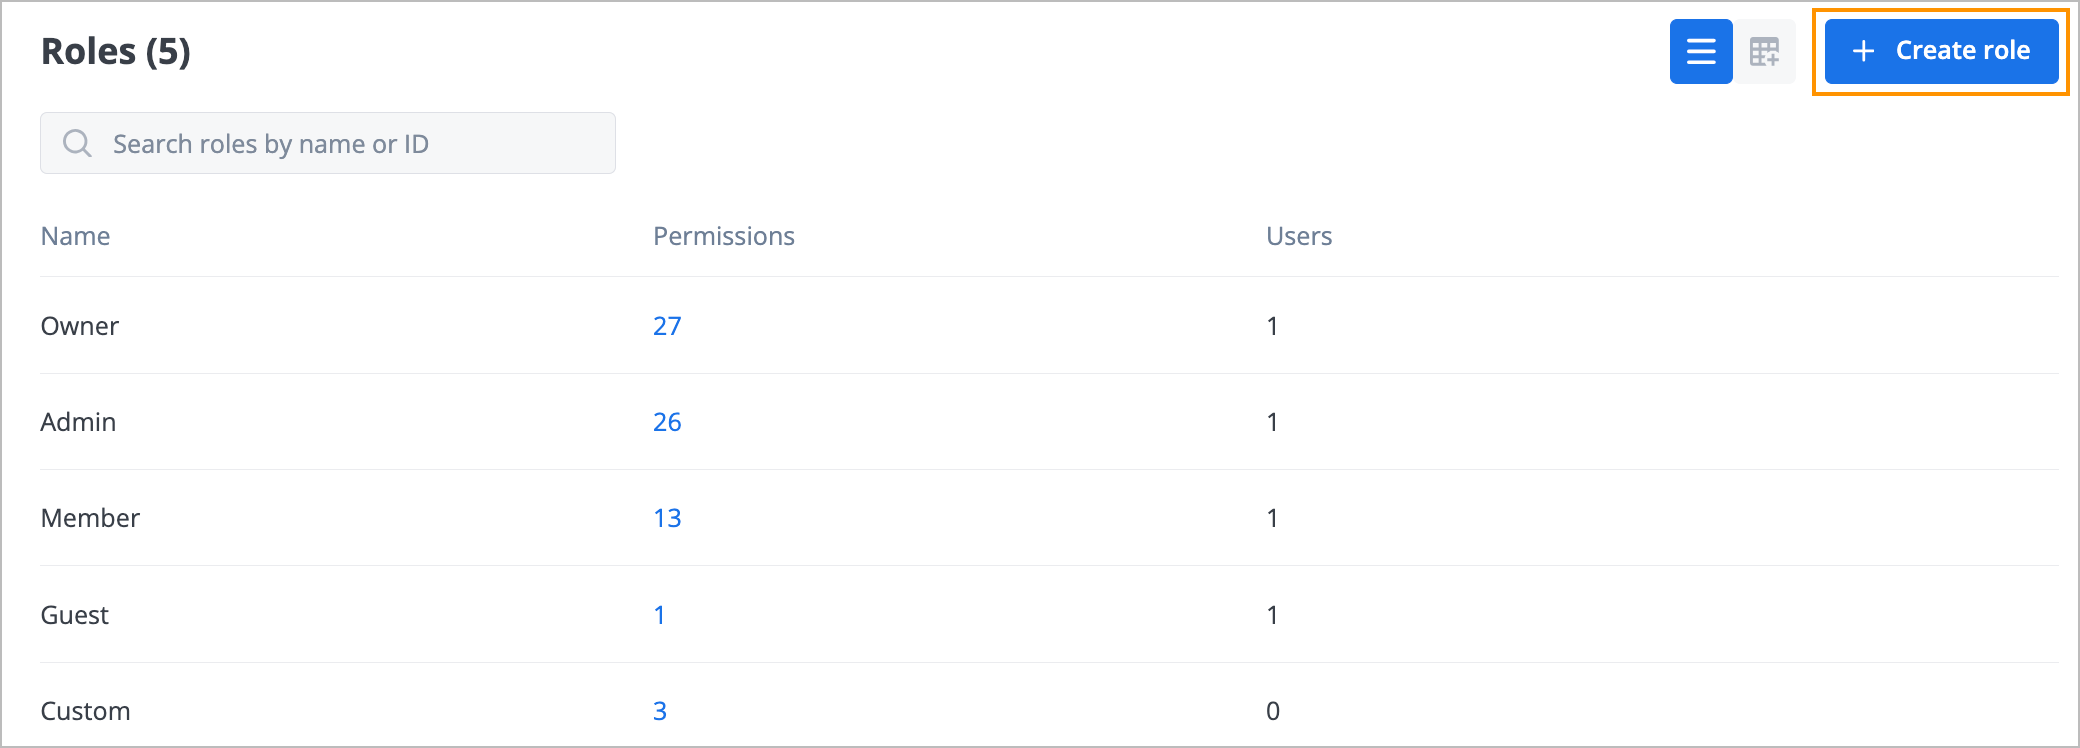
Create role
To create a role:
In the upper-right corner of the Roles page, click Create role.
In the New role dialog, enter the role name, add users (optional), and then click Create.
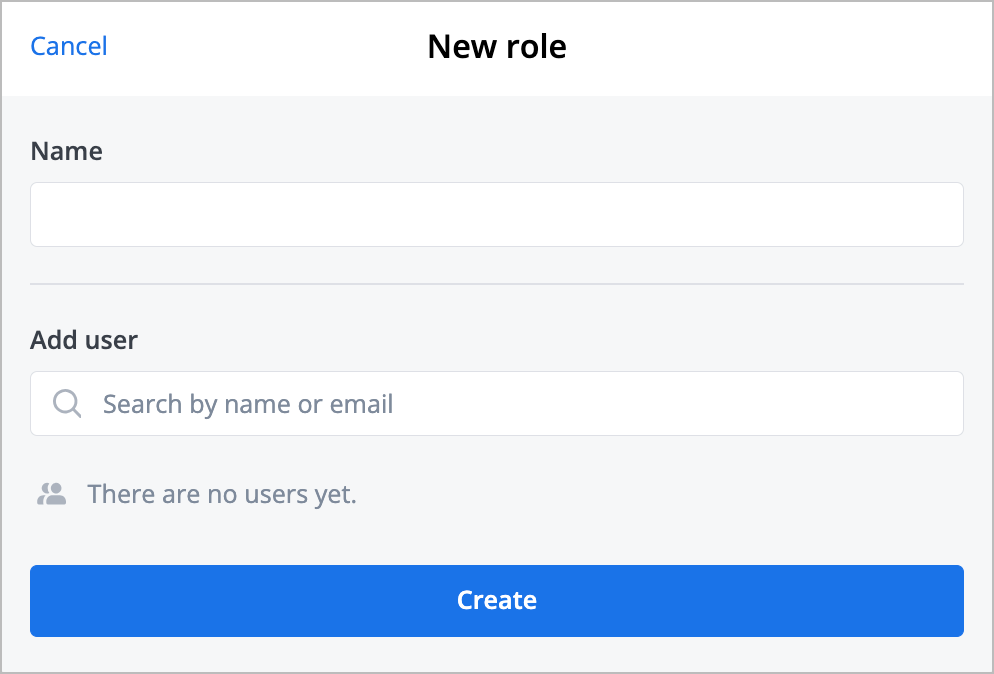


The new role is created and the success message appears at the top of the Roles page.

Check role user details and manage permissions
Note: You can add or remove permissions to/from the role if you have the appropriate permission for your current role. If you have the Owner or Admin role, you can configure the permissions for the roles in your list.
To check role user details and add or remove permissions:
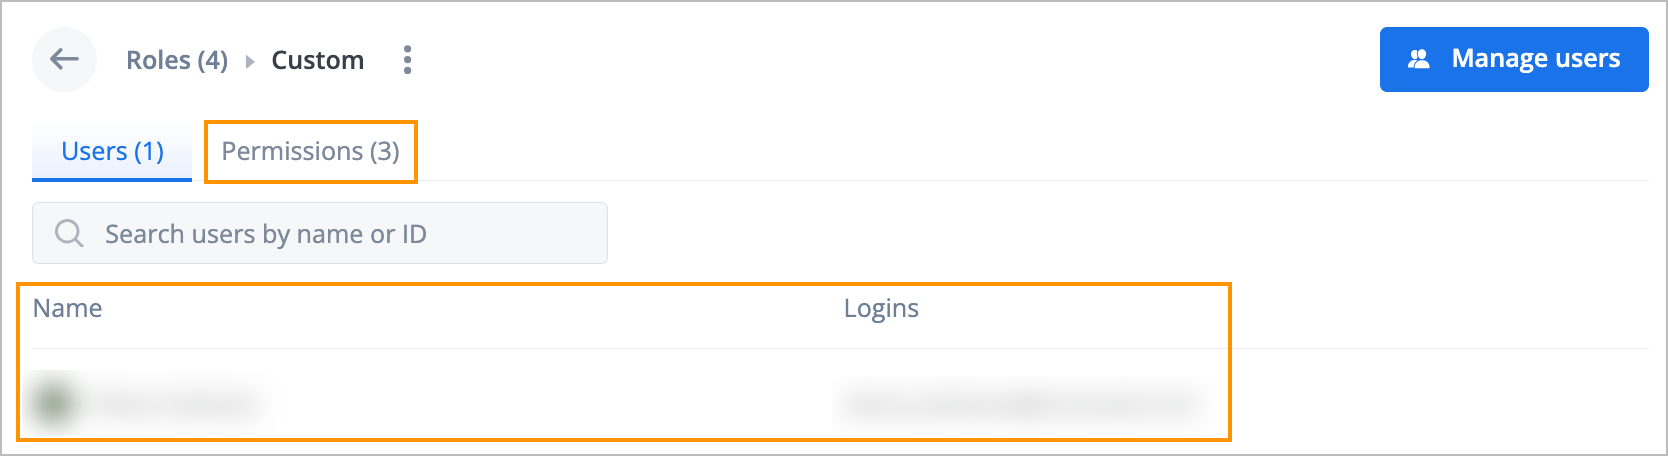
On the Roles page, select the needed role.
On the Users tab of the selected role, view the names and emails of the users with the selected role, and then click the Permissions tab.
On the Permissions tab, select or clear the needed permissions’ checkboxes and click Save.
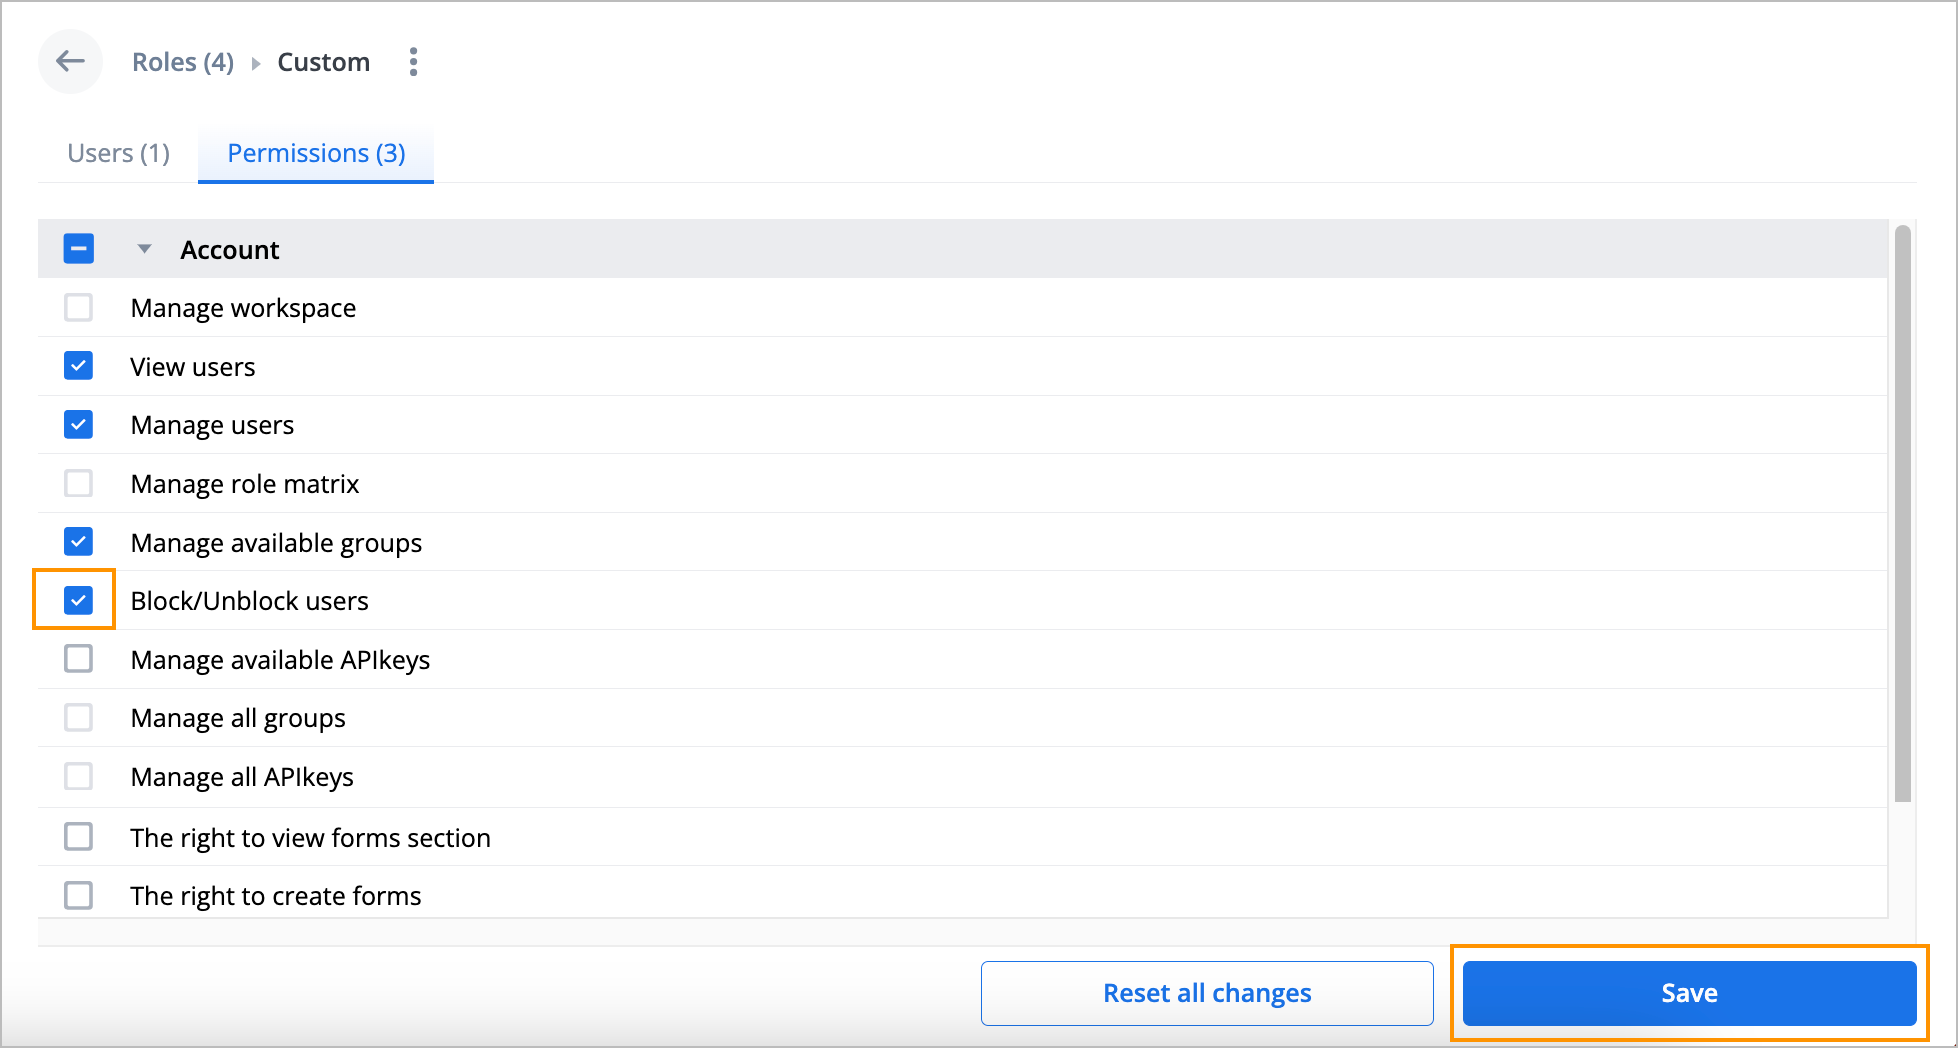


The permission list of the selected role is updated.
Note: You can use an alternative way to add or remove permissions:
In the upper-right corner of the Roles page, click the table icon  , select or clear the needed permissions checkboxes, and then click Save.

Perform additional actions on role
Note: You can rename or remove a role if you have the appropriate permission for your current role. If you have the Owner or Admin role, you can configure the permissions for the roles in your list. For more information on role permissions, go to Permissions.
On the Roles page, you can perform additional actions on a role:
Rename role
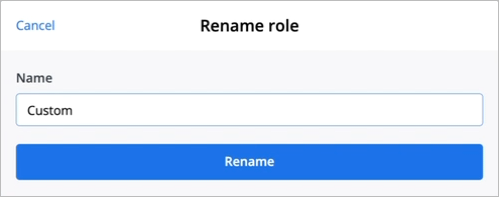
To rename a role:
Hover over the needed role and click the edit icon
 .
.

In the Rename role dialog, edit the current role name and click Rename.
 .
.

The role is renamed, and you can see the new role name in the role list.
Copy role ID
To copy a role ID, hover over the needed role and click the copy icon  . The role ID is copied, and the success message appears at the top of the Roles page.

Delete role
To delete a role:
Hover over the needed role, click the options icon
 , and then click Delete.
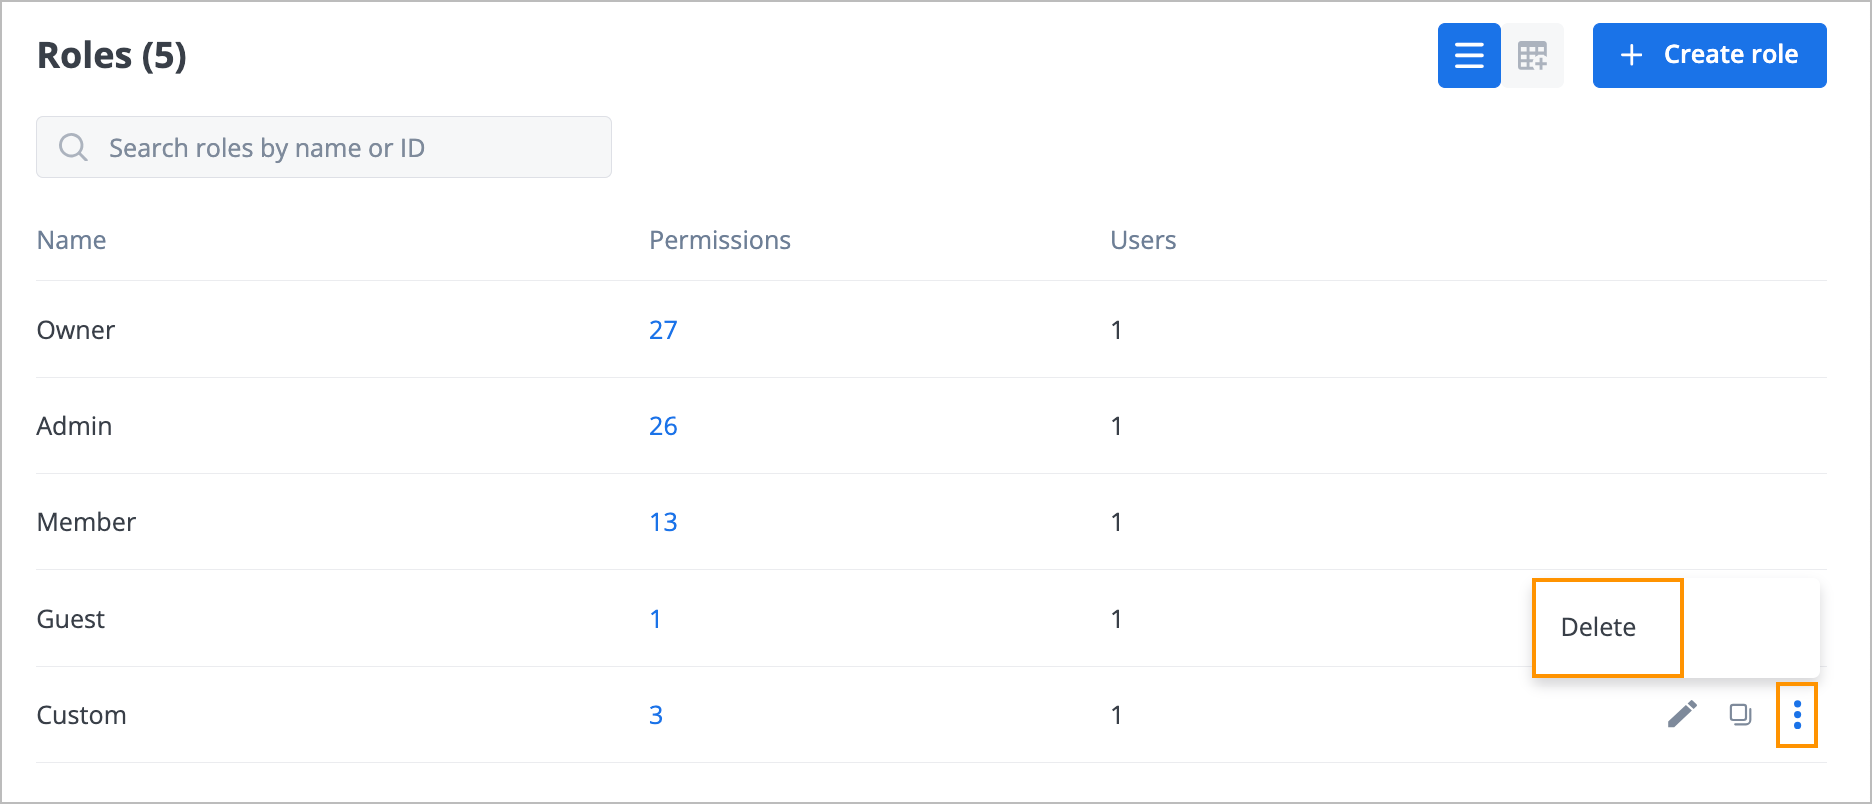
In the confirmation Delete role dialog, click Delete.

 , and then click Delete.

The role is deleted and doesn’t appear in the role list. The users that had the deleted role are not removed from the Workspace.
Permissions
A regular workspace has two permission categories Account and Simulator.Company.
Account: Is available in every workspace of the environment. Includes the following permissions:
- Manage Workspace: Remove or rename own workspace.
- View users: View users, all cookie users, own API keys of the workspace.
- Manage users: Invite, remove users to/from the workspace, add users to the workspace without invite, assign a new role to a user.
- Manage role matrix: Create, rename, and delete a custom role, add or remove a permission to/from a custom role.
- Manage available groups: Create a group, rename and delete own group, add a user to a group, delete a user from a group.
- Manage available API keys: View own API keys, add an API key, remove own API key.
- Manage all groups: Create a group, rename and delete any group, add a user to any group, delete a user from any group.
- Manage all API keys: View all API keys, add or remove any API key in the workspace.
- Block / unblock users: Block or unblock users in the workspace.
- Manage all webhooks: Create a webhook for a workspace.
Simulator.Company: Is available in every workspace of the environment. Includes the following permissions:
- Moderate actors reactions: View, comment, rating, sign, done, reject, freeze, and execute an event, leave a comment or a reaction to an event.
- Create actors: Create actors in Simulator.
- View Account space: View the Account space with users, invites, roles, groups, keys, and settings.
- Create account names and currencies: Create account and currency pairs in an account.
- View communications: View comments and reactions in the Chat tab of an event.
- View scripts: View scripts on the Scripts page.
- Create scripts: Create scripts on the Scripts page.
- View forms: View forms on the Forms page.
- Create forms: Create forms on the Forms page.
- View settings: View Settings pages (Webhooks, Notifications, and Import & Export).
- Manage Workspace settings: Modify permissions of other users.
- Import / export actors and forms: Import and export actors and forms on the Import & Export page.
- Connect to other companies in Simulator Cloud: Connect to other companies via a created company card on the Outer Graph page.
- Publish a company to Simulator Cloud: Publish a company to connect it to other companies.
- View transactions: View transactions on the Transactions page.
- Modify system actors: Edit system actor details or remove system actors.
- View transfers: View transfers on the Transfers page.
- Create transfers: Create transfers on the Transfers page.
Was this article helpful?