Graphs
- 14 Mar 2024
- 5 Minutes to read
- Contributors

- Print
- DarkLight
- PDF
Graphs
- Updated on 14 Mar 2024
- 5 Minutes to read
- Contributors
- Print
- DarkLight
- PDF
Article summary
Did you find this summary helpful?
Thank you for your feedback
Overview
A graph is a model of a system or an object, which represents its structure and connections between separate elements or parts considering the changes. Graphs in Simulator consist of node actors and edge actors between them.
Graphs are dynamic, illustrative, and highly customizable allowing for easy navigation through models and convenient management of model elements.
Using graphs, you can build an interactive model of literally any system, process, or organization. Graphs and actors are the tools for creating a digital twin of a particular object, or device, and a whole organization or network of organizations. Owing to actors' recursive nature (a graph consists of actors each of which can be a graph and so on), you can expand an existing graph by adding new devices or organizations as well as zoom in by adding new process or organization details.
General Menus
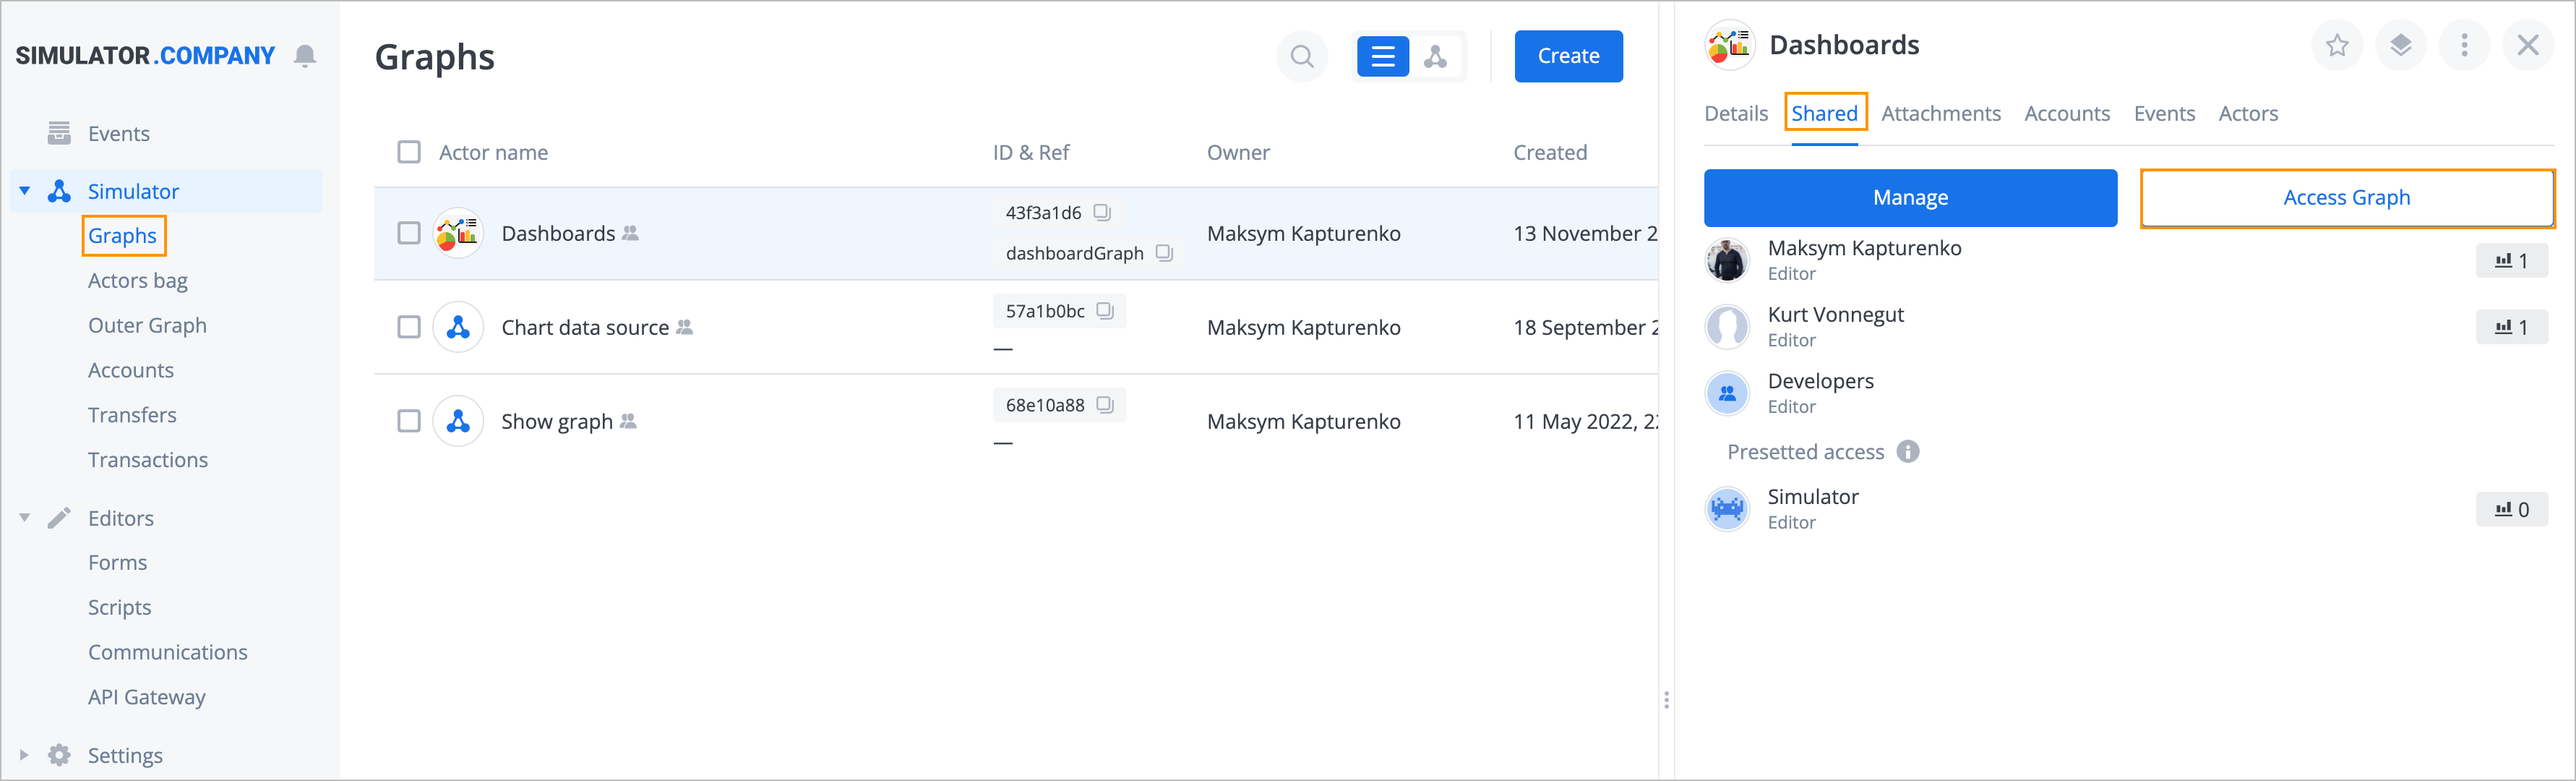
To work with graphs, open the Simulator->Graphs subsection:

In the Graphs subsection, you can:
- View the table of graphs in the workspace
- View graphs' actor ID, owner, and creation date and time in the table
- Manage graphs in the table using the right-side graph menu
- Create a graph.
In the group actions menu, you can do the following: - Share a graph
- Add graph to the export queue
- Remove a graph
Right-side graph menu
In the graphs table, you can manage graphs using the right-side graph menu. To open the menu, click the menu icon near the graph you want to manage:
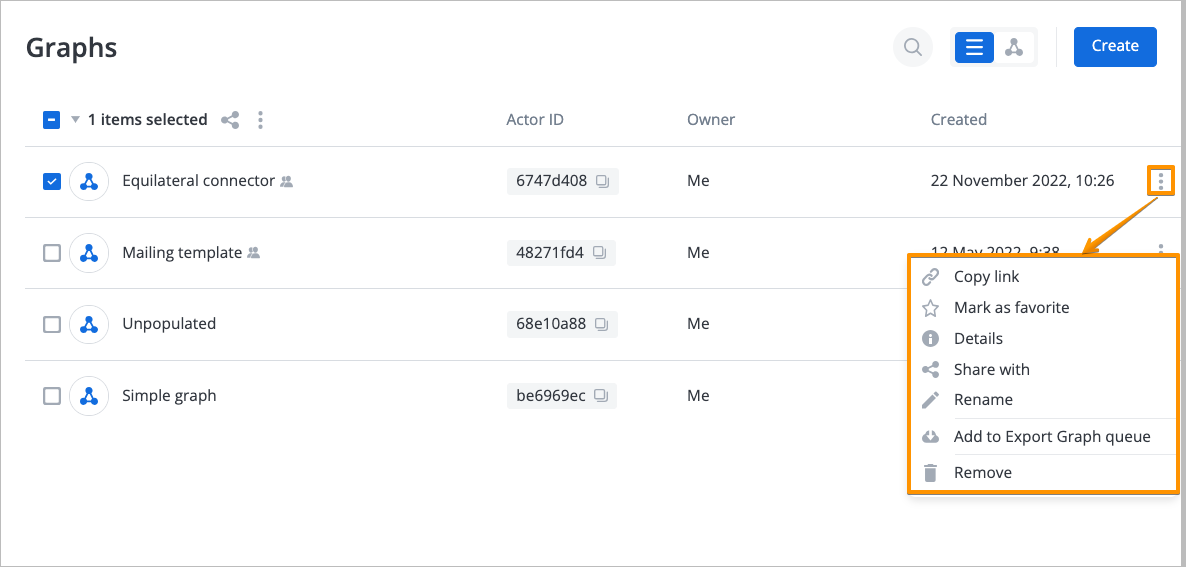
In the right-side menu, you can:
- copy graph link
- mark/unmark a graph as favorite
- open graph details
- share a graph
- rename a graph
- add a graph to export graph queue
- remove a graph
To open the graph details menu, select the Details item in the graph menu:
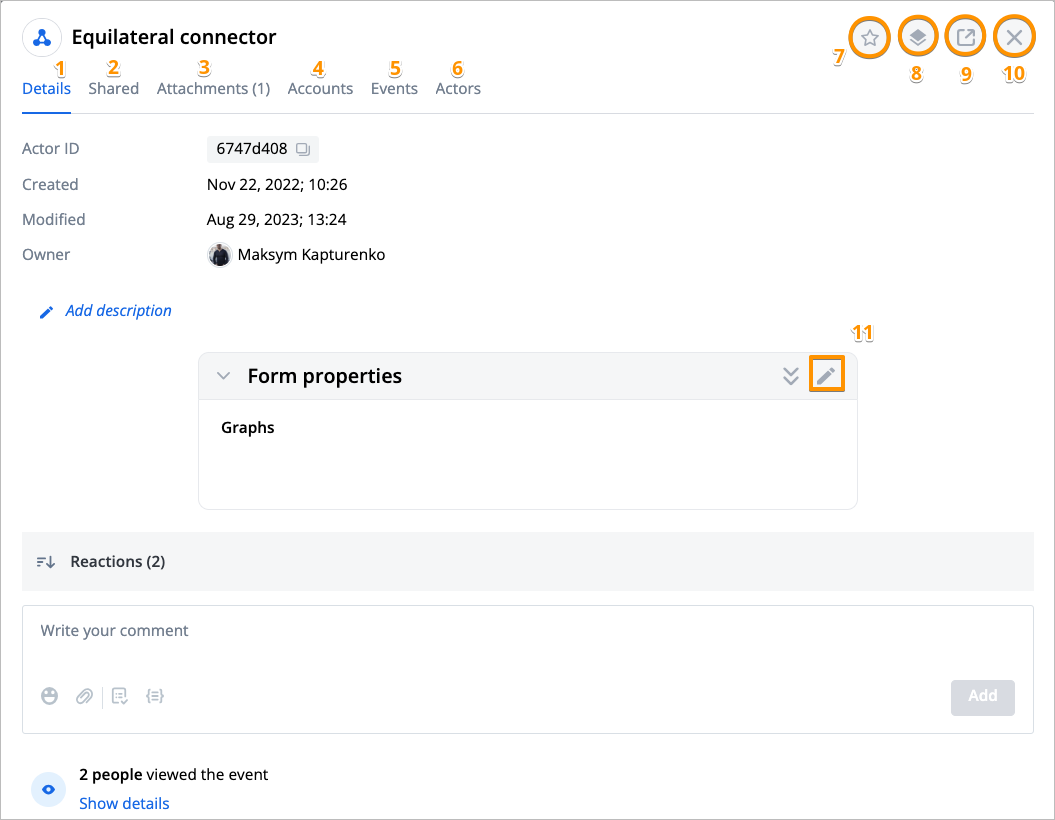
The graph details menu has the following tabs:
- Details (1) - opens by default and provides the main controls of the graph details menu
- Shared (2) - shows the list of users the graph is shared with, which you can manage. The list is empty by default
- Attachments (3) - shows the list of files attached to the graph and allows you to remove and attach new files. The list is empty by default
- Accounts (4) - shows the list of graph accounts, which you can manage
- Events (5) - shows the list of events attached to the graph, which you can manage. The list is empty by default
- Actors (6) - shows the list of actors attached to the graph, which you can manage. The list is empty by default
- Mark as favorite (7) - marks/unmarks the graph with a star as favorite. You can do the same in the right-side graph menu
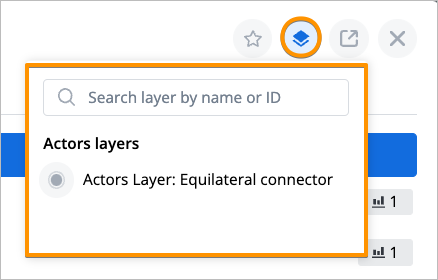
- Show layers with the actor (8) - shows layers that relate to the graph in the list with a quick search field:
- Open in new tab (9) - opens the graph form menu with the graph info panel in a new browser tab:
- Close (10) - closes the graph details menu
- Form edit (11) - opens the graph form edit menu.
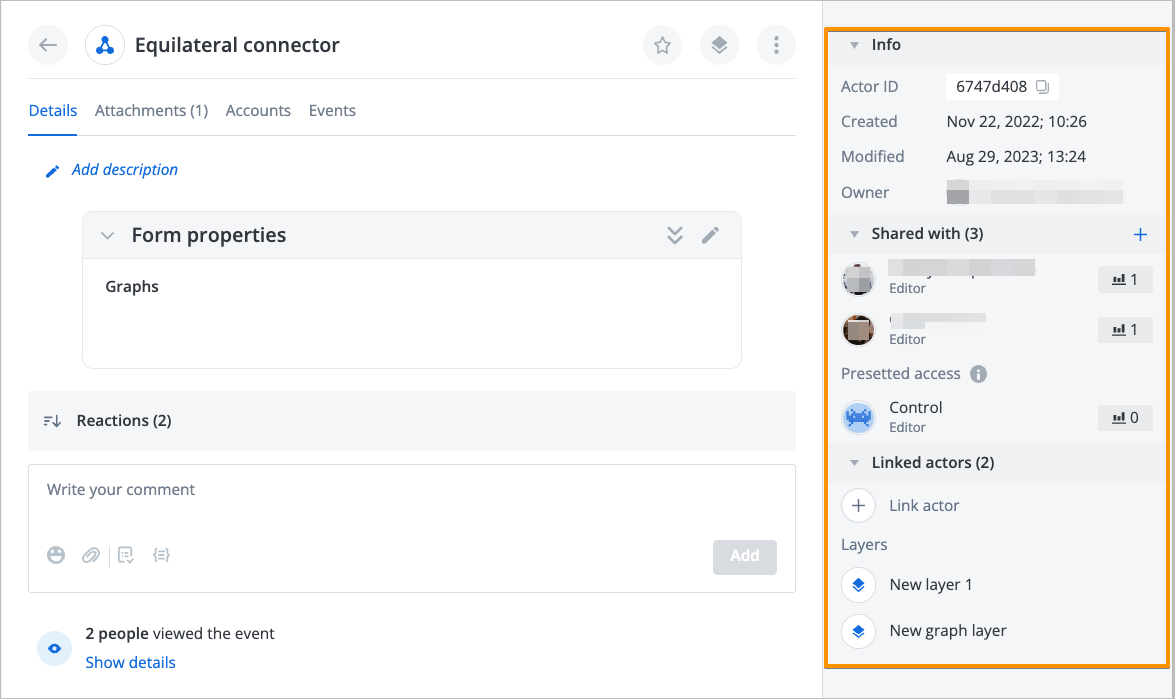
Shared tab
On the Shared tab of the right-side graph menu, you can view the table of users with which the graph is shared:
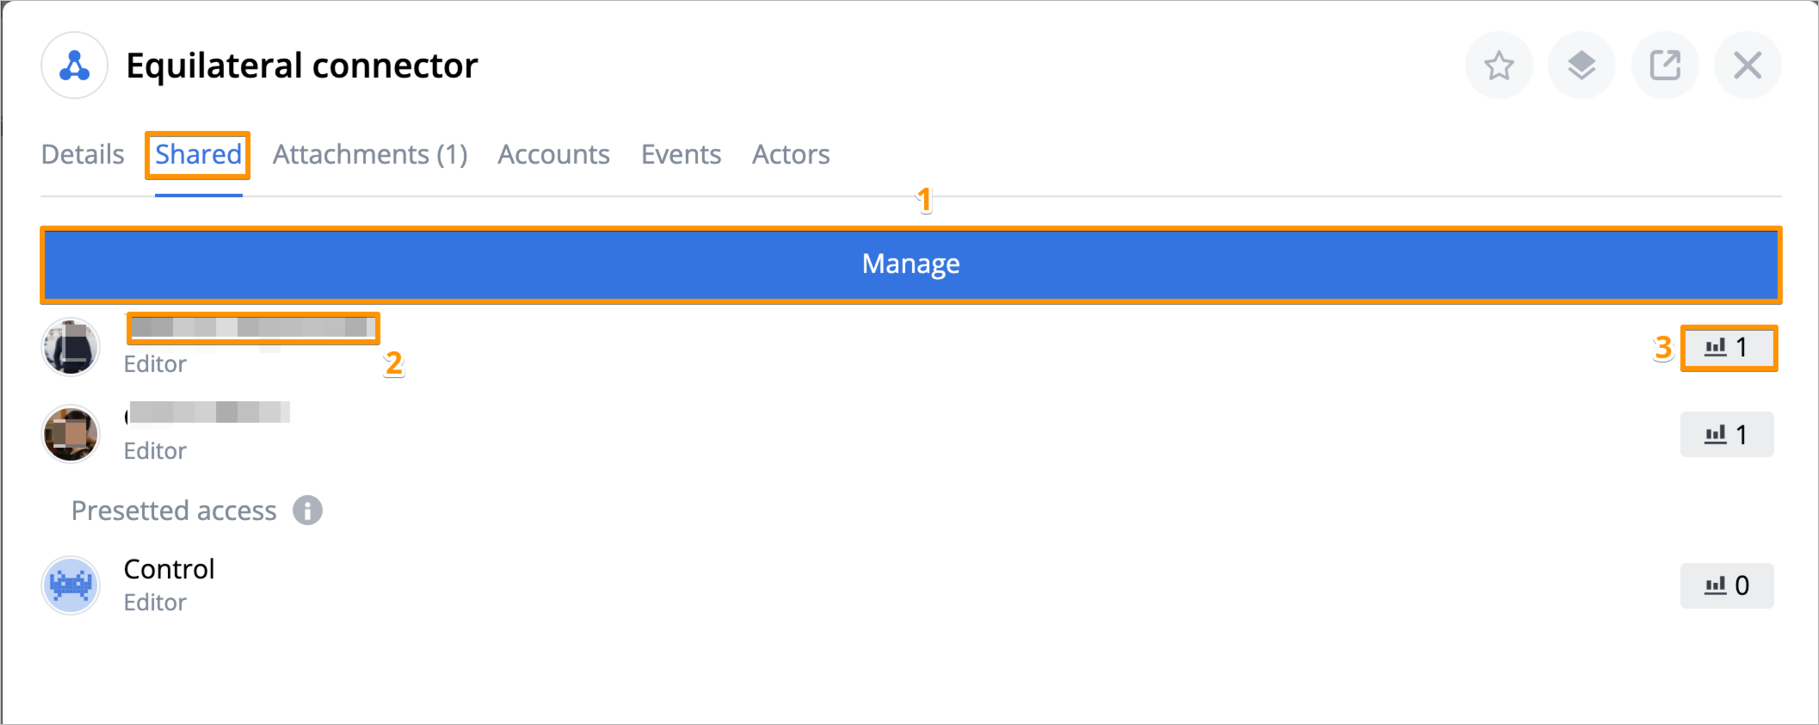
To manage graph sharing rights and users and user groups table, click Manage (1). In the table, you can also click a user name (2) or the user activity rating (3, shows the number of user graph-related actions) to view the user actor window.
Clicking the Manage button opens the manage access rules window:
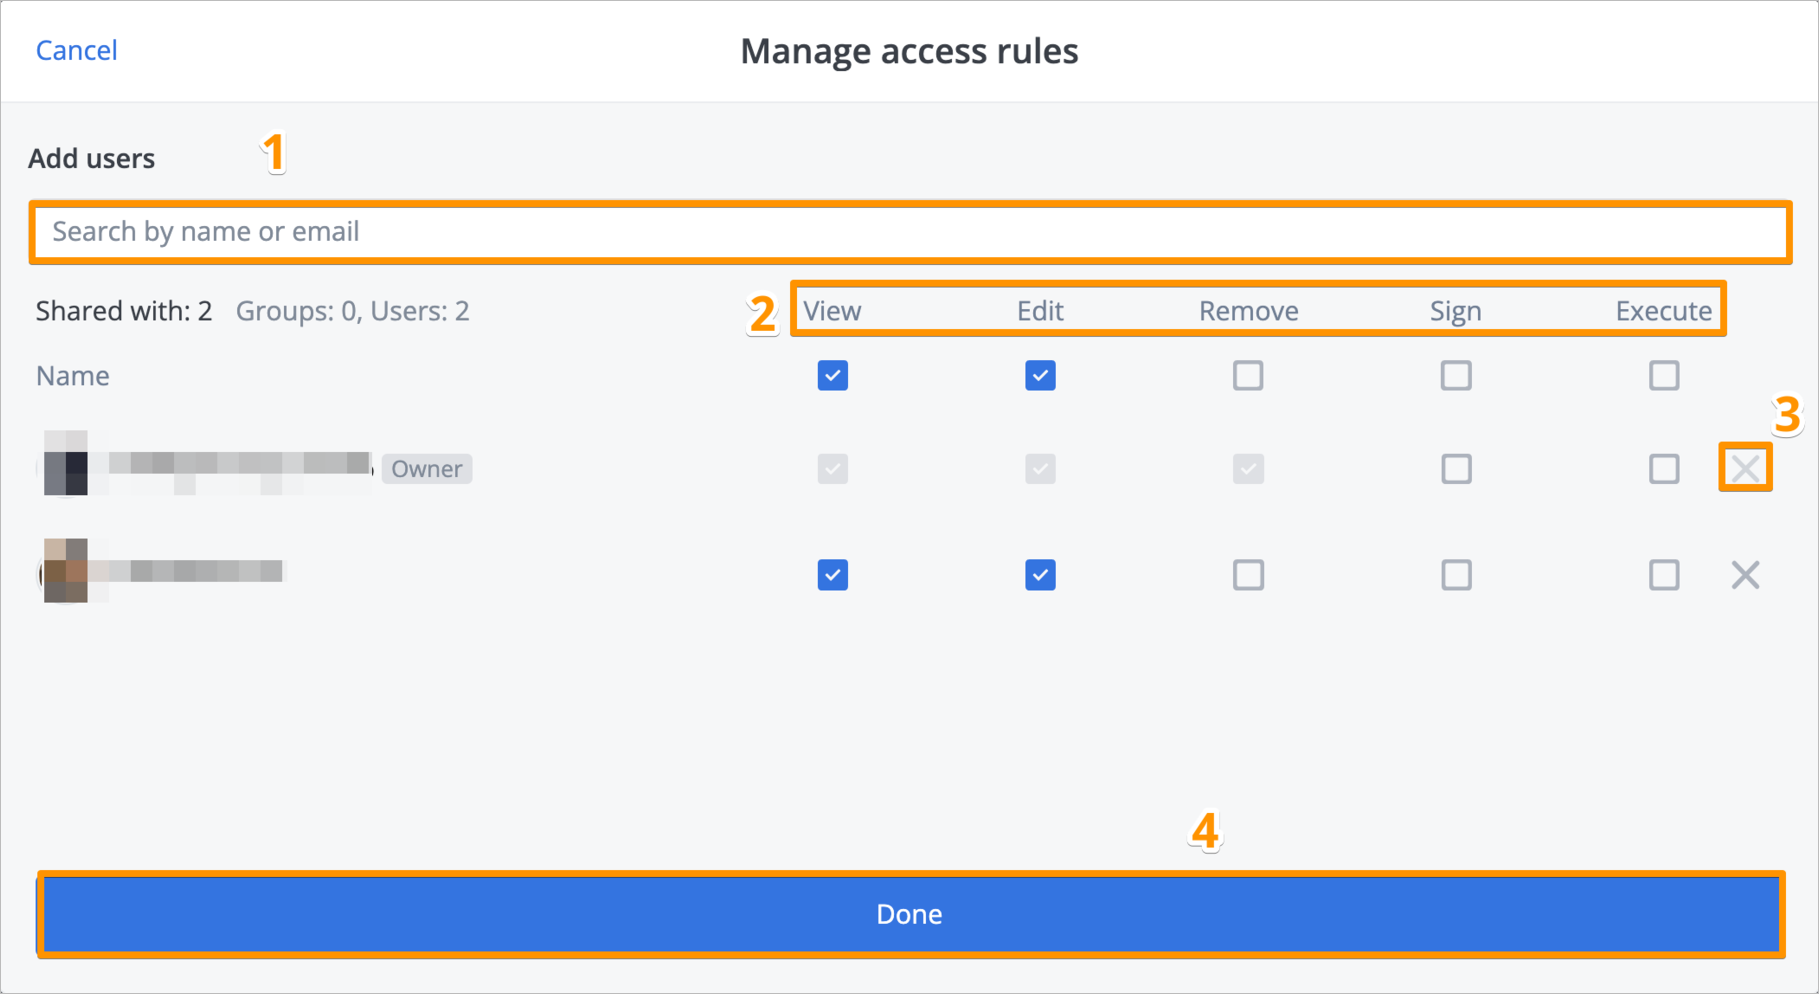
In this window, you can:
- enter a user group or a user name or email in the field (1) to find and add a user or a group to the shared with table
- select or clear View, Edit, Remove, Sign, Execute (2) checkboxes to grant or take away the corresponding permissions
- remove a user or a group from the shared table by clicking the remove icon (3).
After you've configured the list of users or groups and their permissions, click Done (4) to save the changes. You can open the Shared tab and configure the users and permissions table at any time.
You can also view a graph's current access scheme on an access graph.
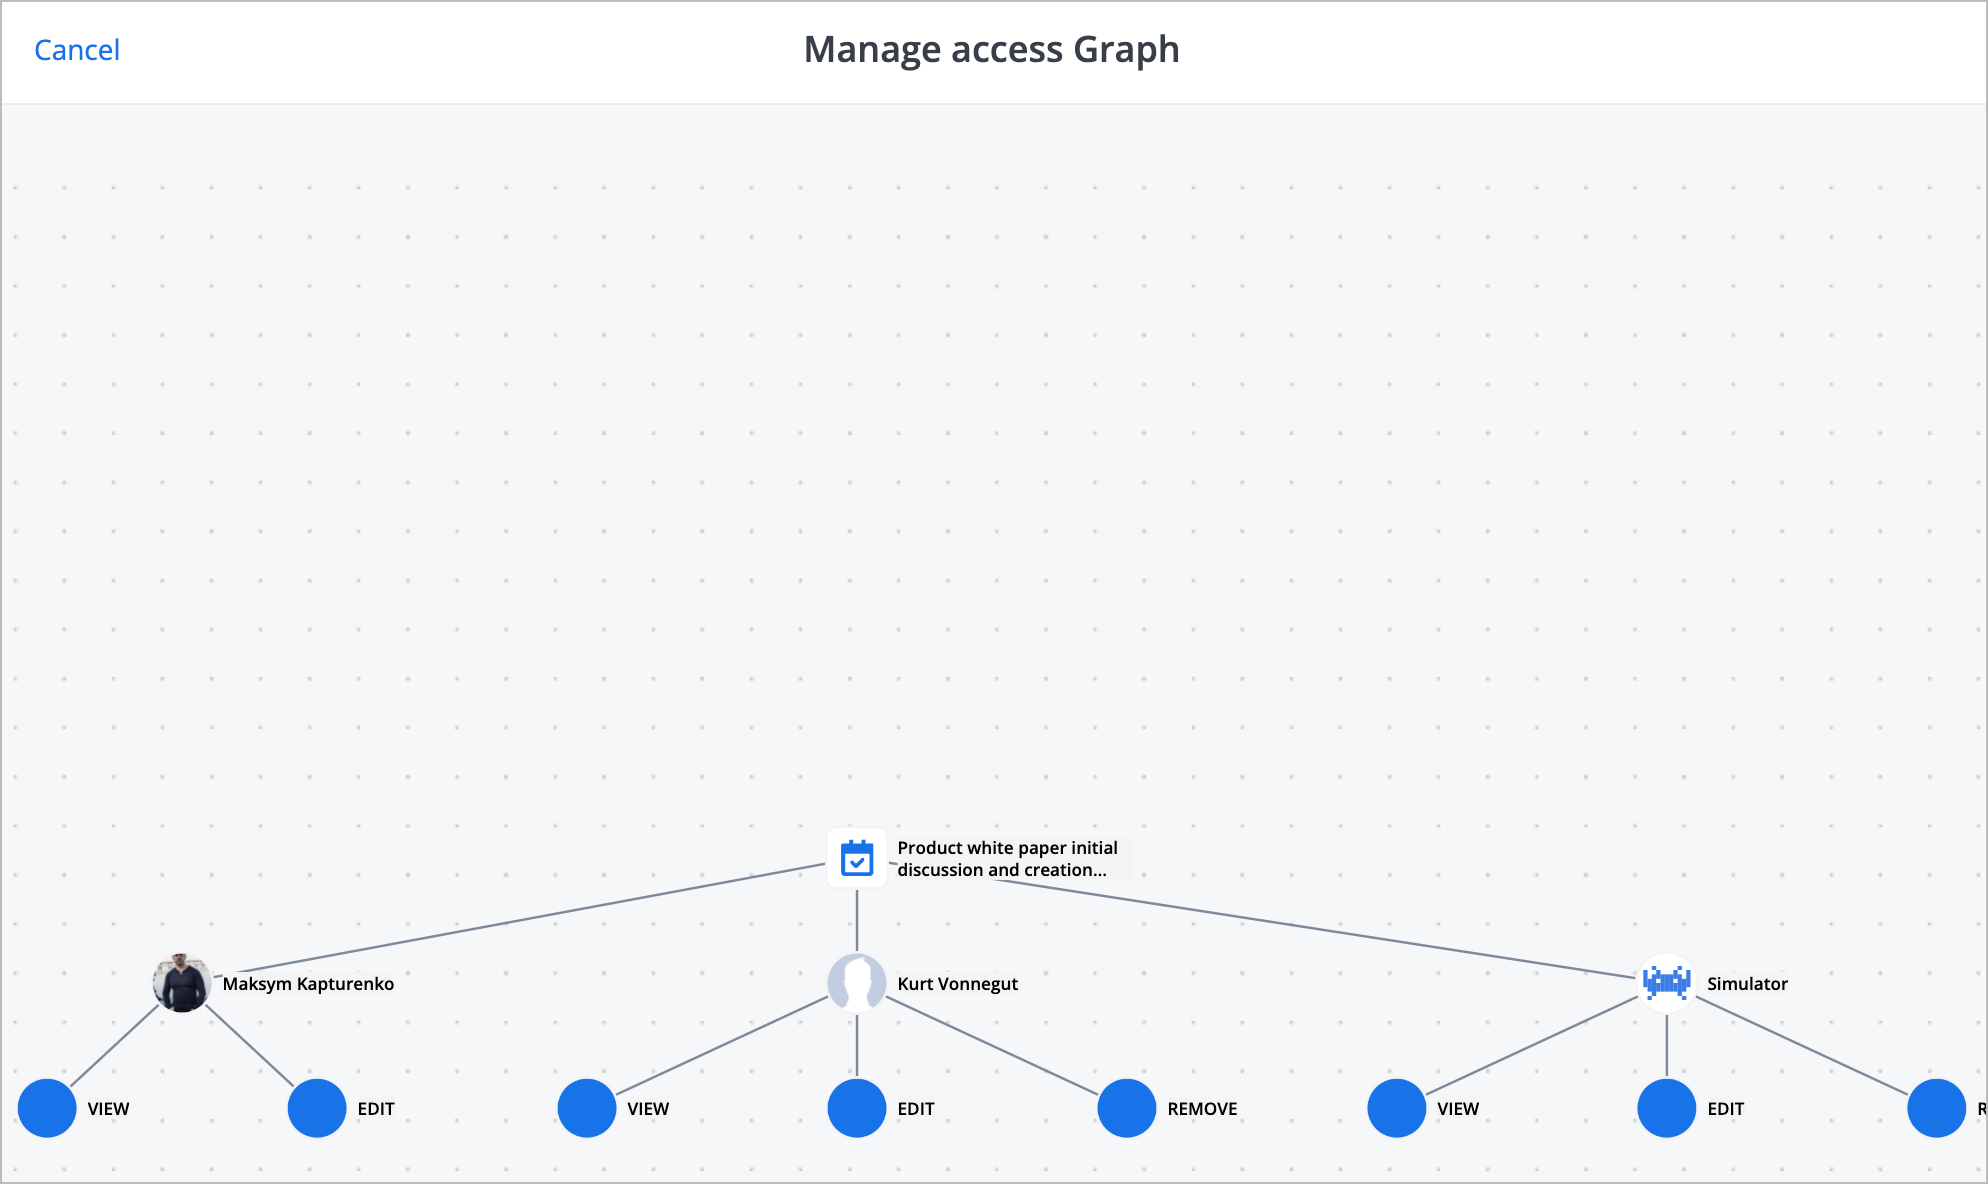
To view the access scheme for a graph on the Graphs page:
- Click the needed graph in the list
- On the actor side panel, open the Shared tab
- Click Access Graph
Attachments, Events, and Actors tabs
The Attachments tab shows the list of files attached to the graph indicating the attached files number in the brackets near the tab name:
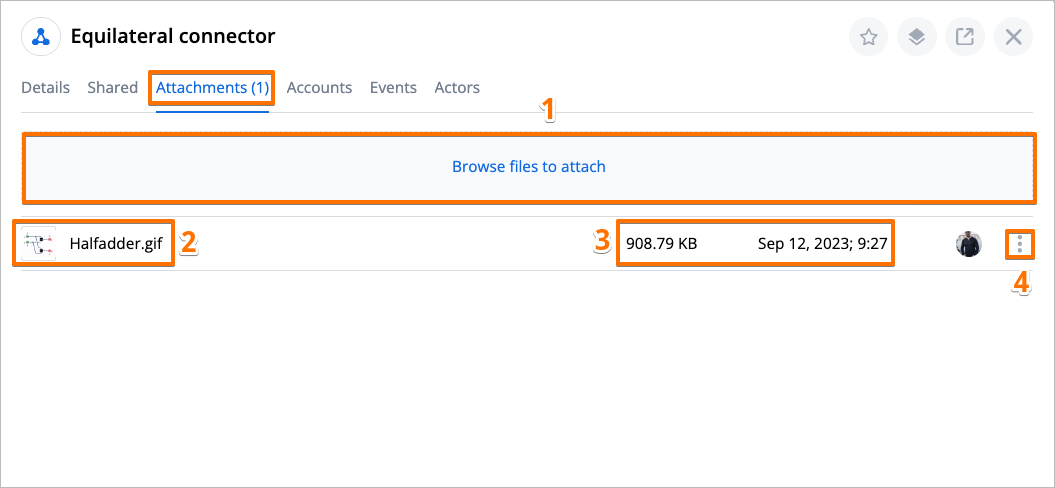
To add a file to the graph, click Browse files to attach (1) and browse to the needed file. In the list, you can view an attached file name (and preview if it's an image) (2), file size and date it was attached (3), and click the attached file menu icon (4) to download or remove the attached file.
Similarly, in the Events and Actors tabs, you can view lists of events and actors attached to the graph and manage these lists by attaching new or removing attached events and actors.
Accounts tab
In the Accounts tab, you can view and manage the list of graph accounts:
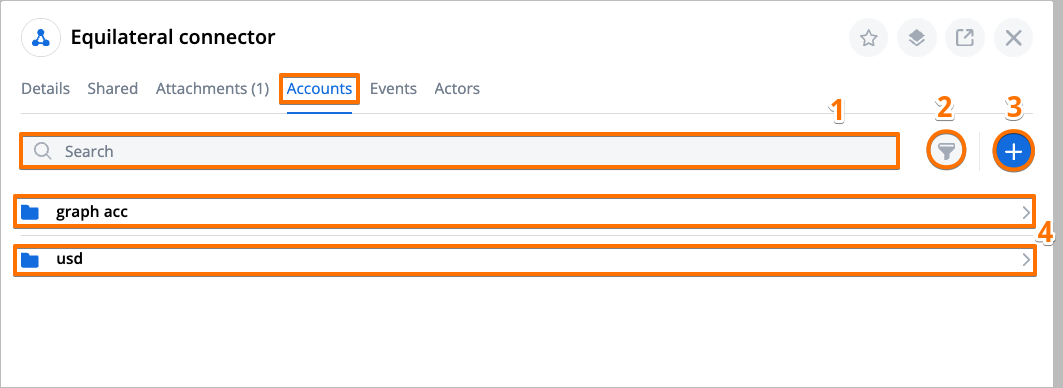
- search for accounts by name in the list of graph accounts (1)
- turn the display of plan (Plan) and actual (Fact) account values on and off (2)
- create a new or add an existing graph account (3)
- view and manage graph accounts grouped into folders by tags and their details (4).
To view graph accounts, expand the needed folder in the graph accounts folders list by clicking the expand arrow to the right:
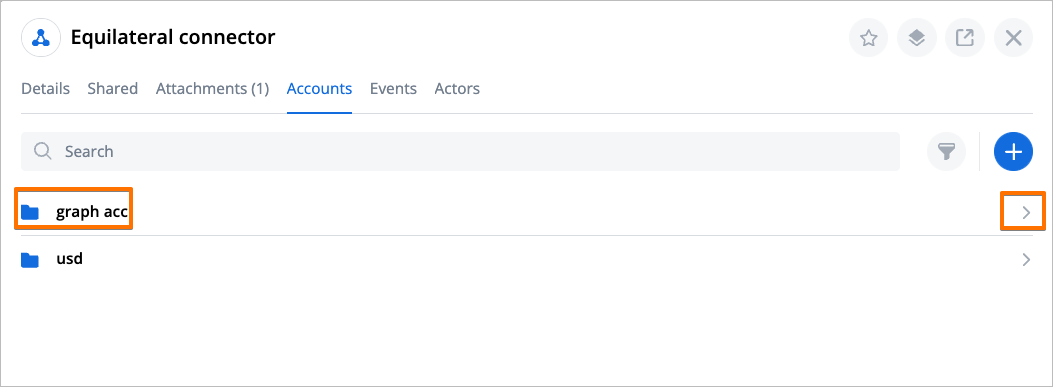
As graph accounts are grouped into folders by their tags, to view all graph accounts in the Accounts tab, expand all the account folders. The graph accounts that have no tags are grouped in the folder named Untagged.
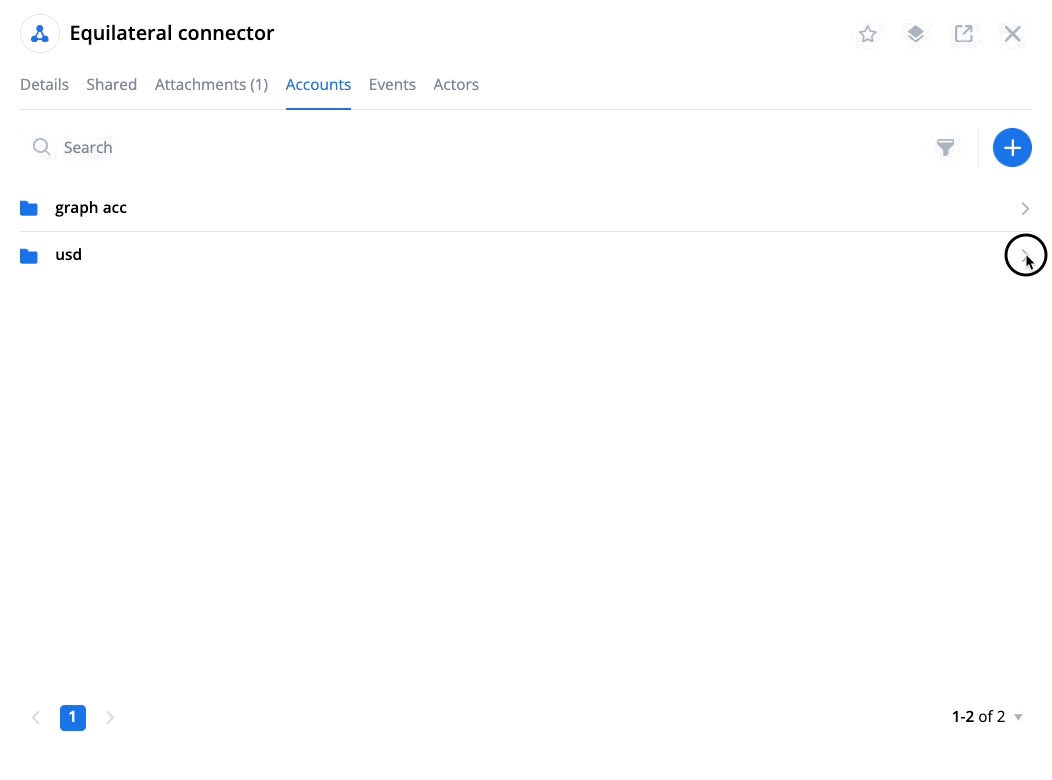
To view account Total, Debit, and Credit or manage an account in the account menu, click the expand arrow or account menu icon in the list of accounts:
Was this article helpful?