Firebase
- 24 Jan 2020
- 5 Minutes to read
- Contributors

- Print
- DarkLight
- PDF
Firebase
- Updated on 24 Jan 2020
- 5 Minutes to read
- Contributors
- Print
- DarkLight
- PDF
Article Summary
Share feedback
Thanks for sharing your feedback!
Firebase is a cloud database with ready-to-use API for integration.
Before customizing the process, we recommend that you read and understand Firebase documentation.
Before you start, let’s create a project in Firebase
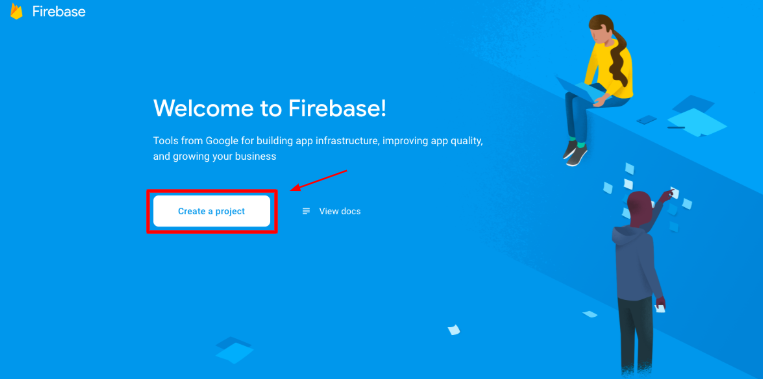
How to create a Firebase project
Go to Firebase console and click the Create a Project button.
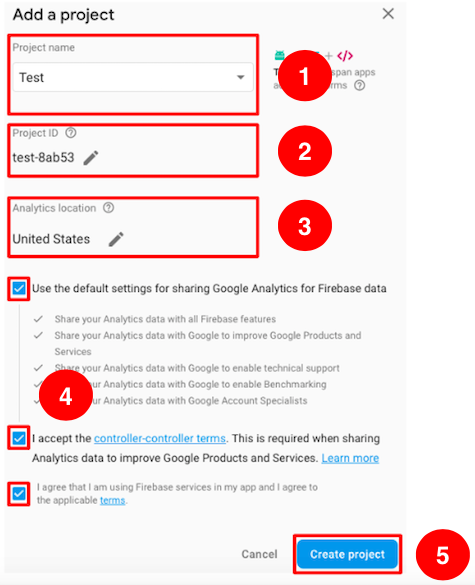
In the form opened, enter the name of your project in the Project Name field.
2.1. Add a new or leave the proposed ID in the Project ID field.
2.2. Select the country of your organization in the Analytics Location field.
2.3. Check the appropriate checkboxes, if you agree with the terms and conditions of Firebase.
2.4. Click the Create a Project button.
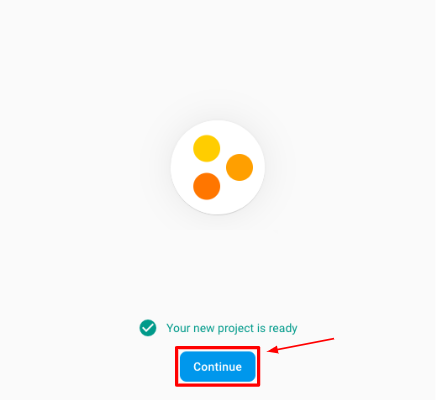
If the project is created successfully, a window with the Continue button will be displayed.
Next, we learn how to obtain an access key to the API Firebase.


How to obtain a key to the API Firebase
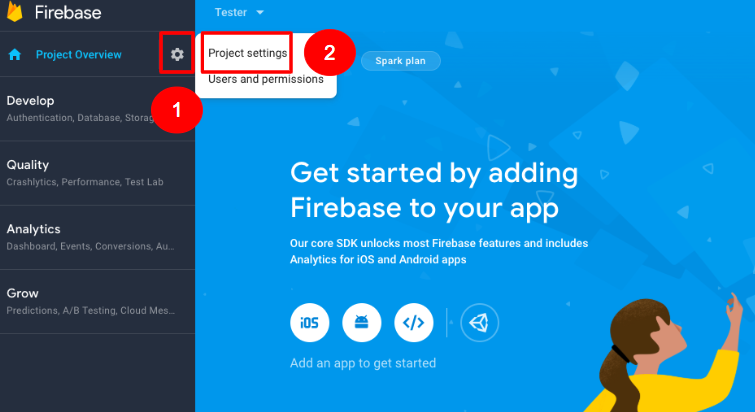
To call API Firebase, a Firebase API Secret Key is required. To receive it, click Settings and select Project Settings in the dropdown menu.
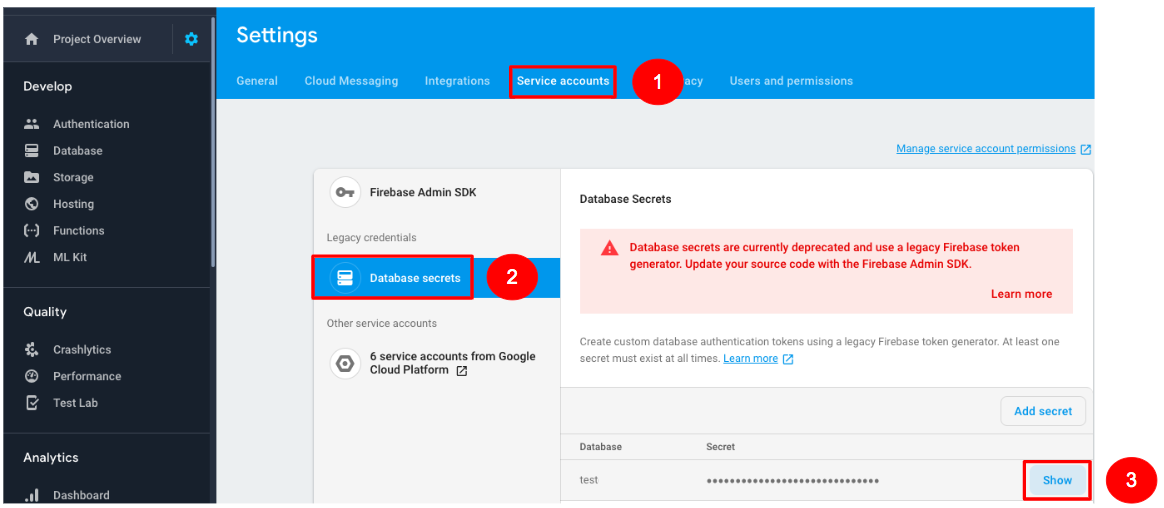
Go to the Service Accounts tab.
2.1. In the appeared window, select the Database Accounts section.
2.2. Click the Show button in the lower right corner and copy the Firebase API Secret Key.
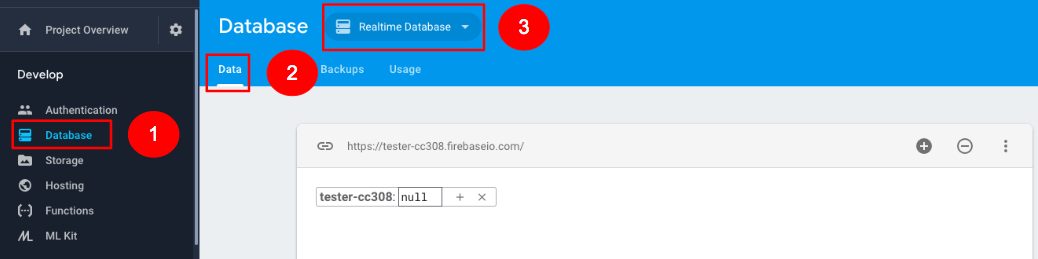
2.3. To call API Firebase you need to receive a unique URL that will identify your project. To do this, go to the Database section.
2.4. Select the Data tab.
2.5. Select Realtime Database in the upper menu.
URL to call Firebase API will be available in the appeared window.
In the next window you can see the structure of the database created which can be customized according to your requirements.
For example, let’s consider the storage of 3 fields in the database as follows:
- ID
- client's first name
- client’s last name.
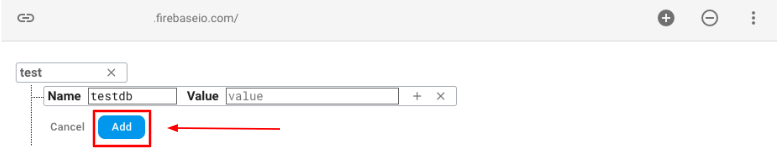
2.6. Start with entering the name for your database.
When the name of the database is added, API Firebase URL query will change to
https://test-xxx.firebaseio.com/{{name_DB}}Within this tutorial, we will use testdb as the name:
2.7. We recommend you to add the name of the table (collection) of objects you will save, for example, clients, as the next element in the URL, as follows:
https://test-xxx.firebaseio.com/testdb/clients2.8. To store information about a client, create an index with number 1. Each client in the DB will have his own unique number of the table to store his first and last names.
2.9. Enter first name and last name parameters of the client to index 1.
As a result, you will get a tree-like structure for storage of client’s first and last names, as shown in the figure below:
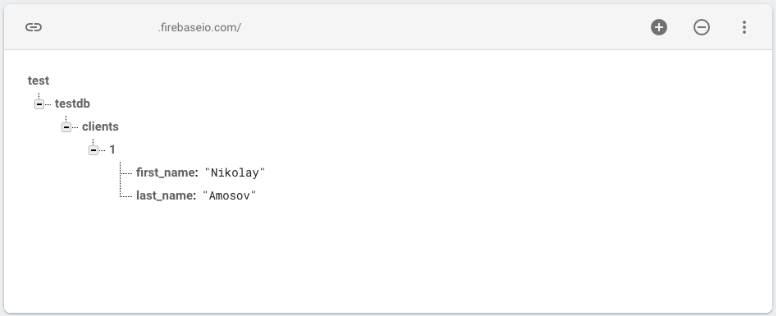
You have learned how to create a structured database in Firebase.
Next, you will learn how to setup 2 processes in Corezoid to be able to export information from the DB and enter new client data to the DB.


How to export entries from the database
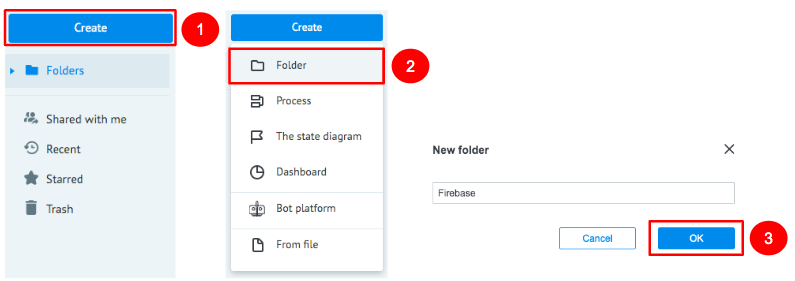
Create a Firebase folder for convenience of work with projects.
Go to the Firebase folder and create a Get Data process which will get data from the DB table using API Firebase.

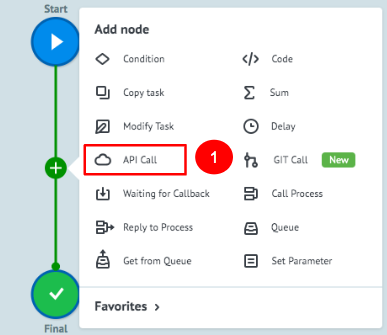
In the process created, add an API Call node which will call API Firebase to get information from the database.
3.1. After you have added the node, click it and fill in the URL field
{{url}}/testdb/clients.json?auth={{key}}Set up the following values in the API Call node settings:
Request format: Default
Request method: GET
Content-Type: Application/Json
where:
- url: you obtained at step 2.3 of How to obtain a key to the API Firebase section.
- testdb: the name of the catalogue assigned by you at step 2.3 of How to obtain a key to the API Firebase section.
- clients: the name of the table assigned by you at step 2.3 of How to obtain a key to the API Firebase section.
- key: DB access key you obtained at step 2.2 of How to obtain a key to the API Firebase section.
Example of URL:
https://test-xxxx.firebaseio.com/testdb/clients.json?auth={{key}}
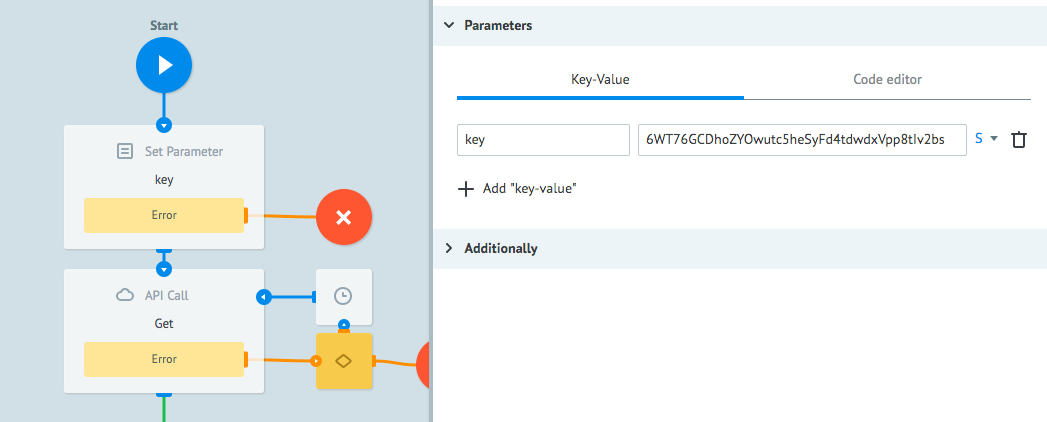
To ensure automatic insertion of the Firebase API Secret Key when API Firebase is called, add a Set Parameter node with the name key after the start node.
4.1. In the Parameters section of the Set Parameter node, add the key parameter having the Firebase API Secret Key value obtained at step 2.2 of How to obtain a key to the API Firebase section.
To make sure the API Call node is set correctly, call API Firebase and you will get a response with information from the database.
To do this, go to the View mode
5.1. Click the New Task button
5.2. In the Task window, fill in the key field with the Firebase API Secret Key obtained at step 2.2. of How to obtain a key to the API Firebase section and click Add Task.
If the API Firebase call is successful, your request will be in the Final node. Click it to look through the contents of the request that contains parameters which you have manually entered to the clients table of the testdb database.
"first_name": "Nikolay",
"last_name": "Amosov"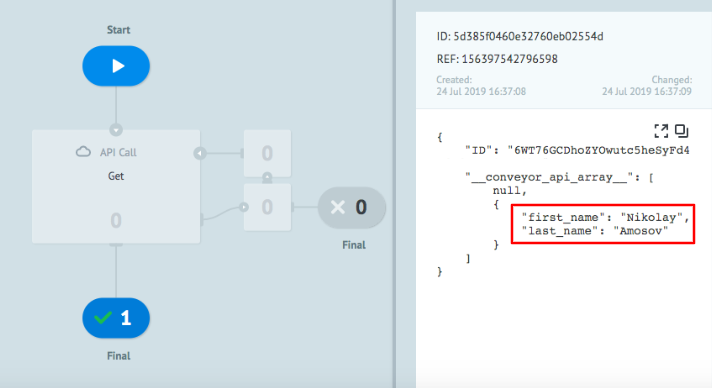


How to save data in Firebase
At step 2.4. of How to obtain a key to the API Firebase section you have learned how to manually add entries to the Firebase database. In practice, recording of data to the clients table of the testdb catalogue is performed using API Firebase.
To do this, create a new process named PUT Data.
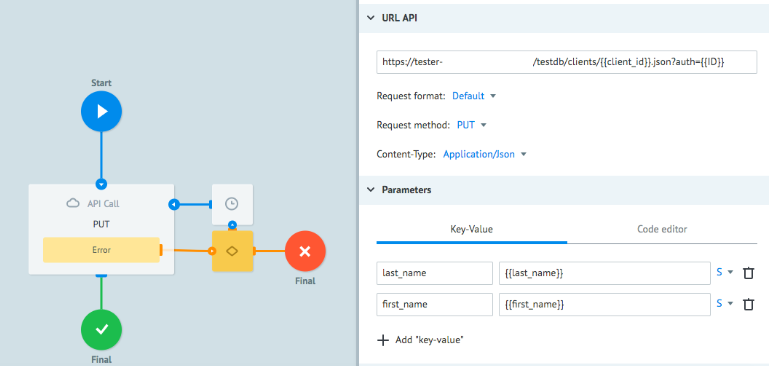
In the PUT Data process, create the API Call node named PUT, which will add data to the Firebase via API.
2.1. After you have added the PUT node, click it and fill in the URL field and request settings in the Parameters section.
Rules of URL formation:
{{url}}/testdb/clients/{{client_id}}.json?auth={{key}}where:
url: you obtained at step 2.3 of How to obtain a key to the API Firebase section.
testdb: the name of the catalogue assigned by you at step 2.3 of How to obtain a key to the API Firebase section.
clients: the name of the table assigned by you at step 2.3 of How to obtain a key to the API Firebase section.
key: DB access key you obtained at step 2.2 of How to obtain a key to the API Firebase section.
Example of URL:
https://tester-xxxx.firebaseio.com/testdb/clients/2.json?auth=rwer4545fgdfb534...Request format: Default Request method: PUT Content-Type: Application/X-Www-Form-Urlencoded2.2. Add the following in the Parameters section.
{
    "last_name": "{{last_name}}",
    "first_name": "{{first_name}}"
}
Values of the {{first_name}}, {{last_name}} parameters are the first and last names of a new client to be added to the clients table of the testdb catalogue.
If the API Firebase call is successful, your request will be in the Final node. Click to look through the contents of the request that contains parameters which you have successfully entered to the DB table
"first_name": "Nikola",
"last_name": "Tesla"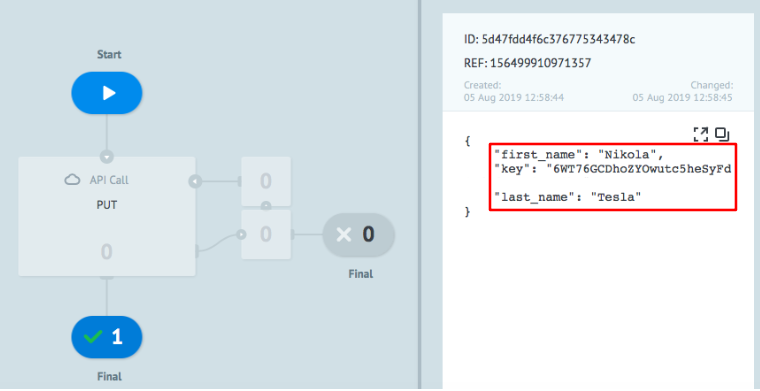


Congratulations! You have learned to create processes using API Firebase.
Was this article helpful?