- Print
- DarkLight
- PDF
On the Events page, you can filter events using the following filters:
- Date-owner: Filter events by their date and owner.
- Tab: Select stream tabs.
You can create a stream tab as an actor to create new events and add existing ones to this tab. For more information, go to the Stream tab.
Filter events by applying:
Date-owner filter: In the upper-right corner, click the date-owner filter icon:
a. In the All time field, select a predefined interval or configure a custom range.
b. In the Owner field, select one or multiple owners.
Note: Clicking the date-owner icon again does not reset the filter settings and only hides the filter fields. Click Reset filters under the date-owner filter fields to reset the filter settings.

Tab filter:
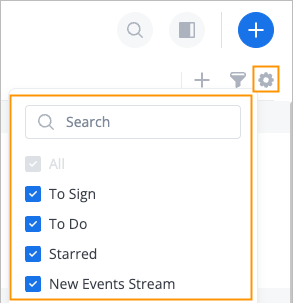
In the upper-right corner, click the stream tab filter icon, in the tabs dropdown list, select the needed tab checkbox or enter a tab name in the Search field.
Note: The All checkbox, which contains all available tabs, is selected by default and can't be deselected.
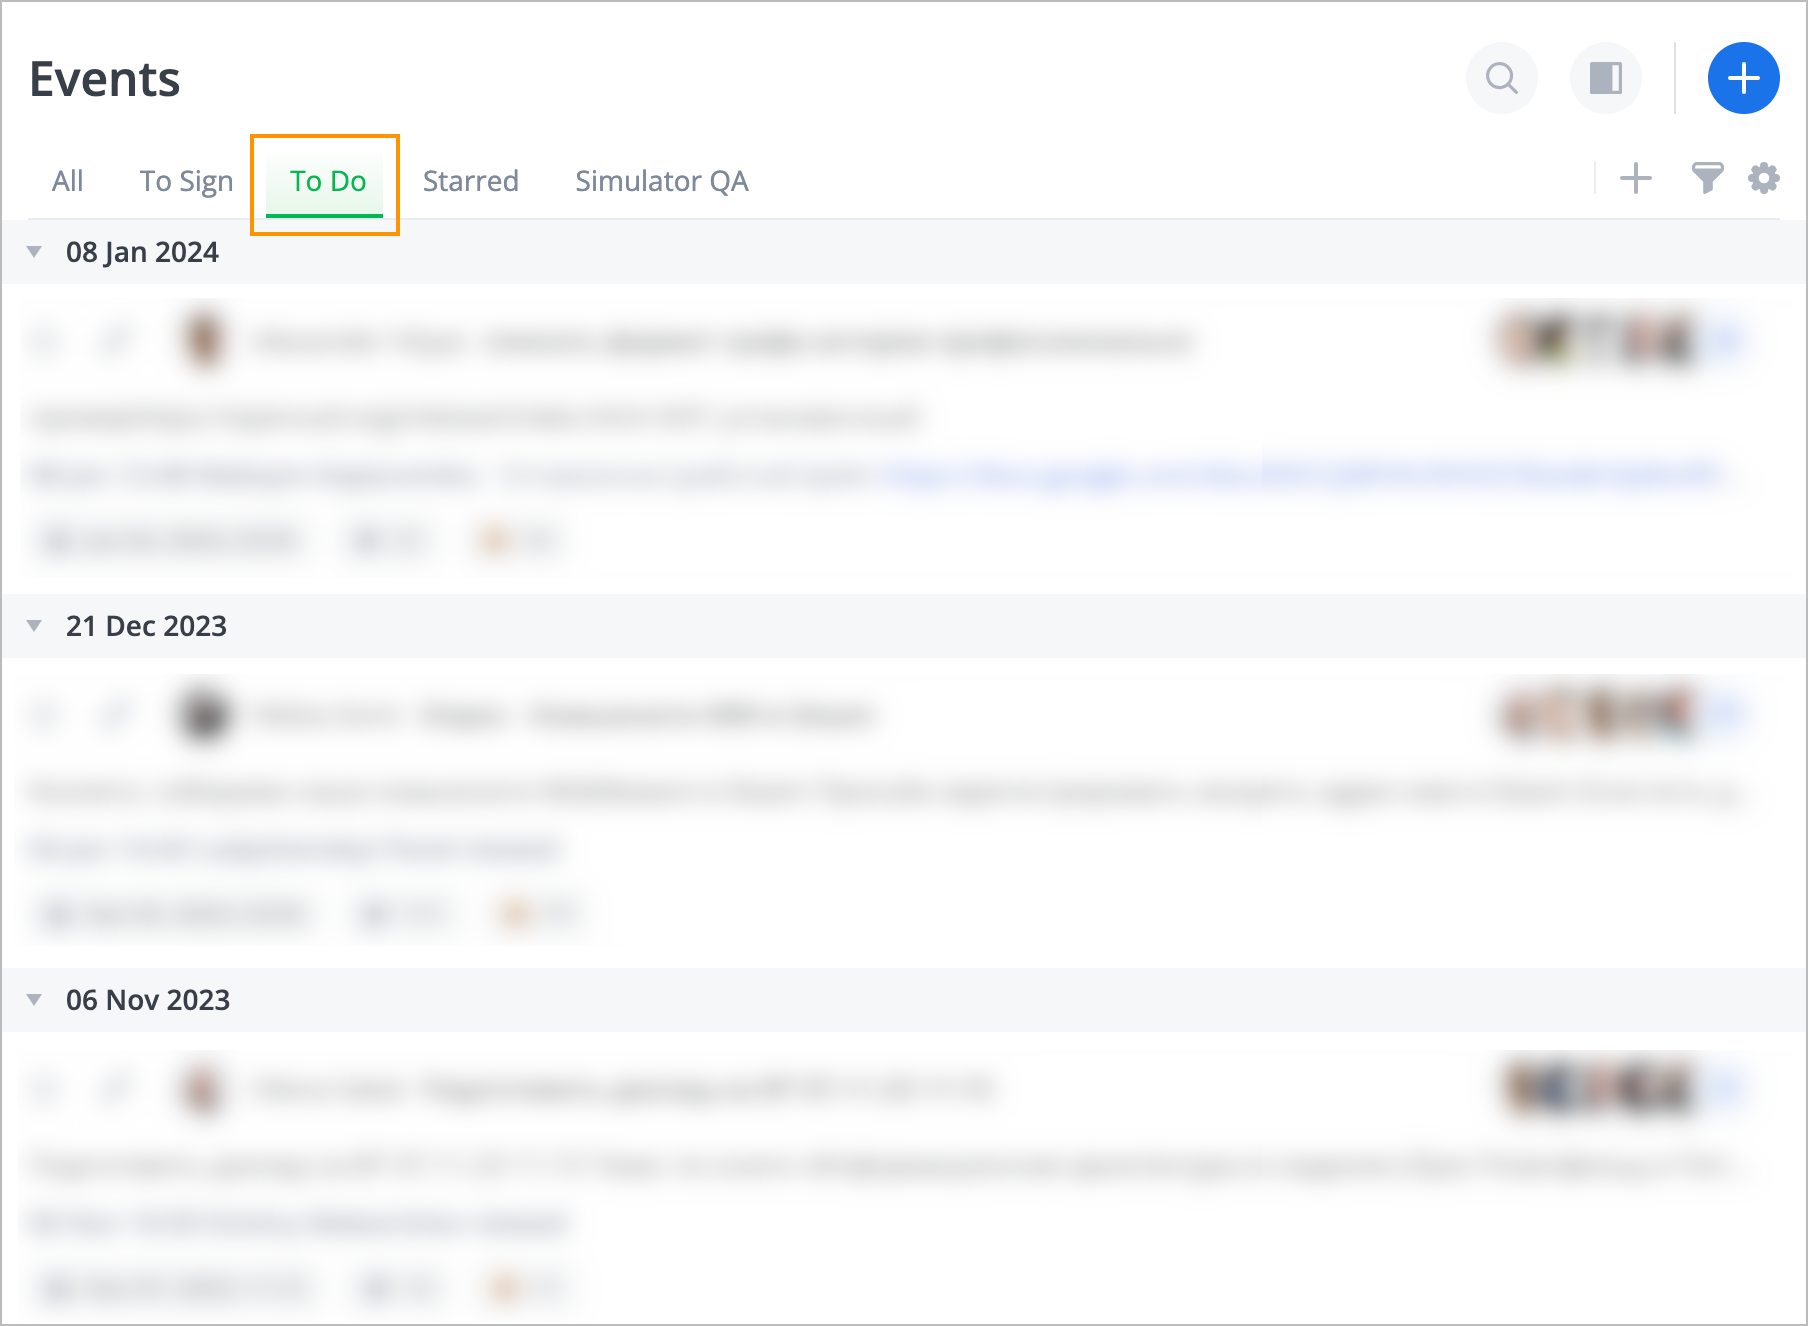
Click the needed stream tab to see the corresponding events.
Stream tab
To use the stream tab, you have to:
Create stream tab
To create a stream tab:
In the upper-right corner of the Events page, click the create actor icon.

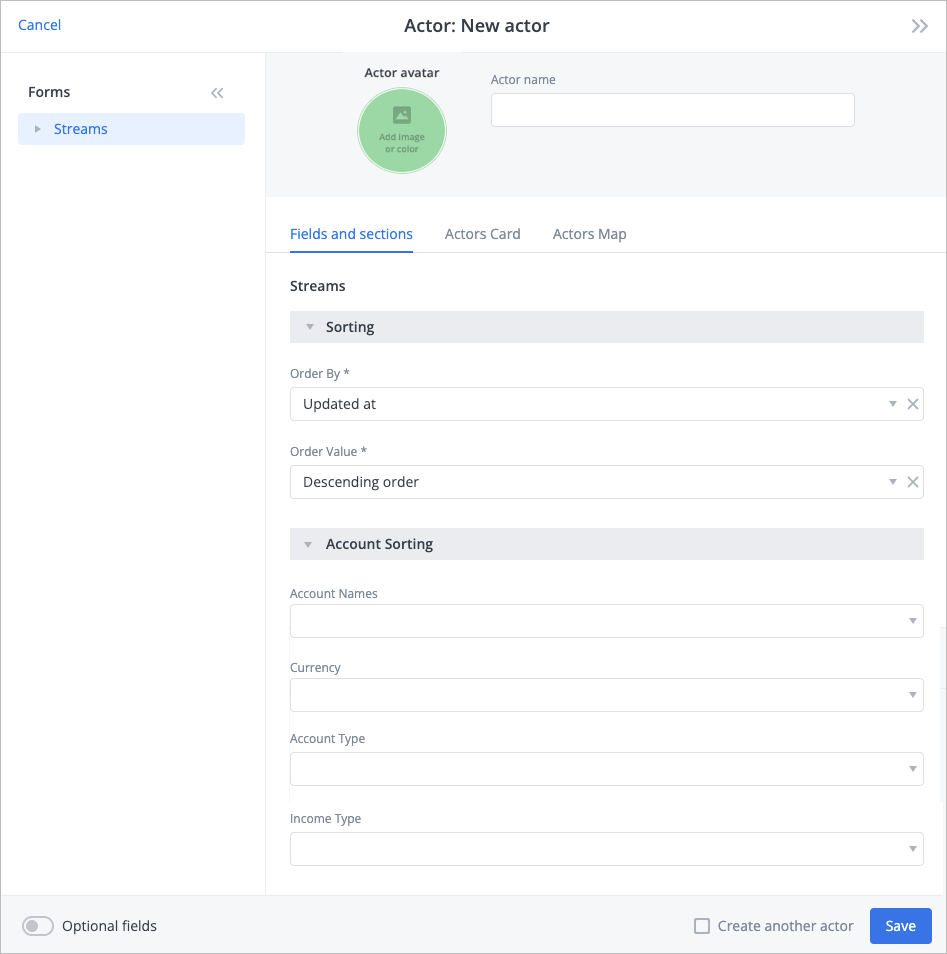
In the New actor dialog, fill out and configure the following fields:
Actor name: Enter the stream tab name, which will be displayed on the stream tab.
(Optional) Reference ID: Enter a string value for making API requests.
Note: This field is available when the Optional fields toggle is turned on in the lower-left corner of the dialog.In Sorting:
- Order by: Select the way the parameter events in the stream will be sorted by (Created at, Updated at, or Account).
- Order value: Select the needed order (Descending order or Ascending order).
(Optional) In Accounting Sorting:
- Account Names: Select the needed account name.
- Currency: Select the needed currency.
- Account Type: Select Fact or Plan.
- Income Type: Select Debit or Credit.
Note: These fields are applicable when in Sorting, you have selected Account in the Order by field.
Click Save.
The newly created stream tab appears on the right side of the existing tabs.

Add events to tab
You can add new or existing events to the stream tab in several ways:
- Add a new event: Click the needed stream tab, and then in the upper-right corner, click the create event icon.

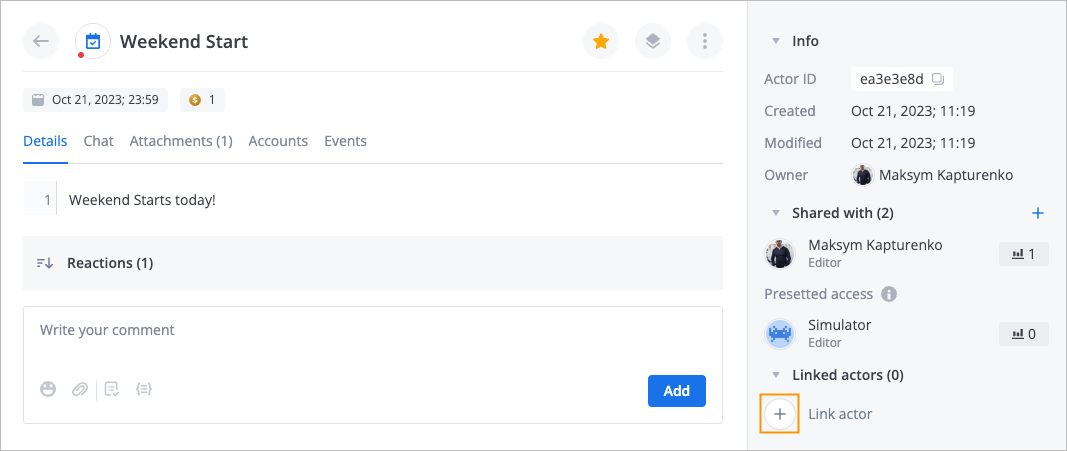
- Add an existing event: Click the needed event, and then on the event info panel, click the Link actor icon and select the needed stream tab name.
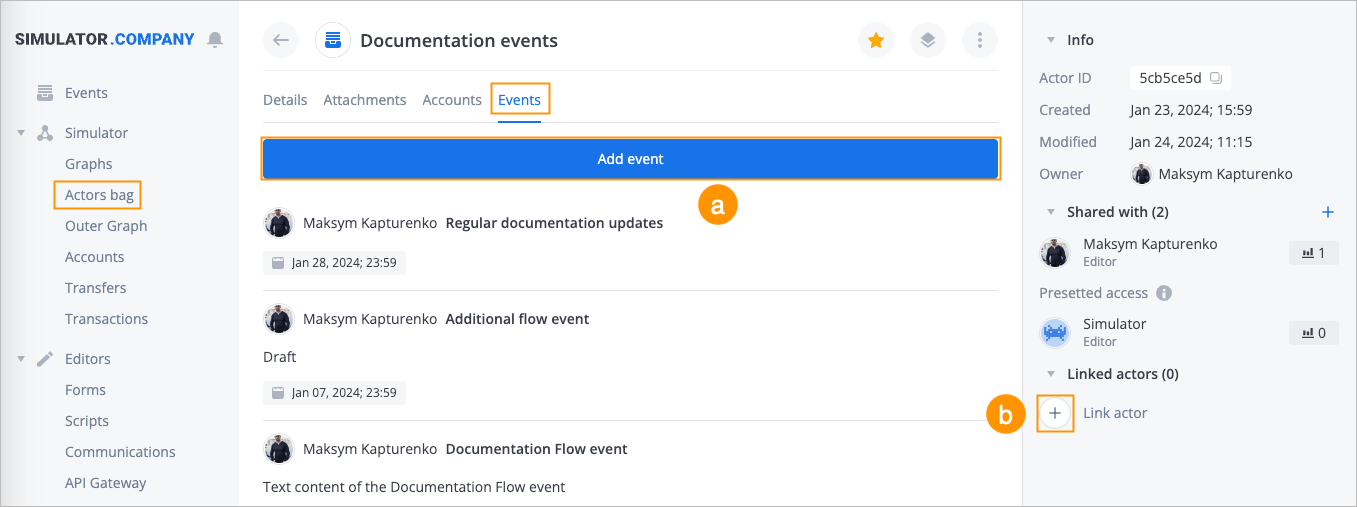
- Add a new or existing event on the Actors bag page:
a. On the Actors bag page, click the needed stream tab name, and then click the Events tab.
b. On the Events tab, click Add event to add a new event to the tab (a) or Link actor (b) to add an existing event.
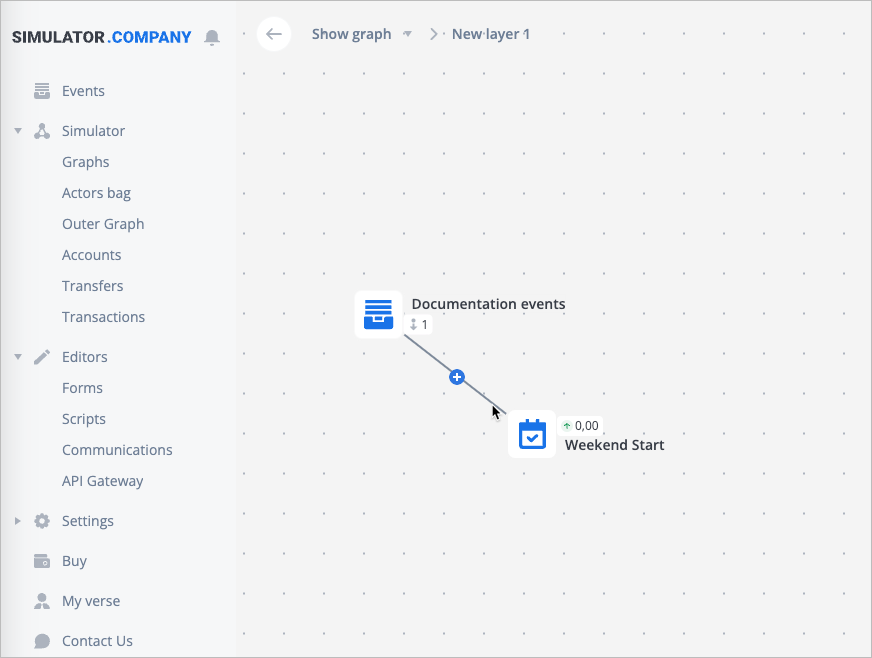
- Add a new or existing event on a graph layer:
a. On a graph layer, add an existing stream tab actor to which you want to add an event or create a new one.
b. Add an existing event actor you want to add to the stream tab or create a new one.
c. Left-click the stream tab actor and draw an edge to the event actor to link them together.
Manage stream tab
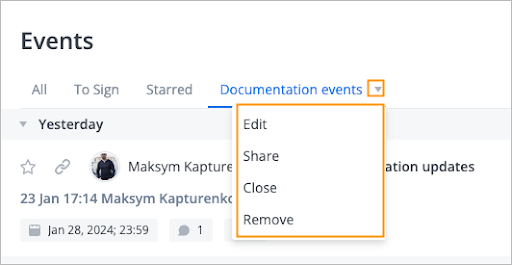
To manage a stream tab, on the stream tab panel, click the arrow next to the needed stream tab and select:
- Edit: To edit the stream tab.
- Share: To share the stream tab with other users or groups.
- Close: To deactivate the stream tab and remove it from the tab.
Note: You can activate the stream tab again by selecting it in the stream tab filter. For more information, go to Filter events. - Remove: To delete the stream tab.
