Events
- 06 May 2024
- 1 Minute to read
- Contributors

- Print
- DarkLight
- PDF
Events
- Updated on 06 May 2024
- 1 Minute to read
- Contributors
- Print
- DarkLight
- PDF
Article summary
Did you find this summary helpful?
Thank you for your feedback
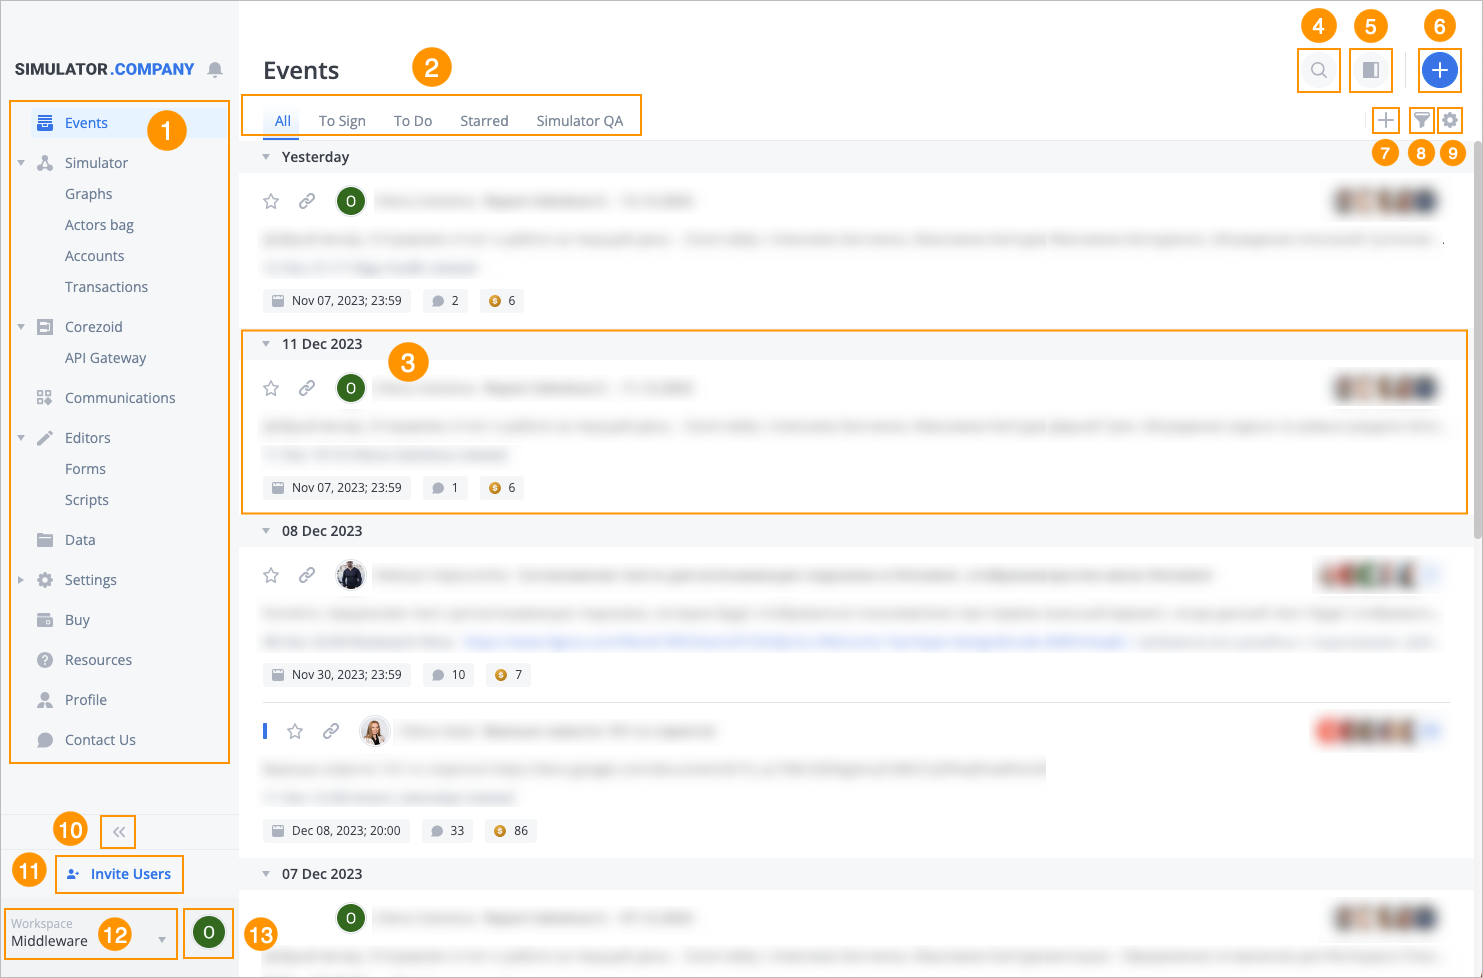
On the Events page, you can view and manage the personalized streams of events you participate in. An event can be any messenger event, comment or dialog reaction, email, calendar event, reminder, escalation, document flow event, or any other system event in Simulator.
On the Events page, you can see the following:
- Left navigation panel
- Tabs (All, To Sign, To Do, Starred)
- Event details (creation date, due date, description, number of comments, participants, event price)
- Search field
- Split view button
- Create event button
- Create actor button
- Events filter
- Tab filter
- Collapse button
- Invite Users button
- Change workspace option
- Profile menu
On the Events page, you can:
Was this article helpful?