Deploy Corezoid on Azure Marketplace
- 17 Jan 2024
- 1 Minute to read
- Contributors

- Print
- DarkLight
- PDF
Deploy Corezoid on Azure Marketplace
- Updated on 17 Jan 2024
- 1 Minute to read
- Contributors
- Print
- DarkLight
- PDF
Article summary
Did you find this summary helpful?
Thank you for your feedback
To deploy Corezoid on the Azure Marketplace:
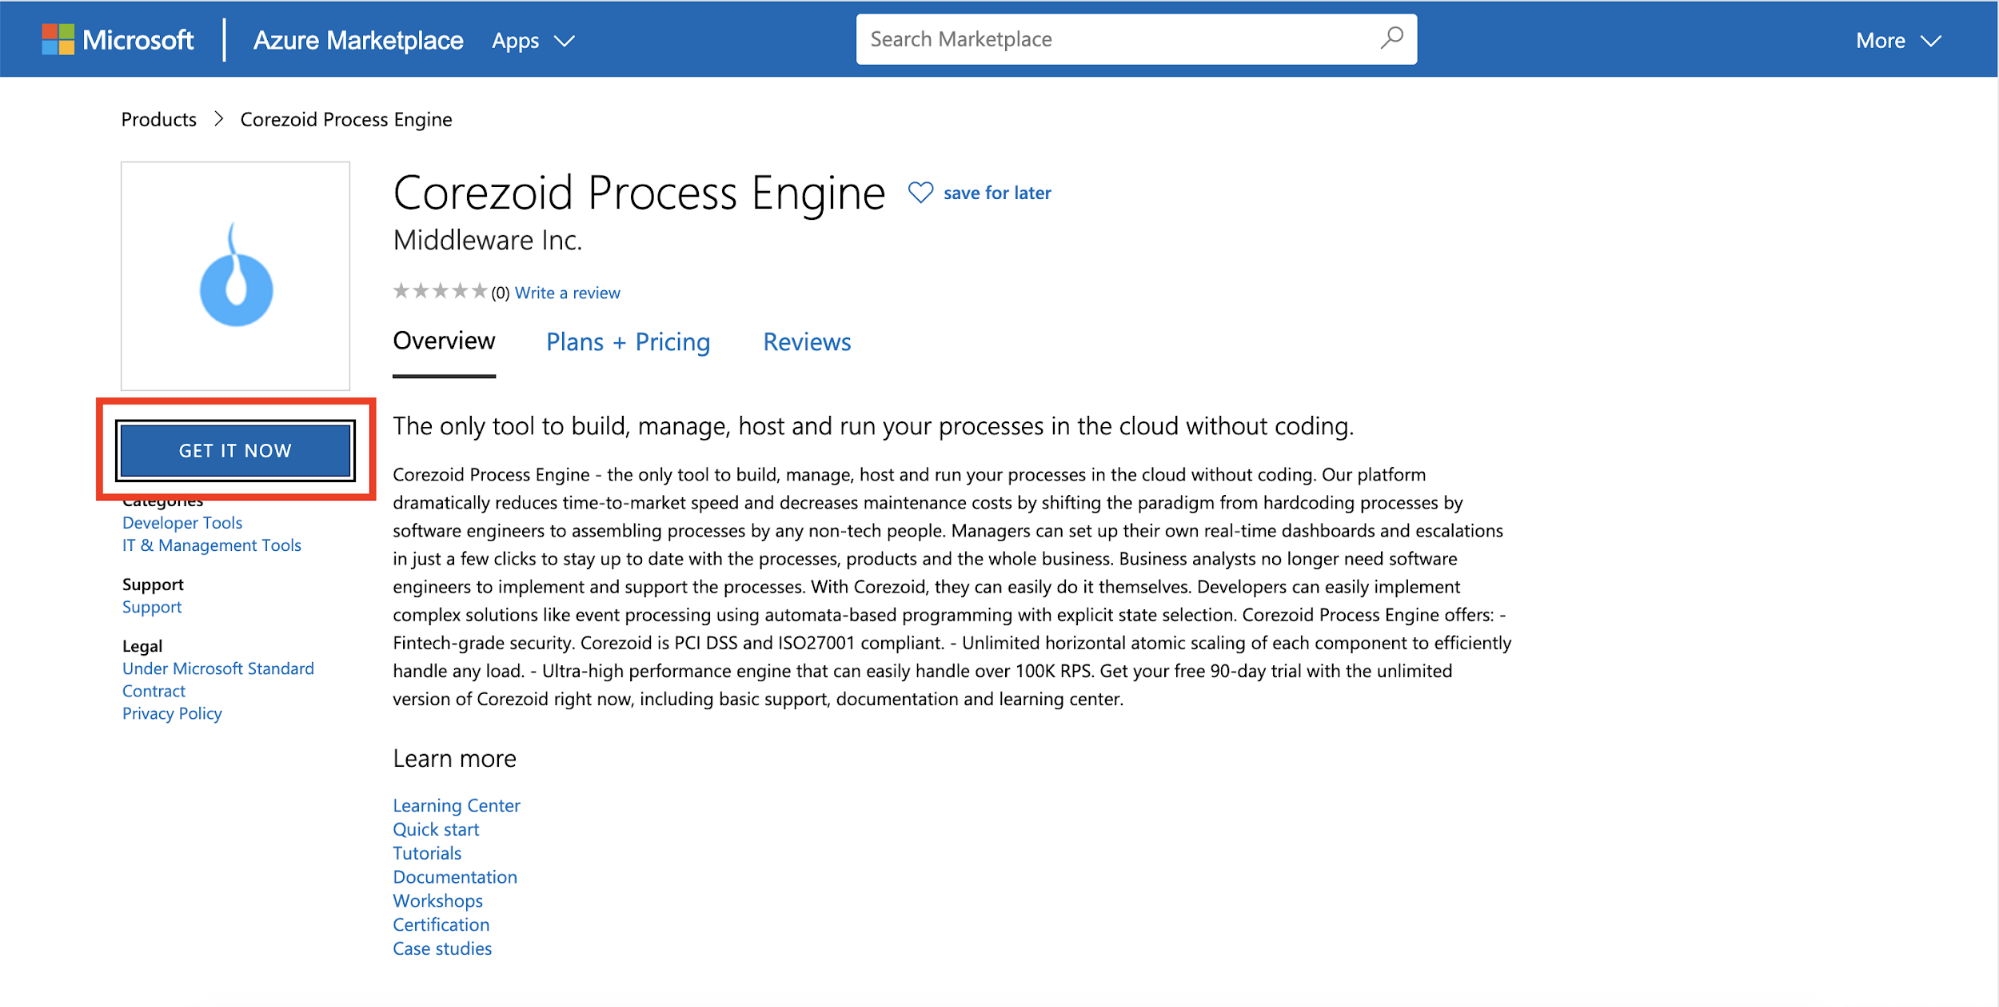
On the Corezoid Process Engine page, click Get it now.
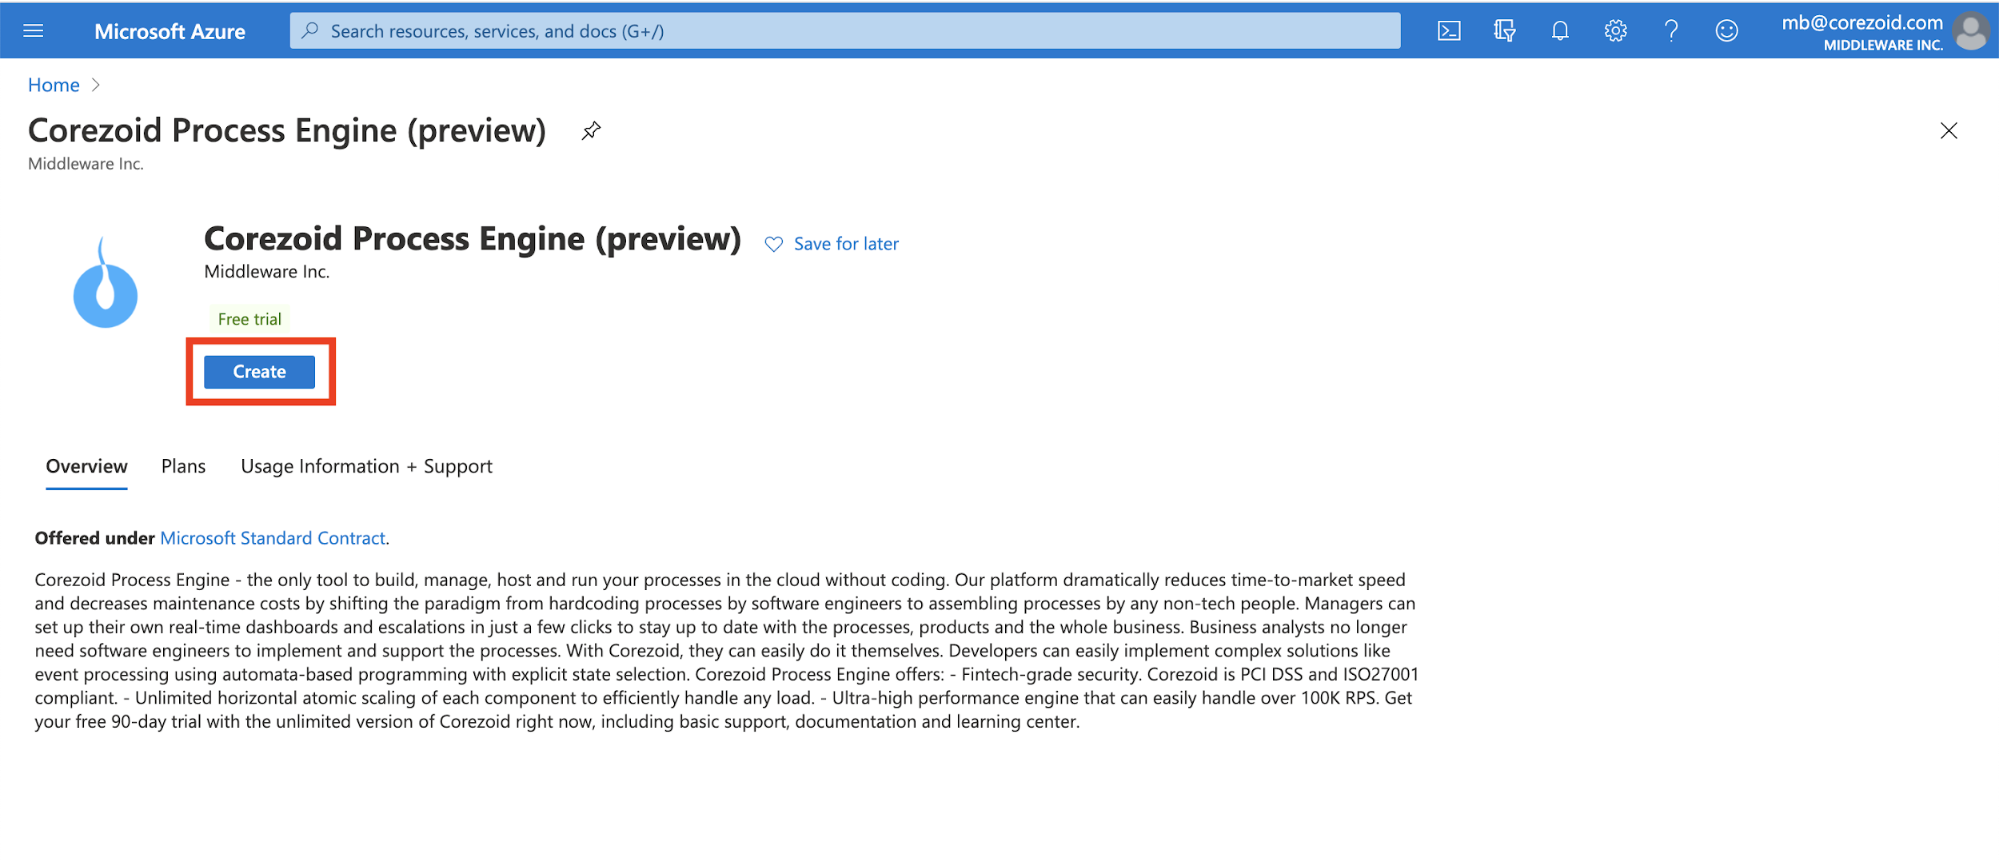
On the Corezoid Process Engine (preview) page, click the Create.
Select the existing Resource group or create a new one.
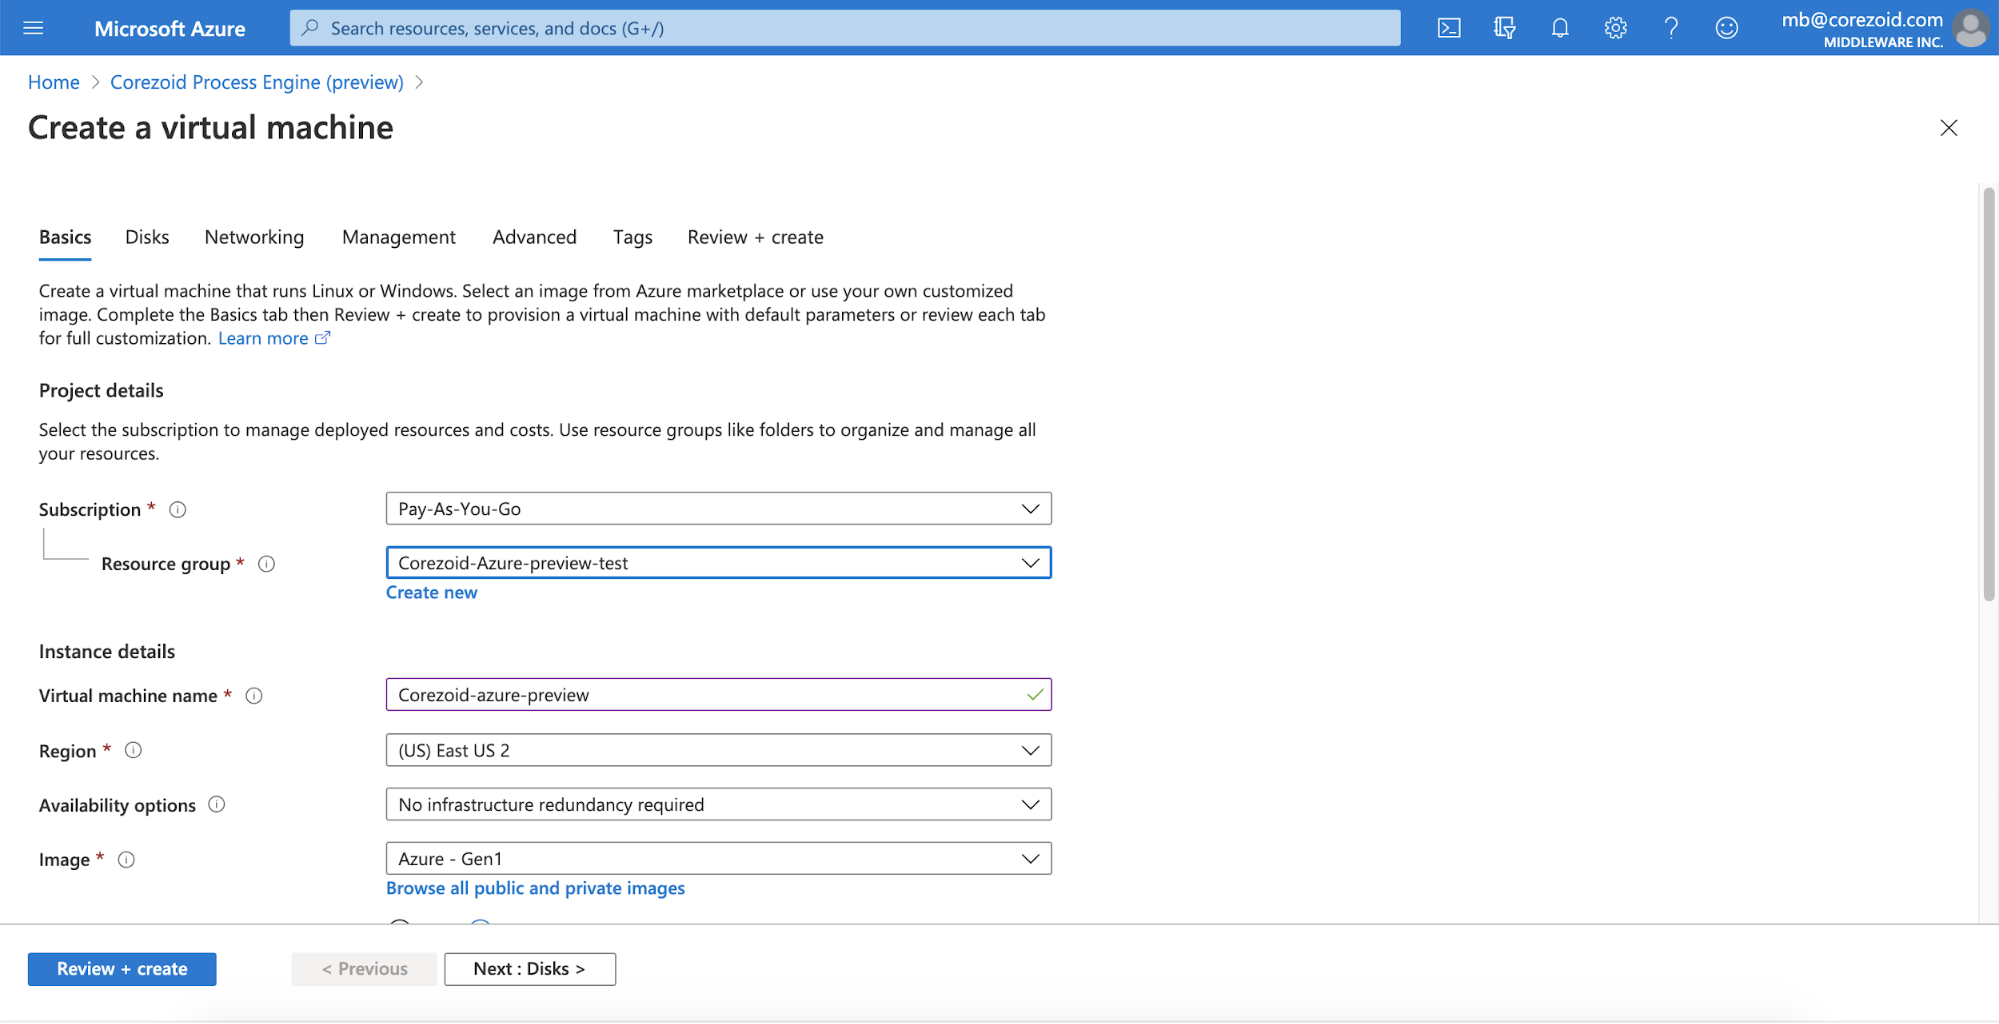
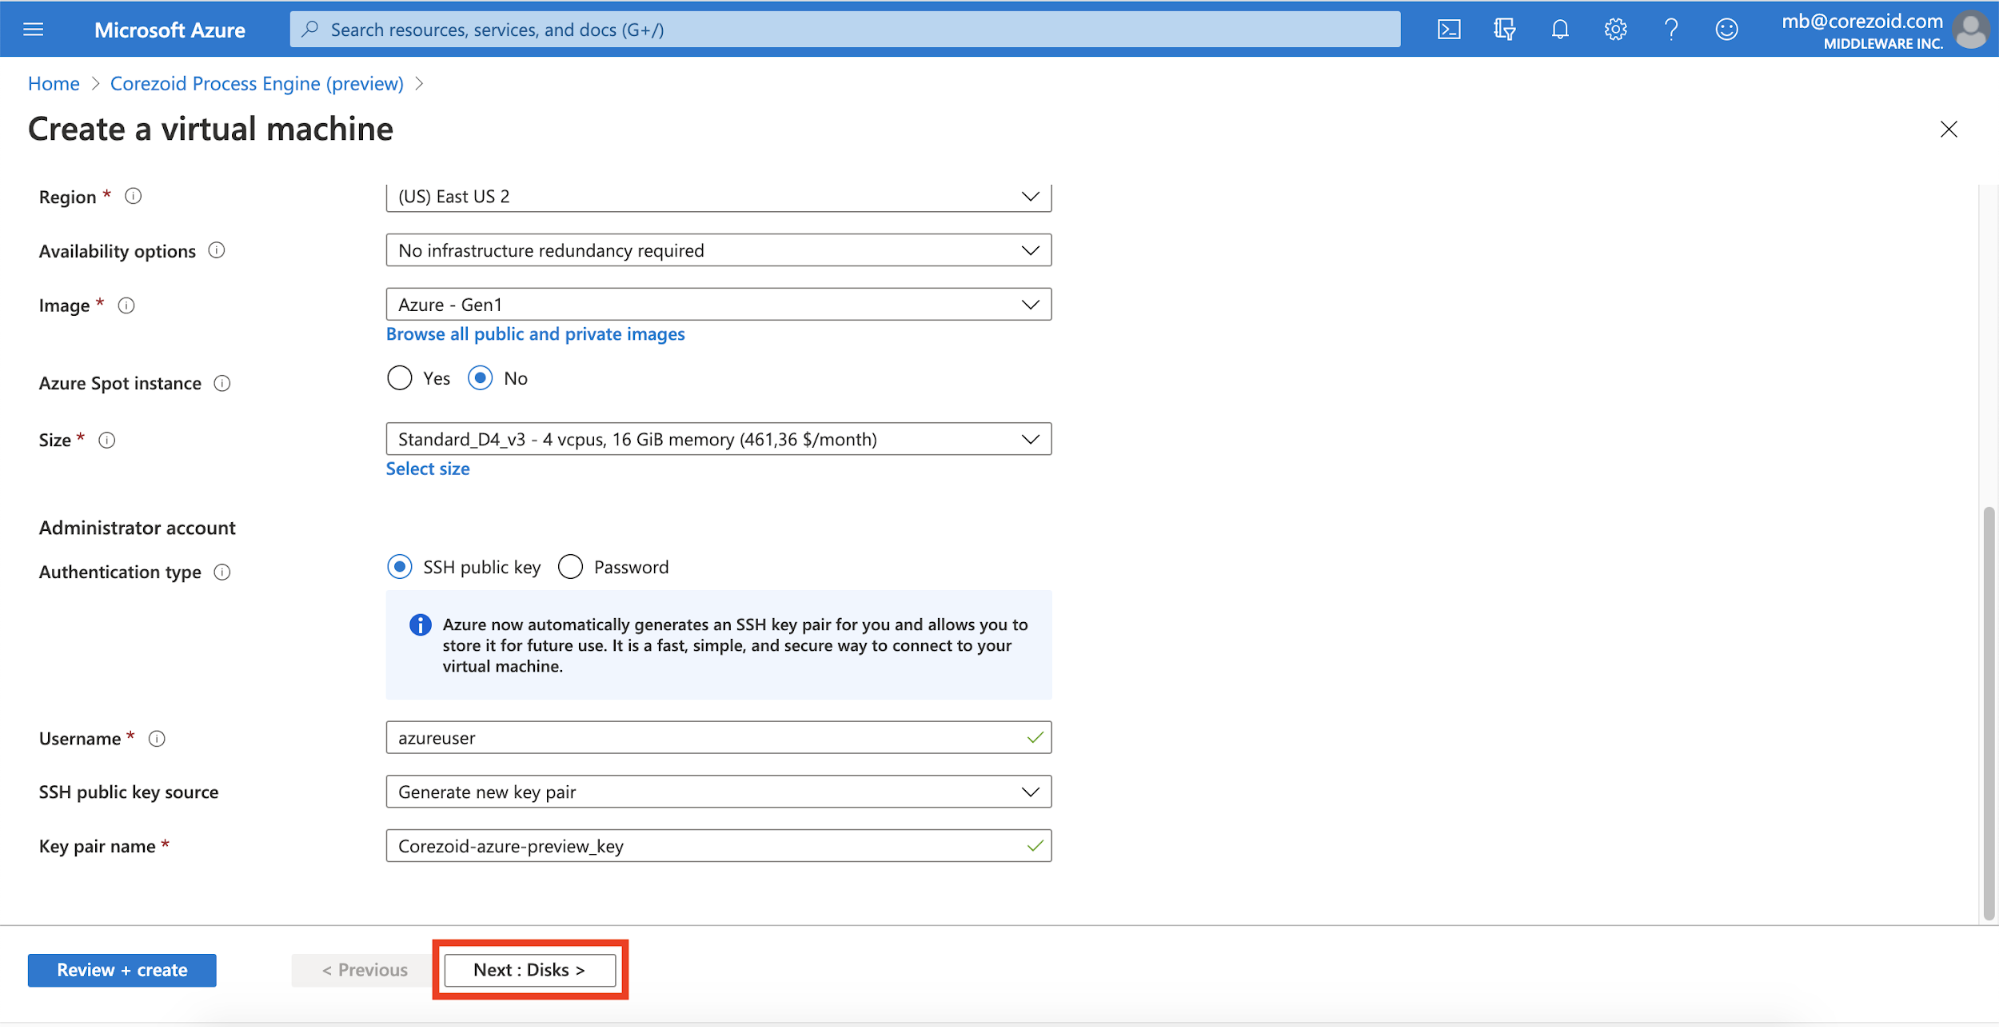
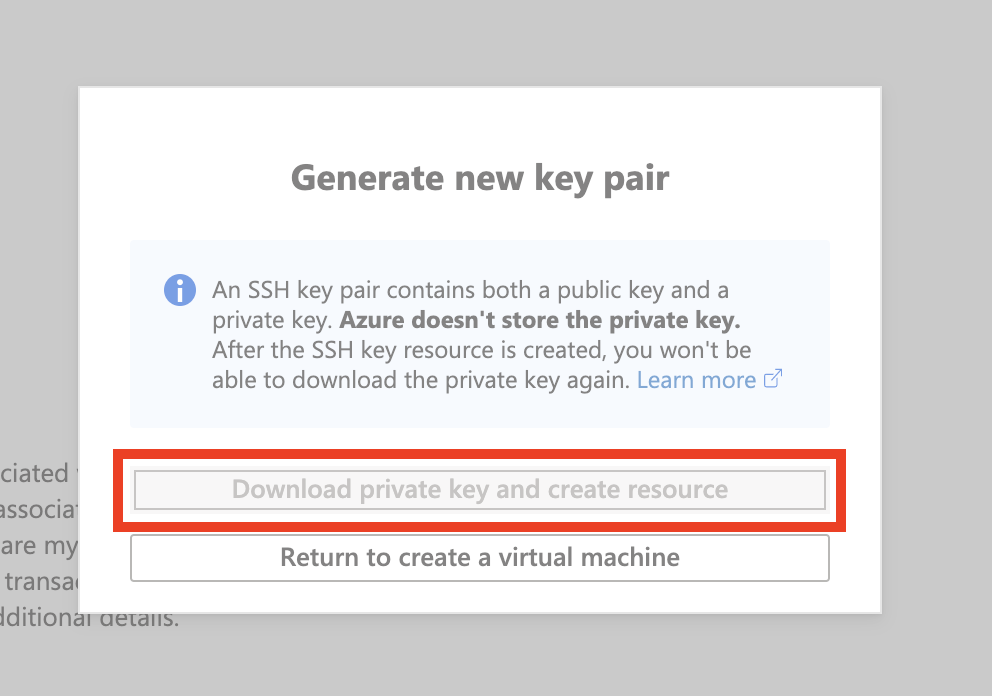
Create credentials for your SSH public key and click Next: Disks.
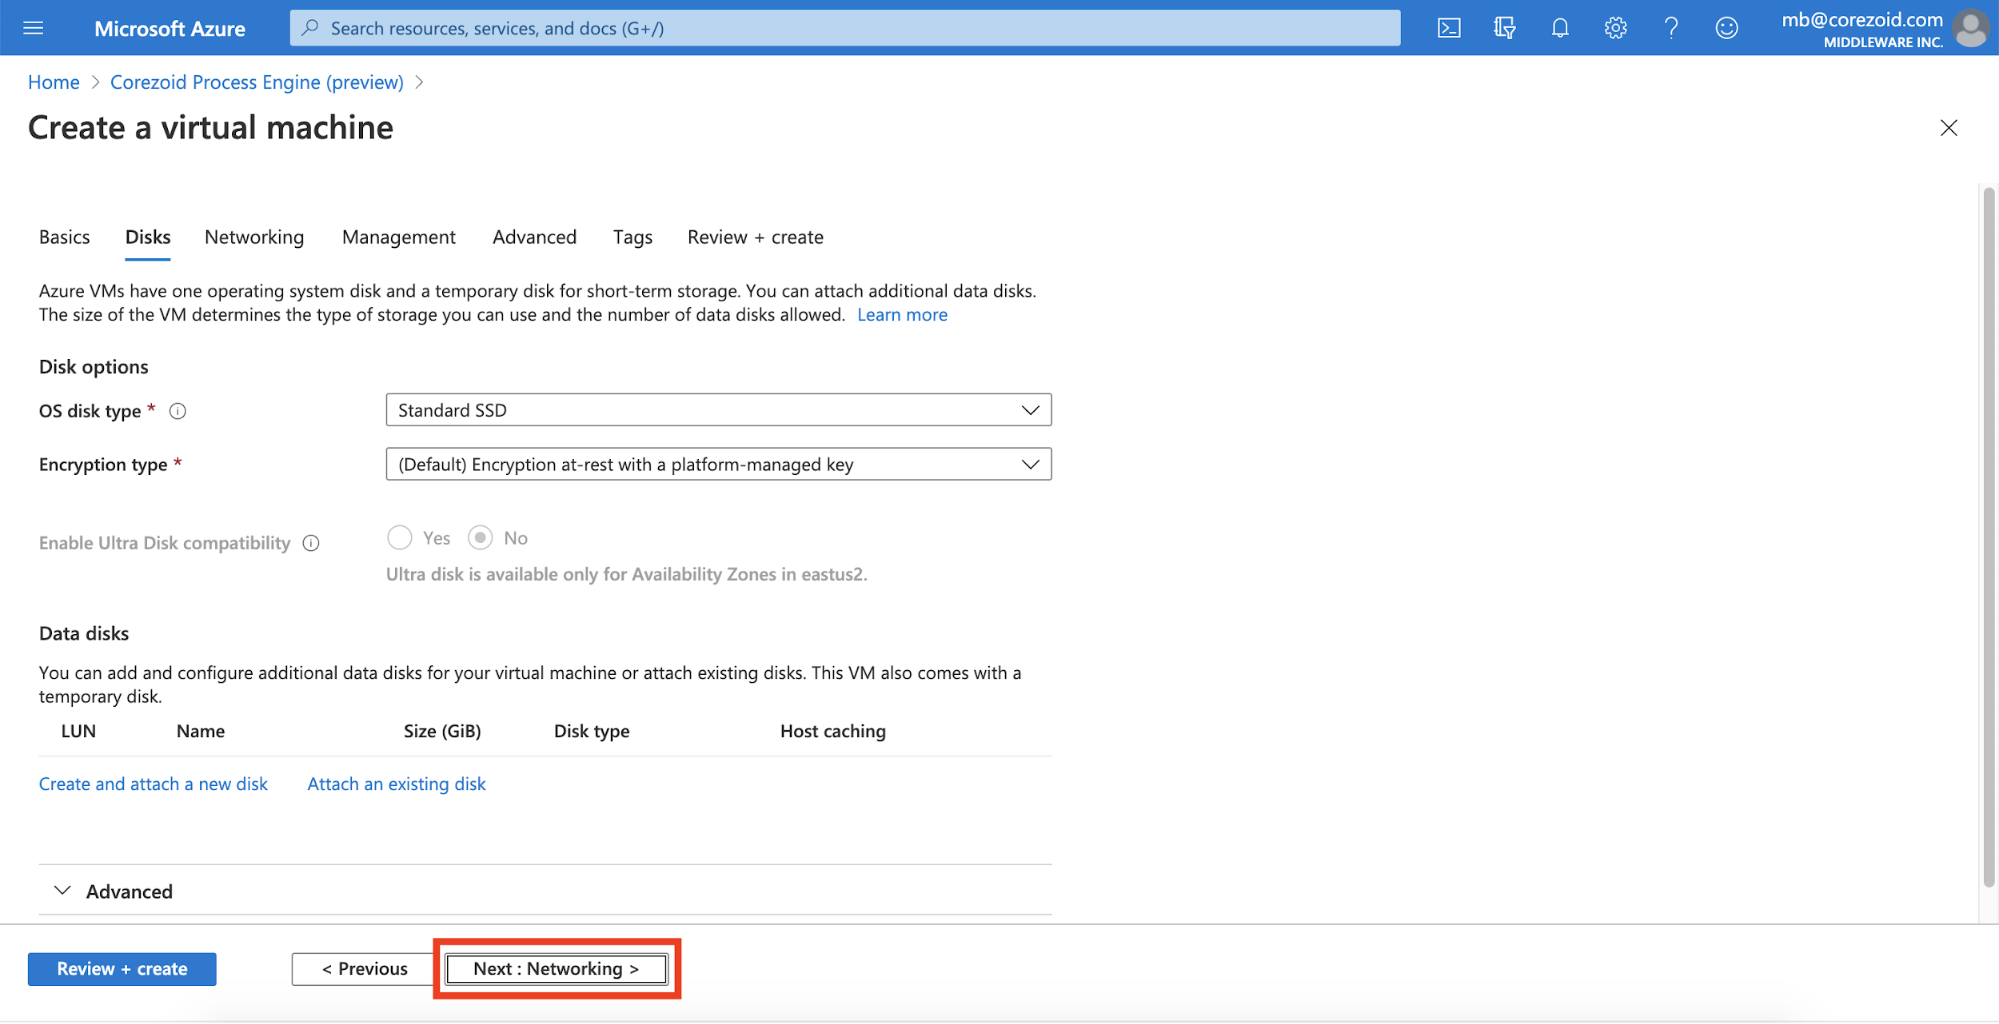
Select the required Os disk type and click Next: Networking.
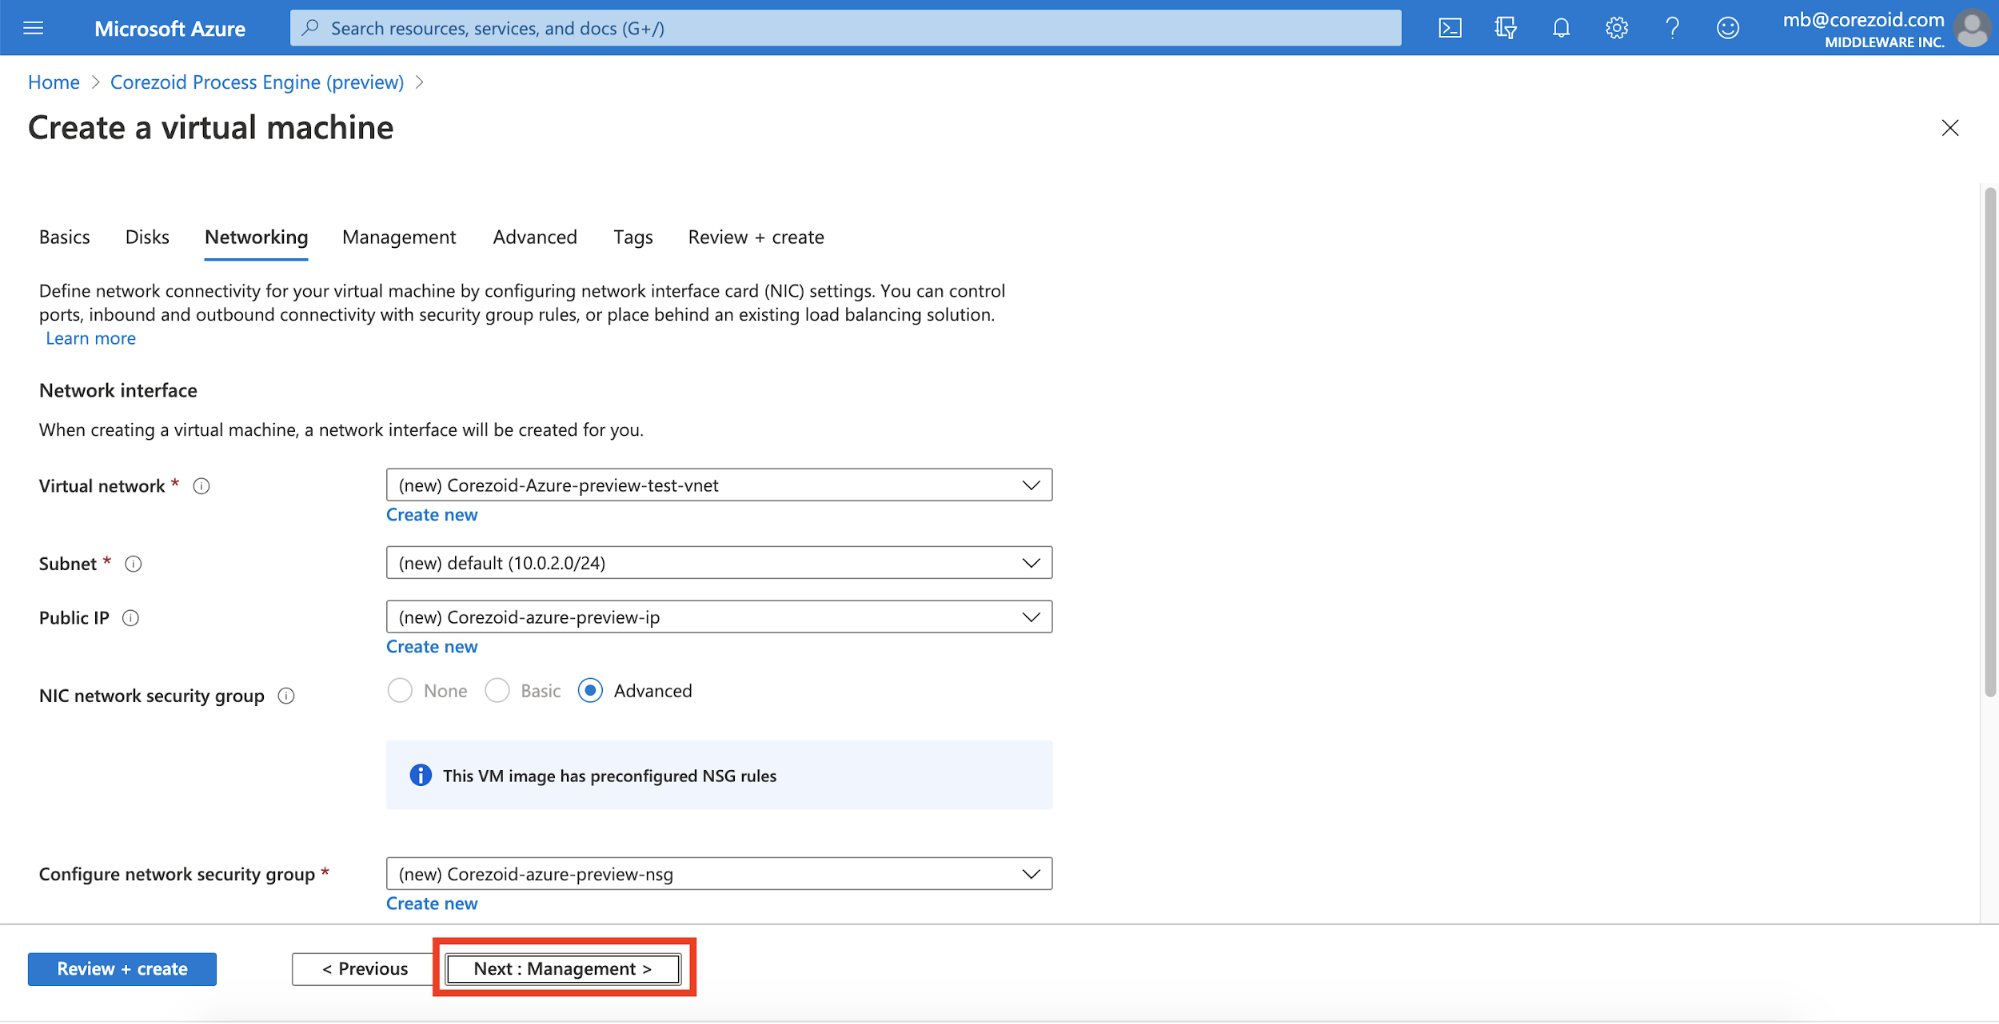
Select the existing Virtual Interface or create a new one, and then, click Next: Management.
(Optional) Select all the necessary settings or leave them as is, and click Review + create.
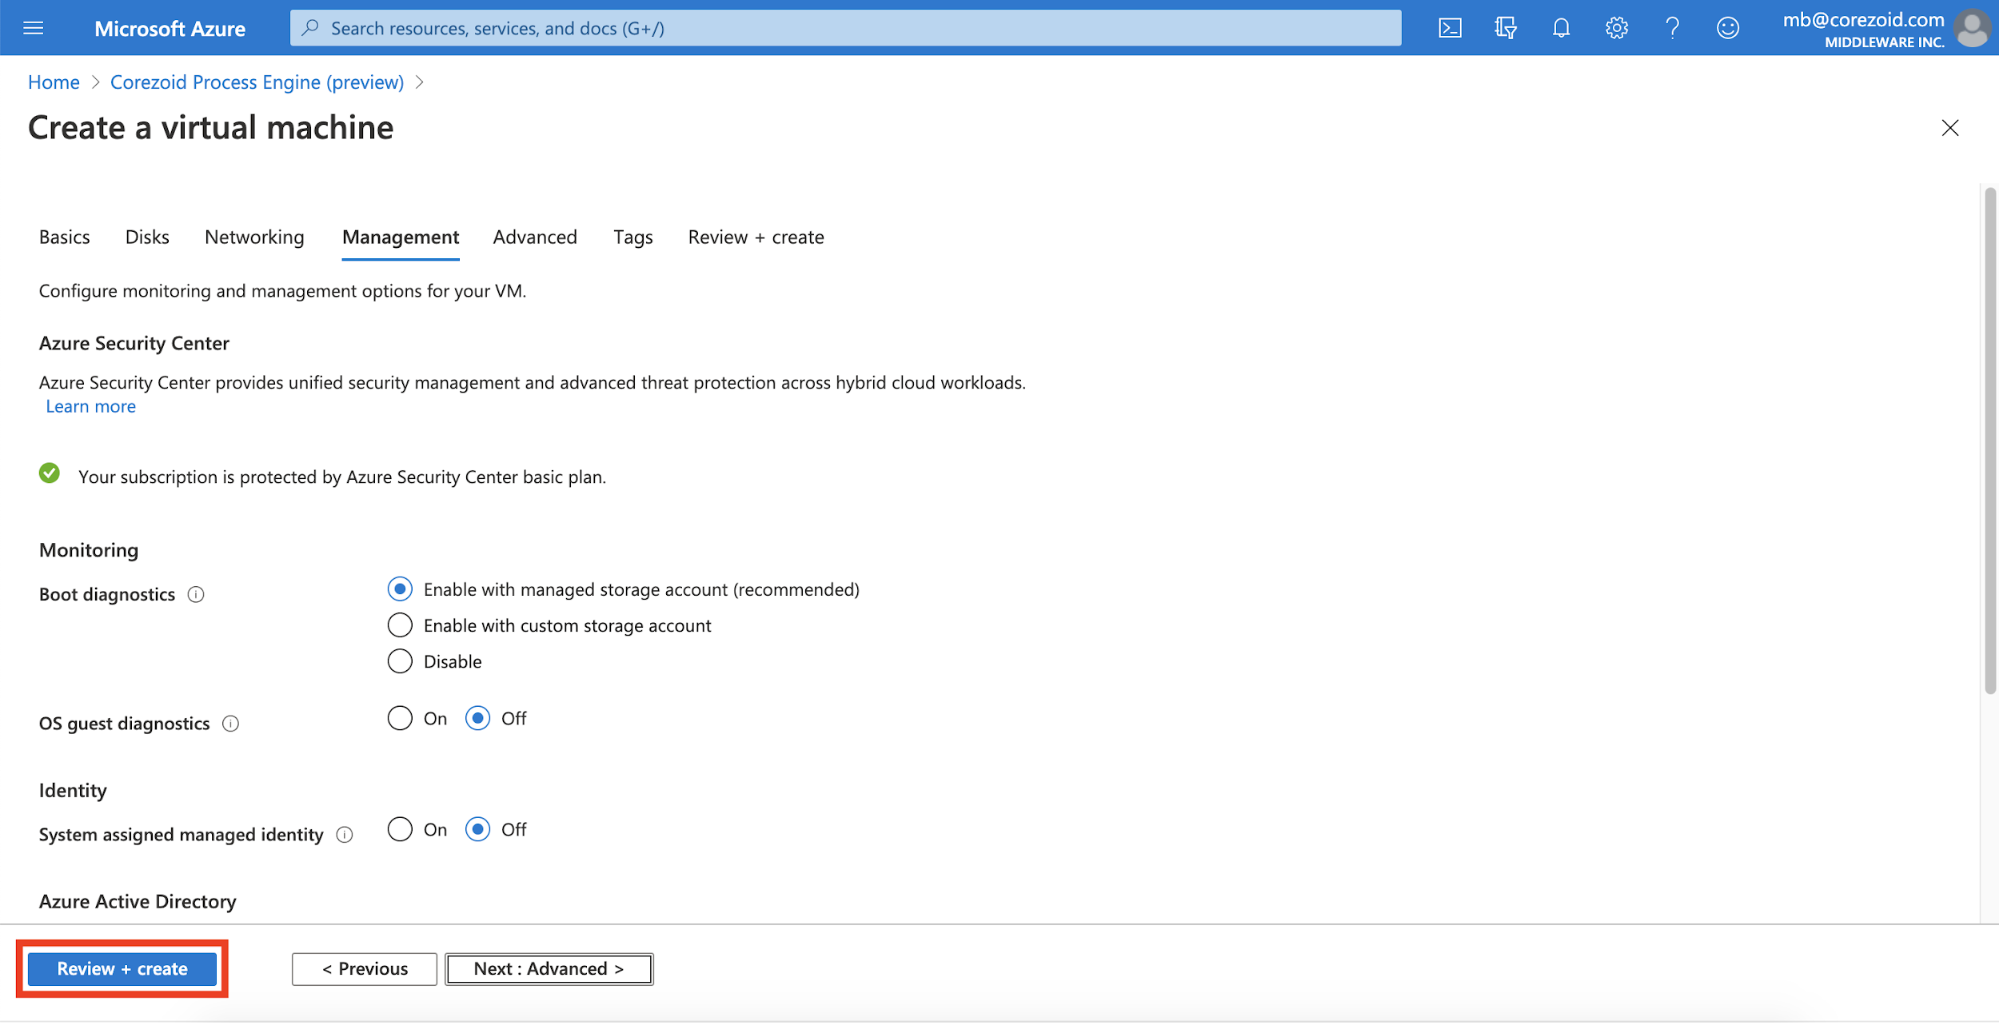
Note: In the two optional tabs, Advanced and Tags, add settings if needed, and then click Review + create.
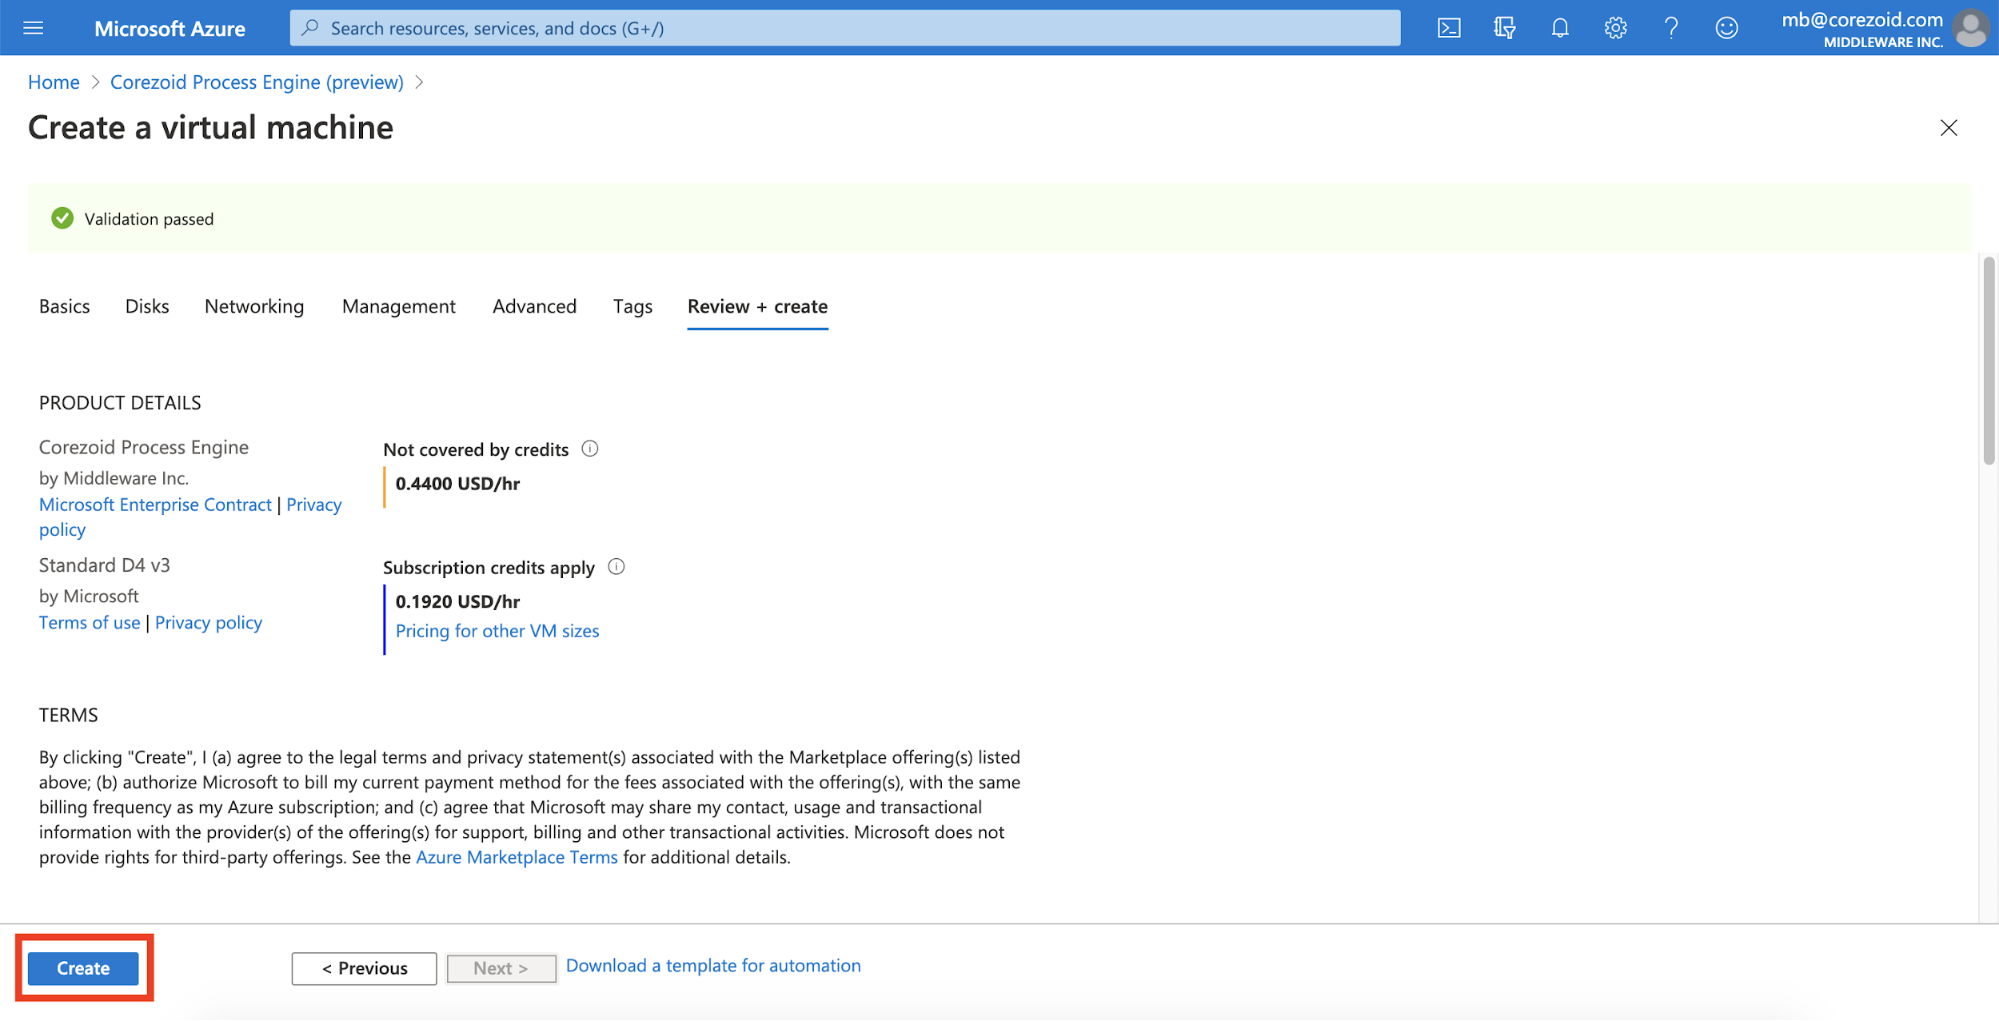
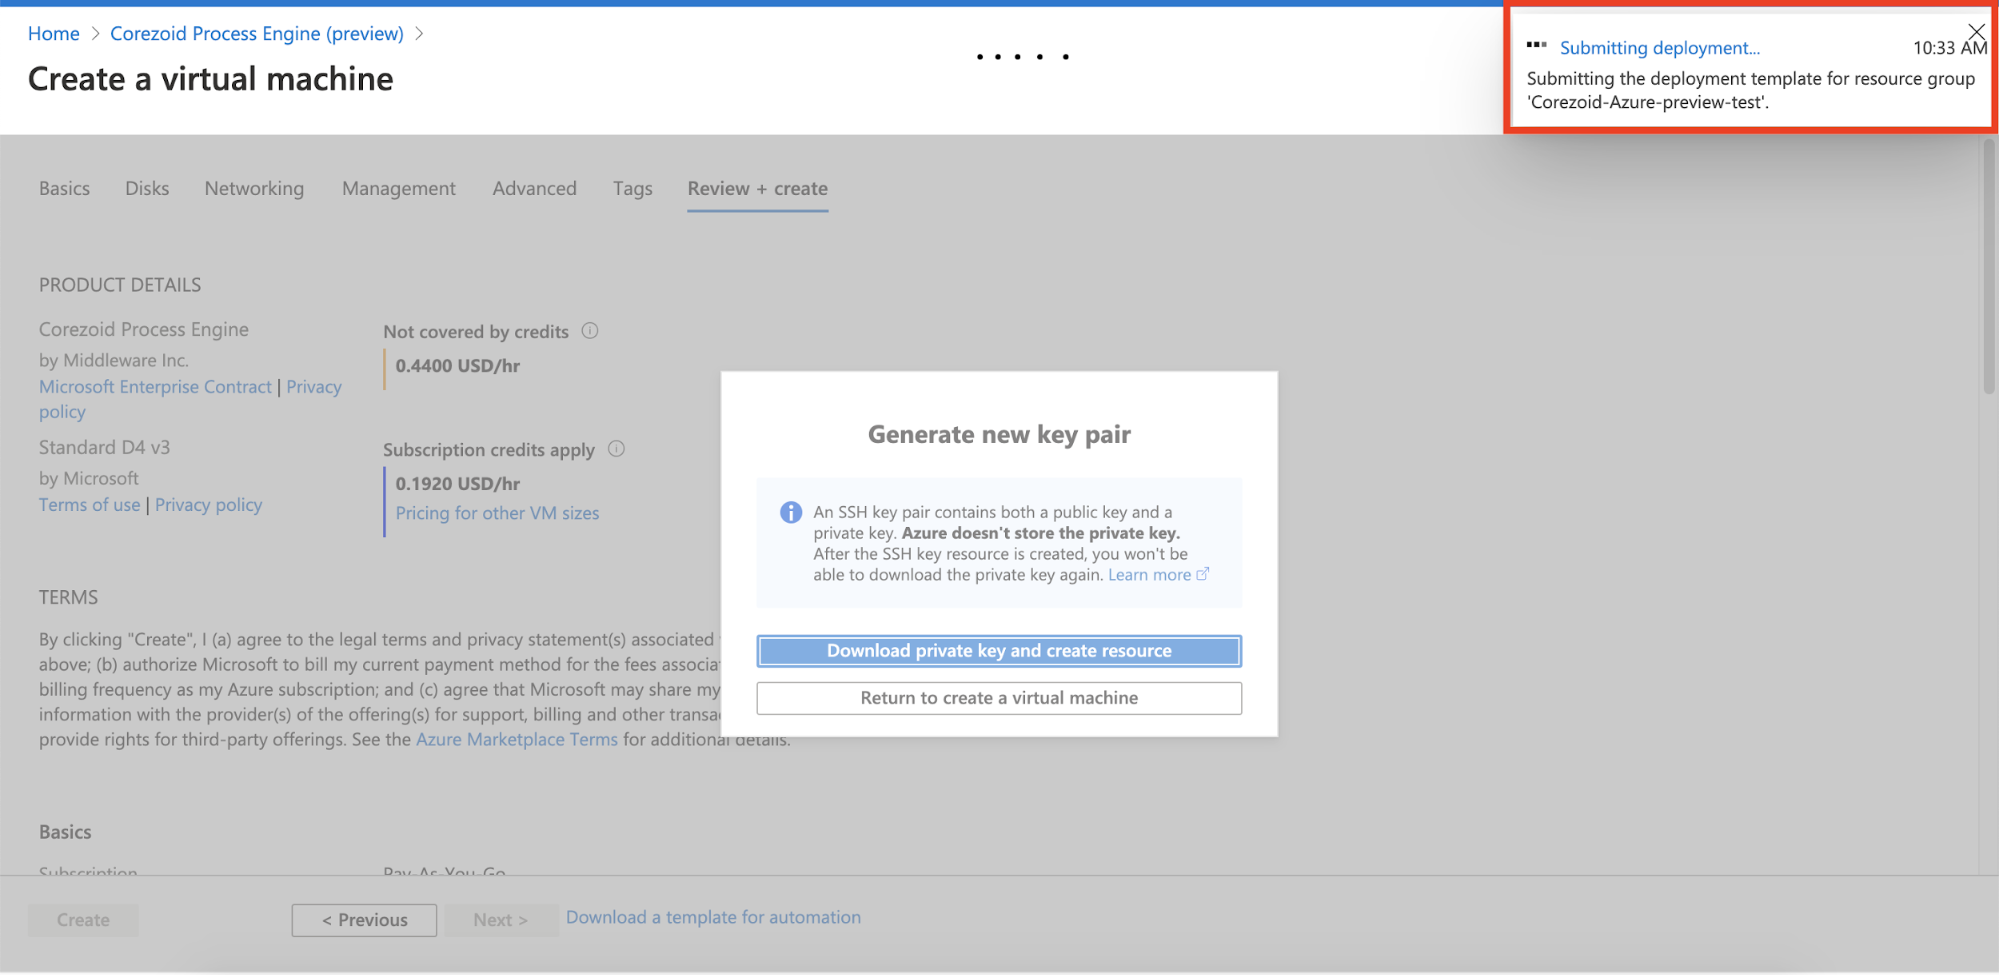
On the Review + create tab, check all the subscription details and click Create.
Download the generated new SSH key pair to enter your instance via SSH after the deployment.
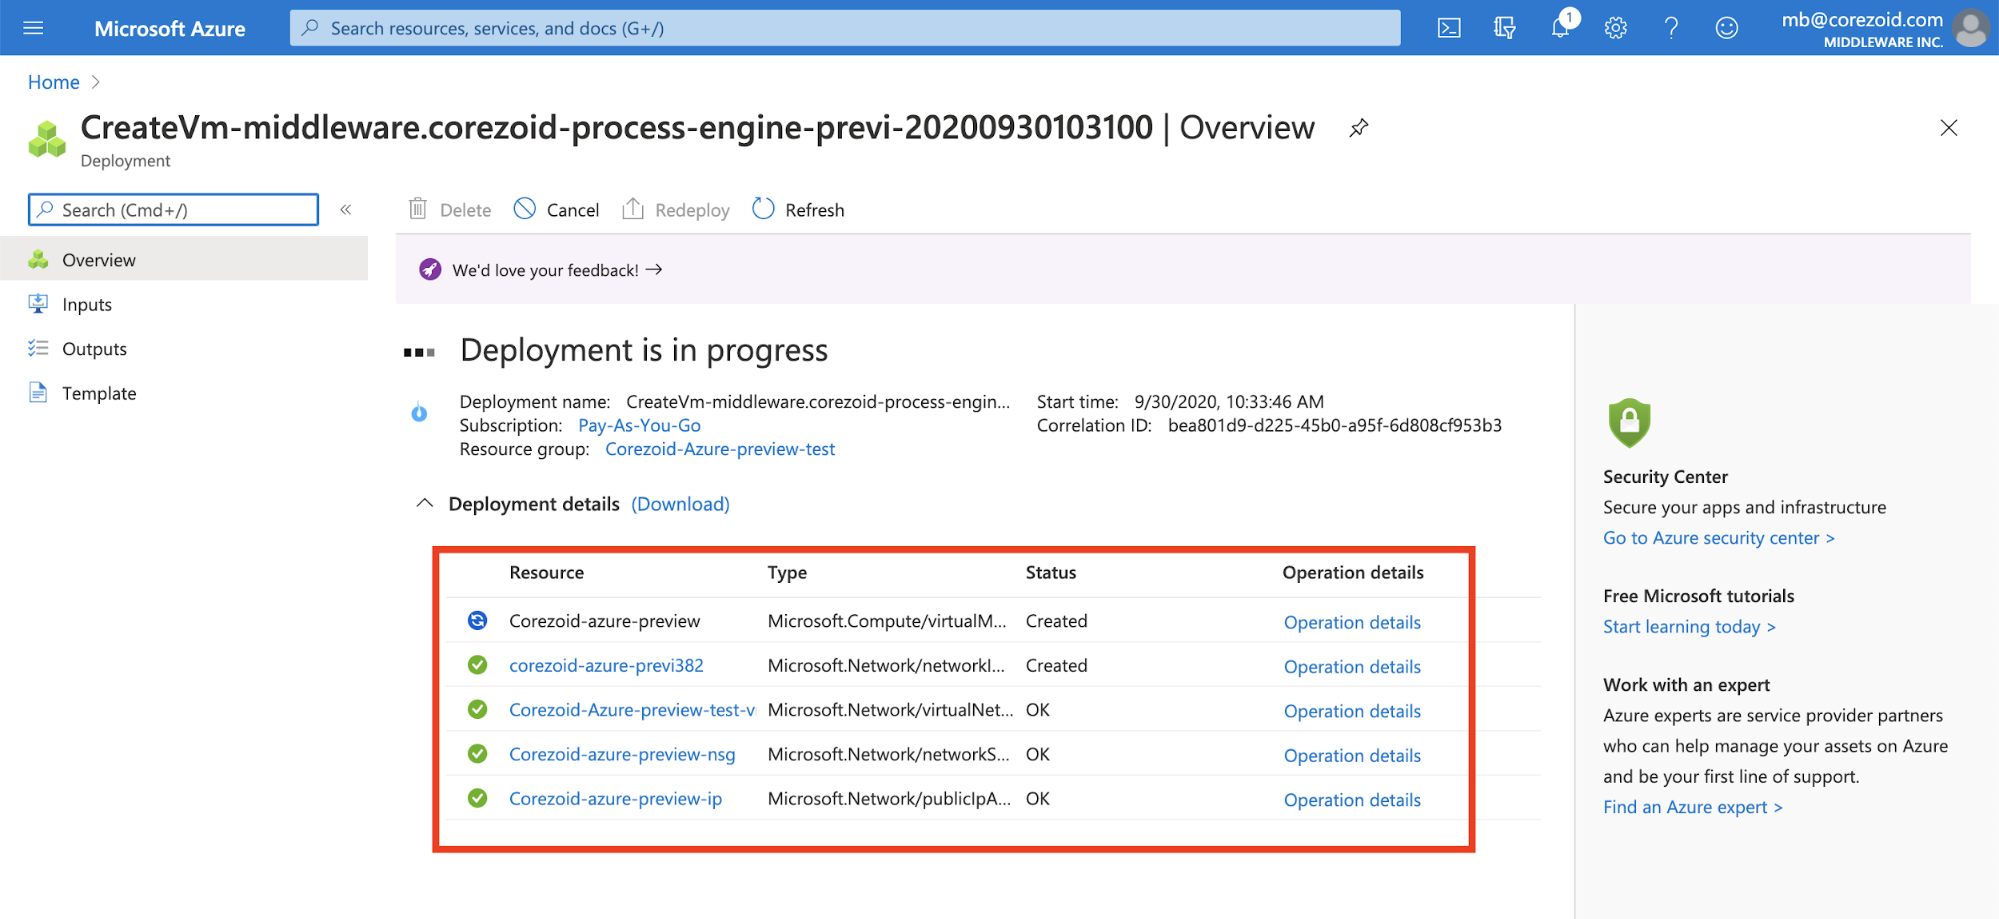
The deployment process will be started and will take a few minutes.
Review the deployment status on the screen.
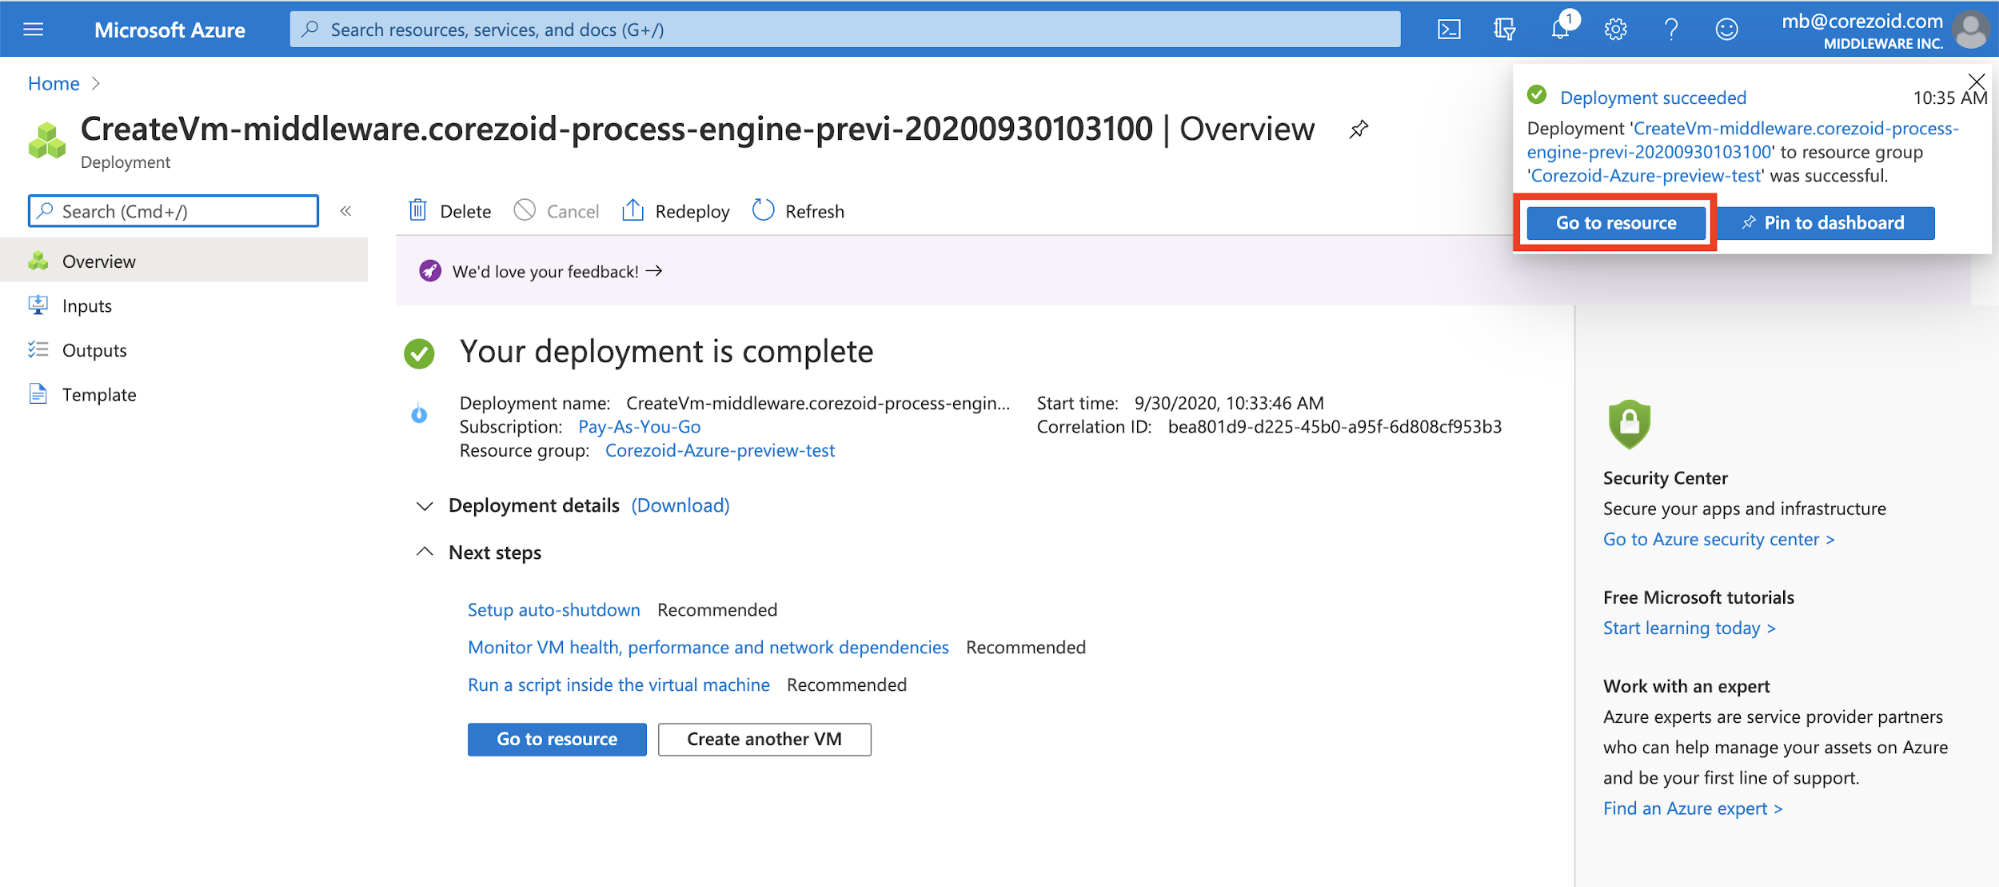
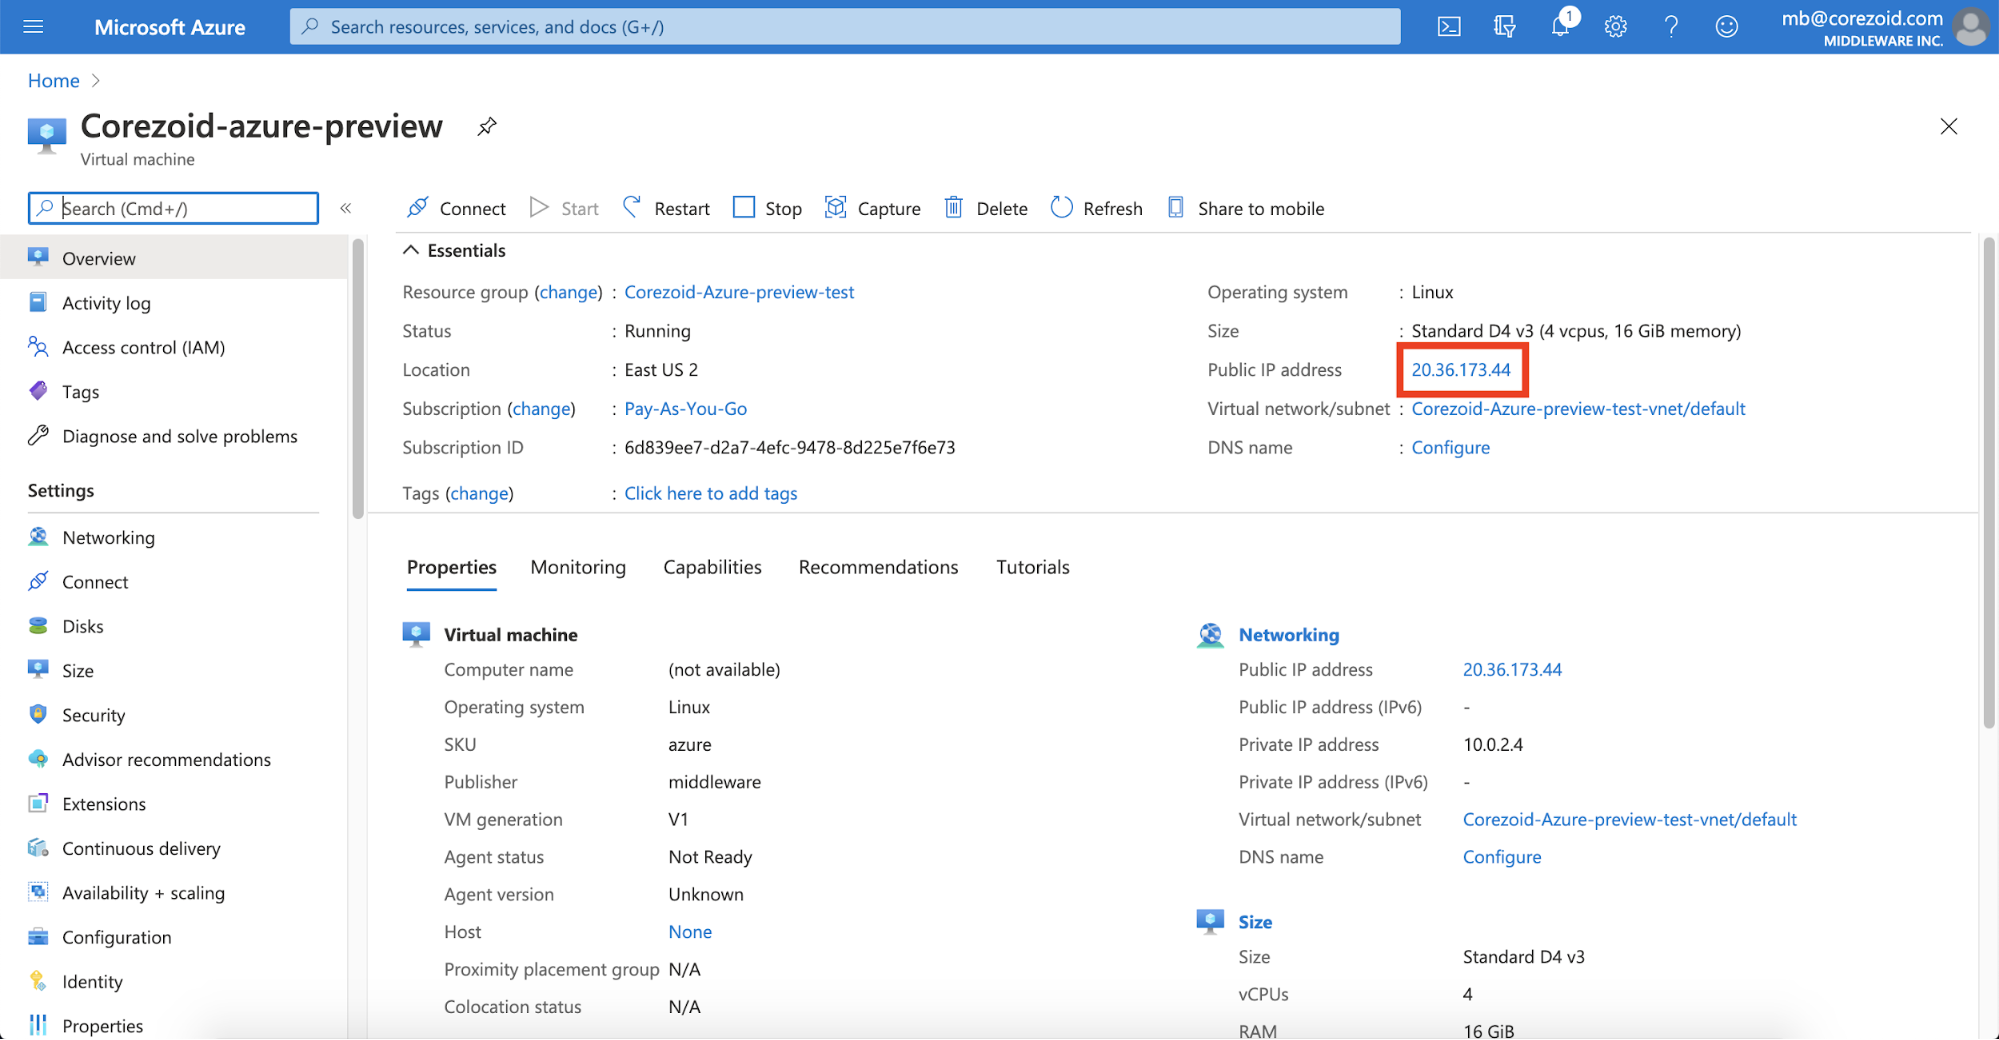
After the deployment completion, go to the created instance by cliсking Go to resource in the upper-right corner of the page.
On the resource screen, view all the Corezoid instance details and enter it via the public IP.


Was this article helpful?